Introduction
This is the second article in the “Flutter for Beginner” series where in we shall look at how to get started on developing cross-platform mobile applications using flutter framework. By the end of this series we shall develop a simple blog list application which contains a blog home page and a blog article page, developed for both Android and iOS together using the flutter framework.
In the previous article we have opened up the helloworldapp we just created via flutter CLI in a Visual Studio Code window and inspected the folder structure and project anatomy. We also looked at the pubspec.yaml and got familiar with what and how the spec file helps in maintaining the code plugins.
In this article we shall look at the main.dart file, which is the starting point for the flutter app execution and understand in detail what it consists of and how things work. We shall also build and run our application with the boilerplate code and look for ourselves the flutter code in action.
Read How to setup Flutter Development Environment Here – How to Install and Configure Flutter
Know how a Flutter Project looks like Here – Understanding App Structure and Anatomy
What is the purpose of main.dart?
Similar with many object oriented programming languages, a main class or a file in a program shall most probably be the starting point of execution of the code. Similar is the case with flutter as well. The main.dart file consists of a single method void main(), which shall be invoked on boot.
void main() => runApp(MyApp());Inside the void main() method we call the library method runApp() which shall load the app layout and all the experience on the screen. The runApp() method takes a parameter of type Widget; we have already seen that in flutter everything is treated a “Widget” – starting from a tiny text label to the entire screen layout.
In this case, we pass a “root widget” which shall be inflated to cover the entire screen space. We define within that “Widget” how it shall be presented on the screen: the layout and how the “widget” shall behave – either be a container or be a content for itself.
In the above case we pass in a widget MyApp, which is a custom class that extends a base Widget. In order to build our own custom widget, we extend a base Widget type and then override the method build() which shall return a Widget object.
Within this Widget object that is returned, we define all our configurations on how the app shall look like.
class MyApp extends StatelessWidget {
  // This widget is the root of your application.
  @override
  Widget build(BuildContext context) {
    return MaterialApp(
      title: 'Flutter Demo',
      theme: ThemeData(
        // This is the theme of your application.
        //
        // Try running your application with "flutter run". You'll see the
        // application has a blue toolbar. Then, without quitting the app, try
        // changing the primarySwatch below to Colors.green and then invoke
        // "hot reload" (press "r" in the console where you ran "flutter run",
        // or simply save your changes to "hot reload" in a Flutter IDE).
        // Notice that the counter didn't reset back to zero; the application
        // is not restarted.
        primarySwatch: Colors.blue,
      ),
      home: MyHomePage(title: 'Flutter Demo Home Page'),
    );
  }
}
In flutter, we have two types of widgets: Stateful and Stateless. We shall look further into these things as we move further, but for now we can think of them like this – a Stateless widget can’t change its state over the time; where as a Stateful widget can change over the time.
Which means like if we inflate a Stateless widget with some data (say some label text or some view data) it can’t be changed once its presented on the screen. Whereas we can have the Stateful widget modify its presentation over the time; like an animation does.
In our current context, we create our own custom Widget by extending our widget definition class (MyApp) from the StatelessWidget class; which itself is an abstract extension of the base Widget class.
We will override the abstract build() method which takes in a BuildContext object; and then returns a fully configured Widget which is inflated or presented over the screen to the user. We shall talk more about this and further tweak this code to our requirement: to show a list of blog posts, in the next article.
On another note, let’s run this application code and see how it looks like in action. For that, we open the app code under the Visual Studio Code (which is the most preferred i’d say for Flutter development these days) and press Ctrl + ~ for Opening a Command Palette within the editor at the project root directory.
Before that, we either need to have an emulator (or iPhone simulator) running in the machine or have a device connected. We can know our device connection status on the bottom right of the VS Code window. For an emulator, we can just click on “No Devices Connected” label shown on the bottom right and select from the available virtual devices from the list that shows from from the top palette.
Once we are ready with the emulator (or with a real device), we open the palette and there we give our command to run the app:
> flutter runand press enter. Once the command picks up for execution, we can see various things that happen within; like the gradle build and assembling and so on (for an android app for example) and once we’re done with the build, the app shall be installed on the emulator (or the simulator or the connected real device) and we can see the test app in action.
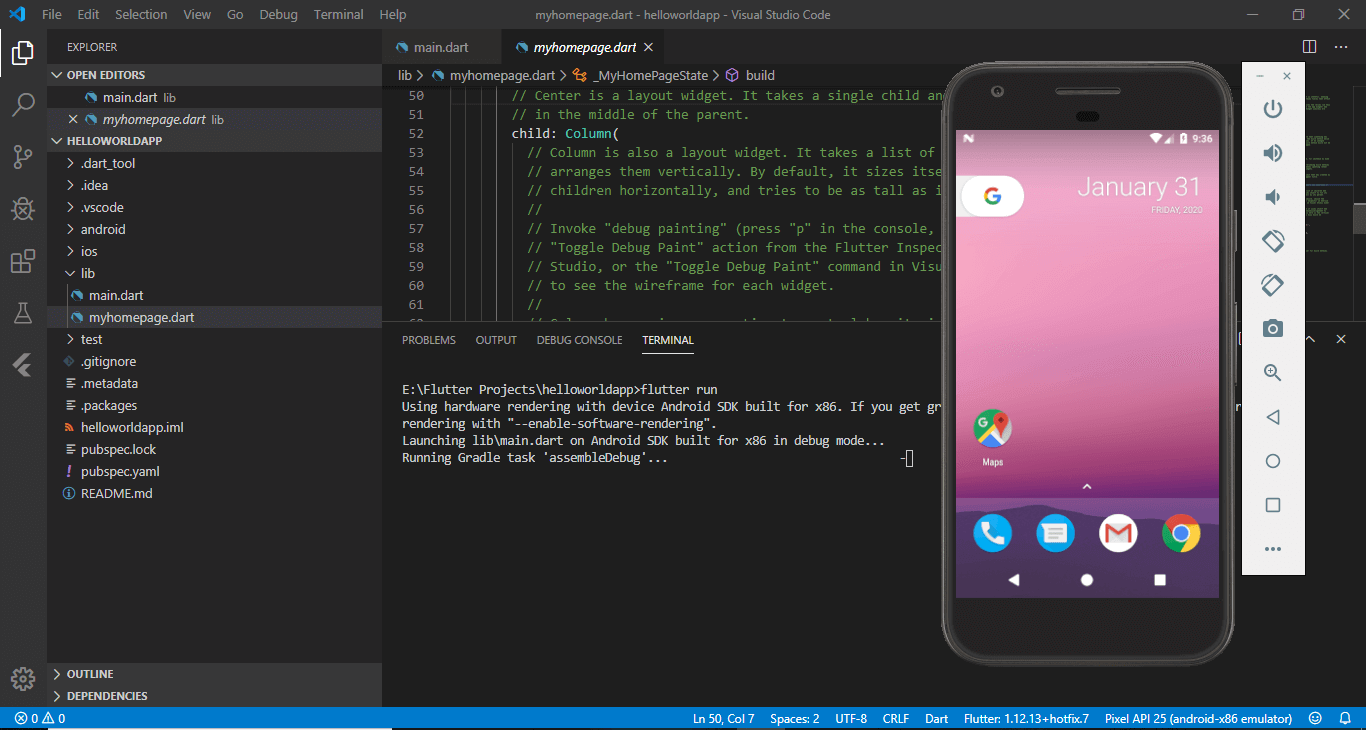
The test app boilerplate code is a text shown at the center of the screen along with a button on the bottom right. Whenever we click on the button, there’s a counter below the text which goes on incrementing by one.
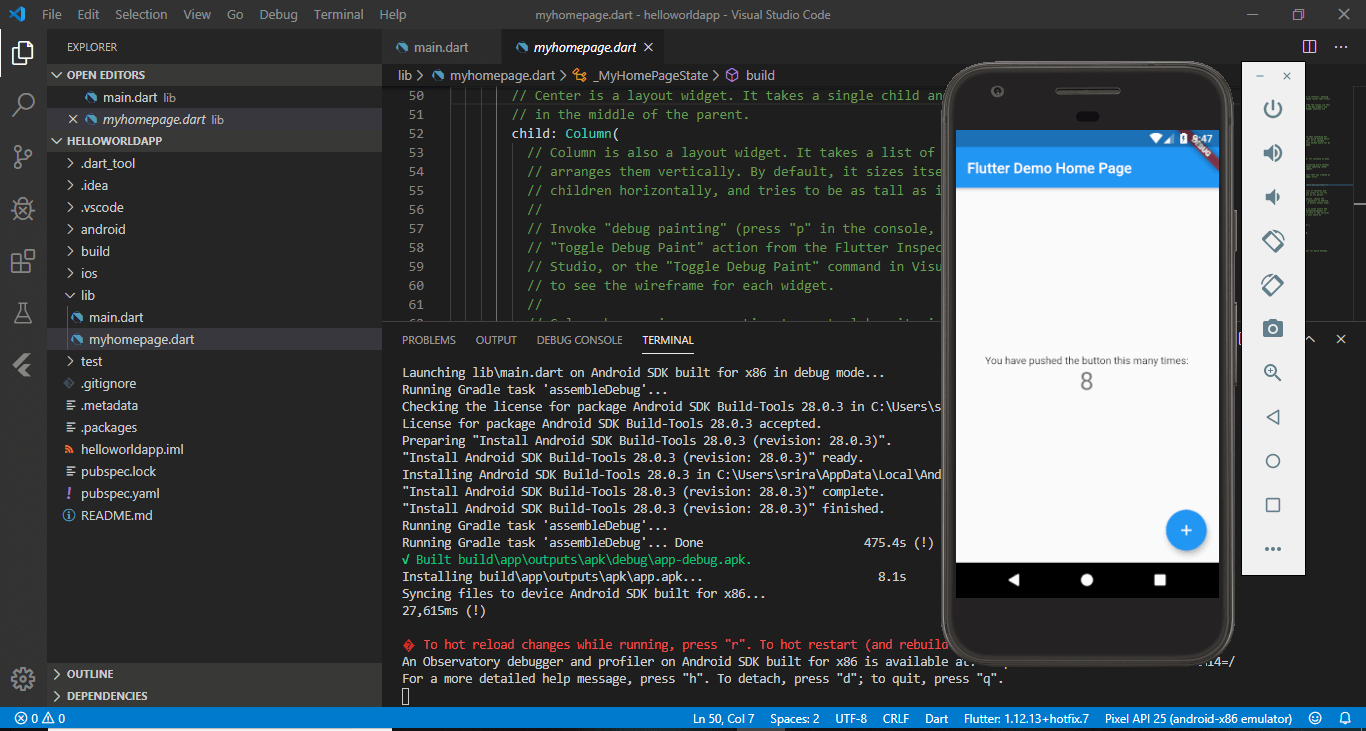
This means that the widget at the center (the counter) is a Stateful widget; since its able to change itself on an event. More on that in the next article; but anyways we have just run our first flutter application. Yay!!!
For all the UI designers and developers who’re looking for a simple utility to create and test colors and combinations for their next awesome apps – here’s a simple app for you, which is completely ad-free and is free! check it out here

Found this article helpful? Please consider supporting!