Introduction
Choosing the right tool for developing an application is as important as developing an application itself. The right mix of development tools which embrace the chosen programming language can accelerate your development and lead to great results!
When developing applications with ASPNETCORE, people often tend to working with Visual Studio, the de facto IDE (Integrated Development Environment) for dotnet, that has been in the market since the beginning of the framework. It’s not a bad idea: Visual Studio offers a wide variety of tools and plugins that make dotnet programming faster and easier. Having said that, there’s another option for developers looking to work on aspnetcore, which is a cross platform open source SDK for developing APIs or web applications – Visual Studio Code.
VS Code is an open-source cross platform lightweight editor released by Microsoft for working with languages such as Javascript, NodeJs, C/C++ and so on. Forget about other languages, it has a great support for working with projects in dotnetcore, which is recognized by very less section of dotnetcore developers (based on my own personal experiences).
In this article, let me try to throw some light on some of the reaons why I personally love developing my aspnetcore projects on Visual Studio Code instead of a Visual Studio IDE. I’d also add a few tips and tricks at the end, so let’s get into business.
5 Reasons Why I Love using Visual Studio Code for .NET Core
Lightweight, Cross platform and Open-source
By definition, Visual Studio Code is lightweight (Not lighter than Notepad though!) and it’s installer size is just around 50 MB. Why I’m highlighting this is because when you compare this with a heavyweight like Visual Studio which occupies around 10 GB for just its core development environment, it’s almost like a mouse compared to an elephant. For the features it offers and weighing around a tens of megabytes, it’s just awesome!
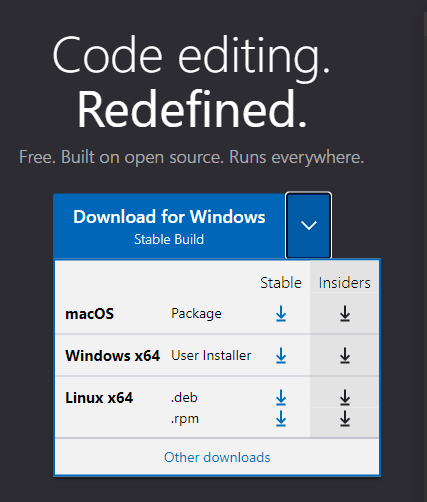
And not to mention, it’s cross-platform, meaning it’s available for all the major operating systems out there like Windows, Linux and even Mac. Visual Studio is strictly a Windows affair. Although Visual Studio for Mac was introduced recently, I feel it’s not on par with what Visual Studio is on a Windows; forget about Linux. So Visual Studio Code gives you the same experience across all the platforms and clearly is a winner!
Performance and Ease of Use
When a binary is lightweight, it loads faster. Obviously, because it takes lesser amount of memory and takes less time to boot up. And when you compare Visual Studio Code against Visual Studio which takes considerably longer time lo startup (with all its plugins and background processes), Visual Studio Code loads like a breeze. Mine was a budget PC with just 4GB of memory, and you can guess why I love Visual Studio Code already.
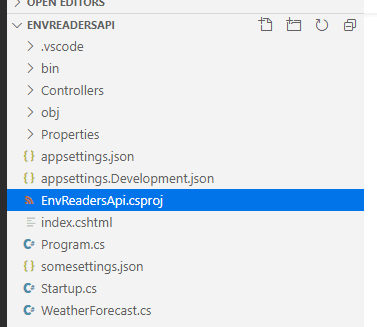
Visual Studio Code treats anything as files and folders; so you don’t have the concept of loading solutions or csproj files here. The difference it makes? A lot. Visual Studio IDE loads the window with all its bells and whistles based on the project template matching the extension of the project (csproj, njsproj and so on) which takes a lot of time and resources, particularly on PCs with lesser firepower. On the other hand, VS Code just loads all the files under a folder you select and then starts lazyloading the needed assets later on (based on user preferences).
Integrated Terminal and Git
I’m one of those people who like to run commands than use GUI as far as possible. If aspnetcore comes with command line tools to help with development, testing and lot more; why to still depend on button clicks for these jobs?
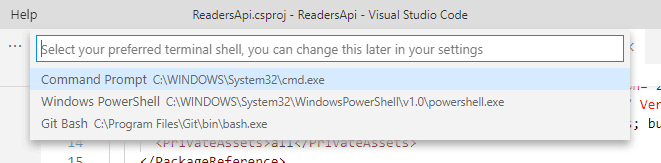
Visual Studio Code comes with an integrated terminal that loads a terminal of your choice among a Command Line, Powershell, Git Bash and more depending on which operating system you’re using. I can just toggle an integrated terminal inside my project folder and run my dotnet commands in the directory to get my things done. You can also run any number of terminal windows you like and they’re all stacked up inside the integrated terminal docked below the editing space. And there’s an option to switch to a different terminal from what you’re using.
Another aspect of having an accessible terminal is that you can easily work with Git. Visual Studio Code comes with integrated Git tools, and so checking in code and working with Git repositories is a lot better and is an aesthetic experience. You can observe the status of each file in the opened folder with respect to their status by means of tags (M for Modified with a yellow, U for new files with a Green and so on). You can switch between the branches by clicking on the branch name shown at the bottom left – which also shows up updates as we continue working on the repo. You also have a dedicated “Source Control” dock on the left that shows you the tracked changes and you can take actions.
Debugging and Testing
Debugging is the best thing that made me ditch my mammoth Visual Studio and switch to Visual Studio Code for my ASP.NET Core applications. Its super simple and provides you with all essential stuffs for a faster and cluster-free debugging experiences.
You have the breakpoints available here as well (those Red dots you tag your code lines with and hit as the code runs). You can start debugging by clicking on the Run section (or Ctrl+Shift+d) and clicking on the “Play” button on the top left. If no build settings are set (in case of a new application), VS Code asks you to choose among a set of runtimes available (click on .NET Core from the list) and it immediately creates a launch.json inside your application directory which contains what to run and how to run.
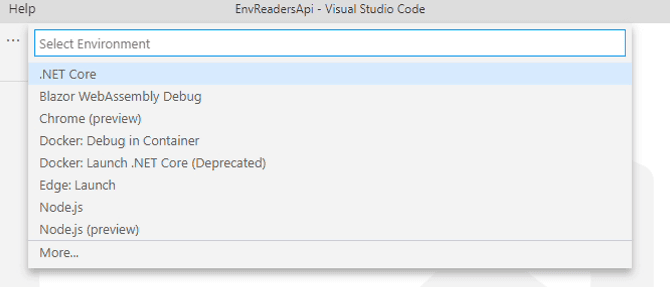
To setup Debug, just tap on F5 inside your project folder and VS Code automatically comes up with a set of suggestions for launch settings, select .NET Core and it adds up a new launch.json which can help you to start a “Debugging session by launching a new app” or “Attach the Debug session” to an already running local app!
Once the application boots up, you can see all your breakpoints on the bottom left of the “Run” section. Once a breakpoint hits up, you can observe the current state of all the variables inside the class where the breakpoint has been currently hit under the “variables” section.
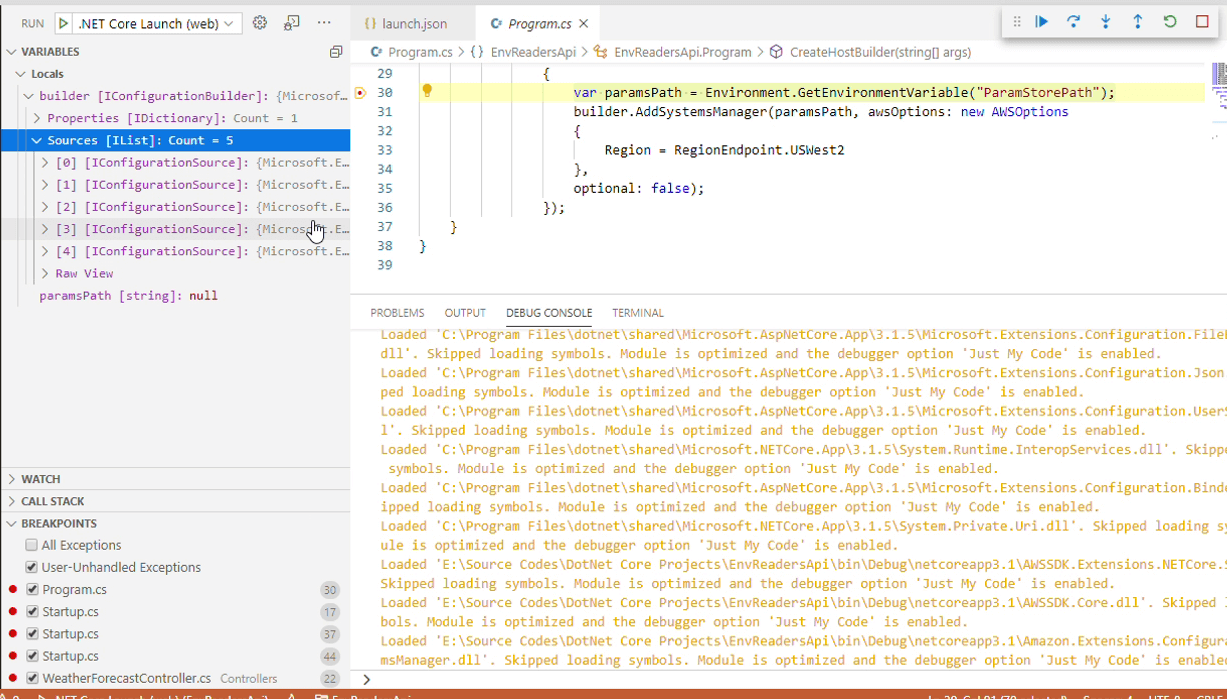
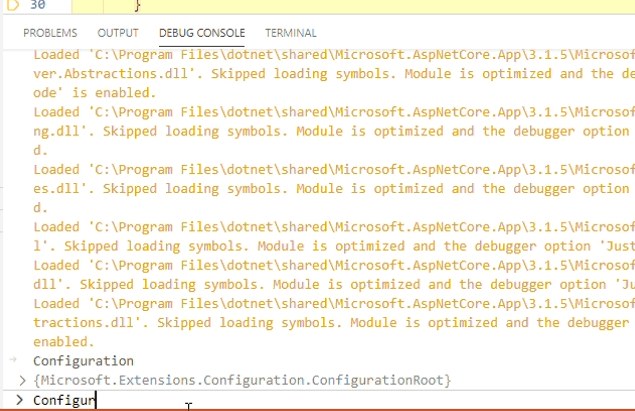
You can even modify the current state on the existing variables while debugging a breakpoint by using the “Debug Console” window that takes the job of “Immediate Window” in Visual Studio IDE. You can modify the variable values as per their declarations and it throws errors as well when you do something undoable. Overall, debugging is a breeze!
Marketplace
One of the significant features of Visual Studio IDE is its ability to add new features to the base IDE by means of plugins and add-ons, helping to customize developing experience as per the developer’s requirements.
Visual Studio Code too comes up with its own Marketplace where you can find many useful plugins and add-ons which help you in writing code for languages even better!
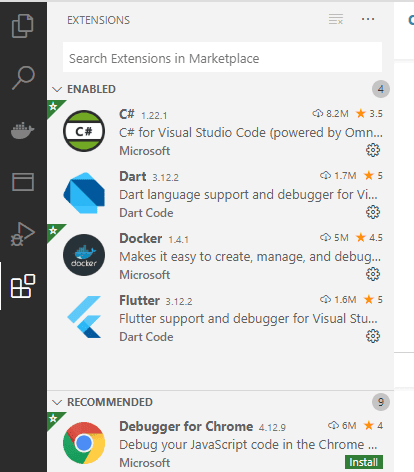
As far as .NET Core is concerned, I like the vanilla extensions that Visual Studio Code already comes built-in; such as the Omnisharp for C#, the aspnetcorerazor for editing cshtml files. VS Code automatically detects the language based on the file extensions and then applies the suitable “Language Mode” which helps in code formatting, intellisense and lot more!
VS Code Tips and Tricks for .NET that I frequently use
I’ve already mentioned a few tips w.r.t working with .NET Core in the earlier talk, but let me just group them here along with a few more shortcuts and tips I generally use for my .NET Core development in VS Code.
- While installing VS Code, tick the checkbox which asks you to add the “code” command into PATH. This is greatly helpful in opening up a VS Code window whereever you want in an intant. Just open up a terminal / command window and type in “code .” which opens up a new VS Code window with the current folder loaded.
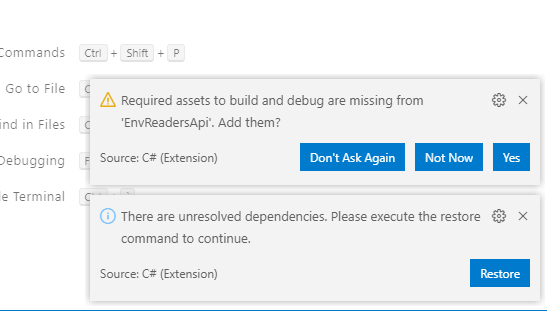
- As soon as you open your ASPNETCORE project in VS Code, don’t just start working but wait for a moment for a popup to show up which asks you to “Add required assets to build and debug”. Click on “Yes” and observe that two new hidden folders .vs and .vscode get added. These folders contain configurations which drastically changes your development experience in VS Code for ASPNETCORE. Trust me, this is worth the wait. But don’t forget to ignore these files while checking in to any repo, because these configurations vary from machine to machine.
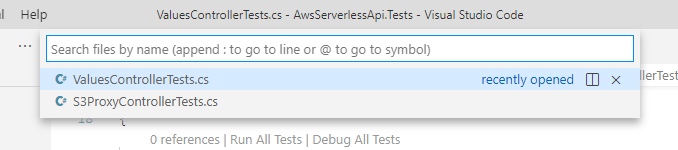
- Opening an existing file in VS Code inside your folder is easy, just tap Ctrl+p and VS Code opens up a popup textbox where you can search for your required file.
- All typical C# stuffs are supported: you can hit Ctrl + . for suggestions, F12 on a class to go to its definition, Ctrl+F12 to view its implementations and so on. But all these work when you add those “Assets” I mentioned before – so its worth the wait.
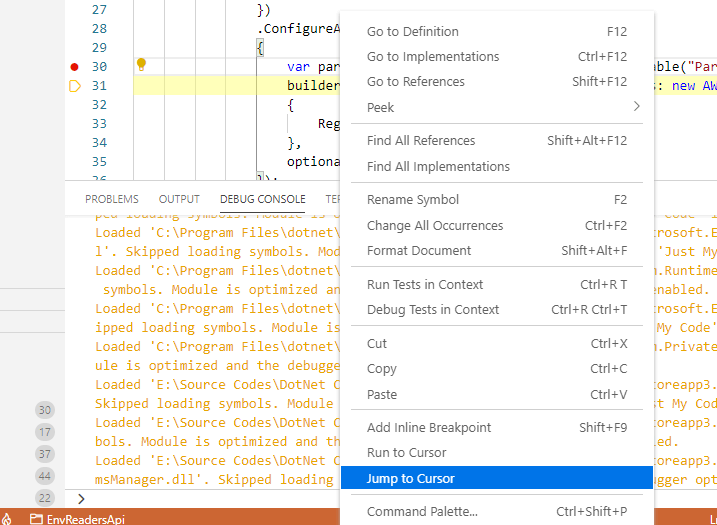
- While debugging, you can go back to a previous line even though the debugger has moved away from that line (IMPORTANT: within a method). Right click on the line you want the debugger to revisit and click on “Jump to Cursor“; the debugger is now back to the line you just wanted it to rerun.
- Use the Debugging Console to “modify” your variables in the current debugging context to any suitable value you want.
- The best part of using VS Code for ASPNETCORE is that you can easily edit the csproj file of your project without any noticeable lag (I notice this while using my Visual Studio IDE) and changes are applied on the project as soon as you save it! Also, adding new file is super simple: just point to the folder under which you want to add a new file and click on the “New File” icon next to the Folder name on top. You also have option to create new Folders as well next to new File. To build the application, you can use Ctrl+Shift+b shortcut.
- To format your code inside a file, hit Alt+Shift+f which is similar to Ctrl+k d in Visual Studio IDE. To collapse the code use Ctrl+k 0.
- To search for occurrence of a Text at a global level, you can use the Search (Ctrl+Shift+f) and type in your requirement. You also have the option to Replace (in case of a Text) there itself.
- VS Code integrates well with Git, be it GitHub or AzureRepos or any other repo provider. You just need to initialize a new Git in your project that creates a .git folder. VS Code picks up on top of the created Git repo and gracefully adds necessary visual appeal to help you with better checkins and checkouts.

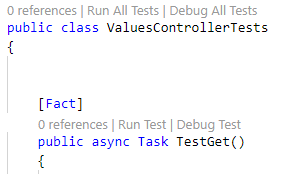
- If you open a solution which also contains a Test project along with it, VS Code will showup options to Run or Debug Tests on top of each Test method and also options to Run All or Debug All at the top of the Class, clicking which would show up your test results in the Output Window.
- While pressing F12 or Ctrl+F12 would take you into the Referenced class definition or implementations, pressing Alt+BackArrow would take you out of the definition of the class into your previous checkpoint.
- Intellisense shortcuts like creating a new property (prop+tab+tab), a try-catch (try+tab+tab) or try-catch-finally (tryf+tab+tab), a constructor (ctor+tab+tab) are still available in C# classes.
- Ctrl+k W closes all the open Files in the Editor – just in case you were looking for it.
- Ctrl+b toggles the side panel while Ctrl+~ toggles the footer panel.
- Ctrl+k Ctrl+c comments out a line of code, while Ctrl+k Ctrl+u uncomments your code.
- To toggle a compare window between two files, you can hit Ctrl+k c
These are some of my favorite tips and tricks in Visual Studio Code, which made me switch to Visual Studio Code completely for my ASPNETCORE development from Visual Studio IDE. Which one do you prefer?

