This is the fourth article in the CI/CD using Jenkins series explaining how we can automate an entire application lifecycle (commit, build, test and deploy). So far we have looked at how we can automate pulling code from a Git repository, automating code build using Jenkins server and for our demonstration we have taken up using an AspNetCore application project for setting up automation pipeline.
In this article we shall look at how we can automate executing test scripts on our fetched codebase after a build and generate a report out of it.
To run tests on our AspNetCore application we make use of xUnit which, which is an opensource testing framework which provides a great support for writing test scripts on AspNetCore applications.
Before moving on to the automation part on the Jenkins side, we shall make a few changes in our development machines to refactor our project into a solution. Then we shall add Test project and wire up tests for the project.
Finally we commit this code into our Git repository so that it can then be pulled on the Jenkins side and then run test scripts automatically.
Preparing the Solution and Adding Tests
We shall start by refactoring our existing codebase (a single API project ReadersApi.csproj) and bring it under a solution file for maintainability. Since we are using AspNetCore here, we can make things easier by using the DotnetCore CLI to add a new solution file.
We shall move the ReadersApi project under a sub directory Readers.Api and then under the root directory we shall open a command terminal (or command prompt) and shall add a new solution by the below command.
> dotnet new sln --name ReadersApiThis would create an empty solution file ReadersApi.sln under the root directory. We would then add the existing csproj under the Readers.Api sub directory onto the solution file.
> dotnet sln ReadersApi.sln add Readers.Api/ReadersApi.csprojWe shall then add a new Test project under the root directory which shall contain all the unit tests and integration tests we would want to write for the existing ReadersApi project.
> dotnet new xunit --name Readers.TestsThis shall create a sub folder Readers.Tests along with all the test project project under the sub folder. We finish our setup by adding the newly created Test project under the solution we have under the root directory.
> dotnet sln ReadersApi.sln add Readers.Tests/Readers.Tests.csprojNow that we have the things ready, we shall start writing test scripts by adding a new UnitTest class file which would contain the Unit Tests onto the UserController existing under the ReadersApi. To keep things simple, we shall write a single unit test for success case when the FetchAllUsers endpoint is invoked.
For a UnitTest, a controller is simply yet another plain class with added dependencies to be injected over constructor (if any). And we can test the functionality by simply creating an object of the UserController class.
The UserController class looks as shown below:
namespace ReadersApi.Controllers
{
    [Route("api/[controller]")]
    [ApiController]
    public class UserController : ControllerBase
    {
        IUnitOfWork repo;

        public UserController(IUnitOfWork repo)
        {
            this.repo = repo;
        }

        [HttpGet]
        [Route("allusers")]
        public IEnumerable<User> GetUsers()
        {
            return repo.UserRepo.Find(x => x.Id != 0);
        }
    }
}
The UserController class has a dependency of type IUnitOfWork and uses a property UserRepo of type IUserRepo from the IUnitOfWork instance. To unit test this, we shall use a mocking unit test case to verify the behaviour of the method GetUsers().
If there are no users available in the system (with a valid Id), then the return list shall be empty, if there are any users found, the result set shall not be empty. We shall verify this functionality using xUnit and Moq, which is an open-source unit testing framework.
namespace Readers.Tests
{
    public class UserController_Tests
    {
        IUnitOfWork unitOfWork;

        public UserController_Tests()
        {
            //Arrange Moqs
            var repomoq = new Mock<IUserRepo>();

            repomoq.Setup(x => x.Find(
                    It.IsAny<Expression<Func<User, bool>>>())
            ).Returns(new List<User>() { new User() });

            var repo = repomoq.Object;

            var uowmoq = new Mock<IUnitOfWork>();
            uowmoq.Setup(x => x.UserRepo).Returns(repo);
            unitOfWork = uowmoq.Object;
        }

        [Fact]
        public void GetUsers_Success()
        {
            //Arrange
            var userController = new UserController(unitOfWork);

            //Act
            var users = userController.GetUsers().ToList();

            //Assert
            Assert.True(users.Count > 0);
        }
    }
}
We setup a mock alternative for the IUnitOfWork interface and then pass the created mock to the UserController class and then call the GetUsers() method over the controller object. We assert if the result is true or not. This completes the setup of Test project.
We shall push this entire change to our Git repository, which is configured to be pulled inside our Jenkins server when the job is executed.
Configuring Jenkins Build Steps – Capturing Test Results
To run tests on the project, we can use the below command via dotnetcore CLI as:
> dotnet testwe can pass additional arguments to the dotnet test command to write the test results onto an xml file, which shall be of the format MSTest. We shall now configure the Jenkins to read data from the generated test results file once the tests are executed and generate a build test stats for us. The command shall be as follows:
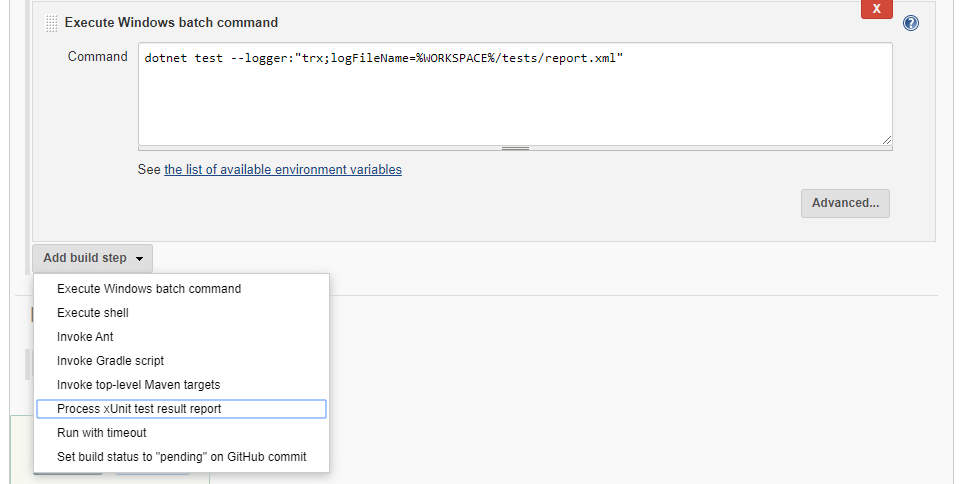
> dotnet test --logger:"trx;logFileName=report.xml"We shall configure the same command under the Jenkins job we created earlier, under a new build step.
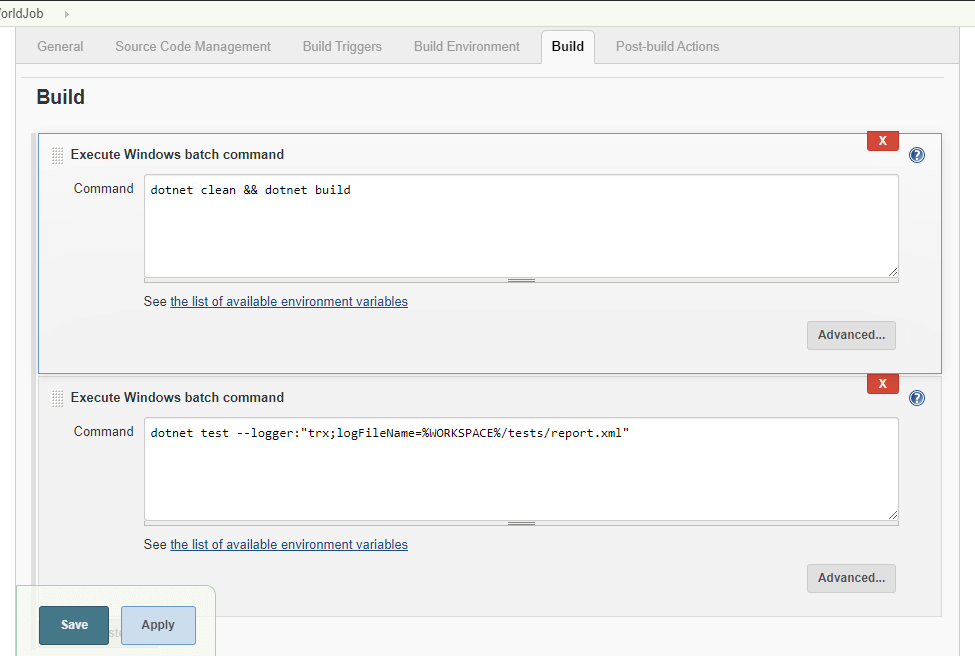
Observe that we have specified a path %WORKSPACE%/tests/report.xml with an environment variable %WORKSPACE%. It means that the variable is substituted with the current absolute path where the job is being executed. And so the report file shall be generated under the job execution path under a sub directory tests.
We shall add a plugin to the build step which takes care of the test report analysis. Since we are using xunit for test execution, we shall add xUnit plugin to the jenkins server which can then be added to the pipeline.
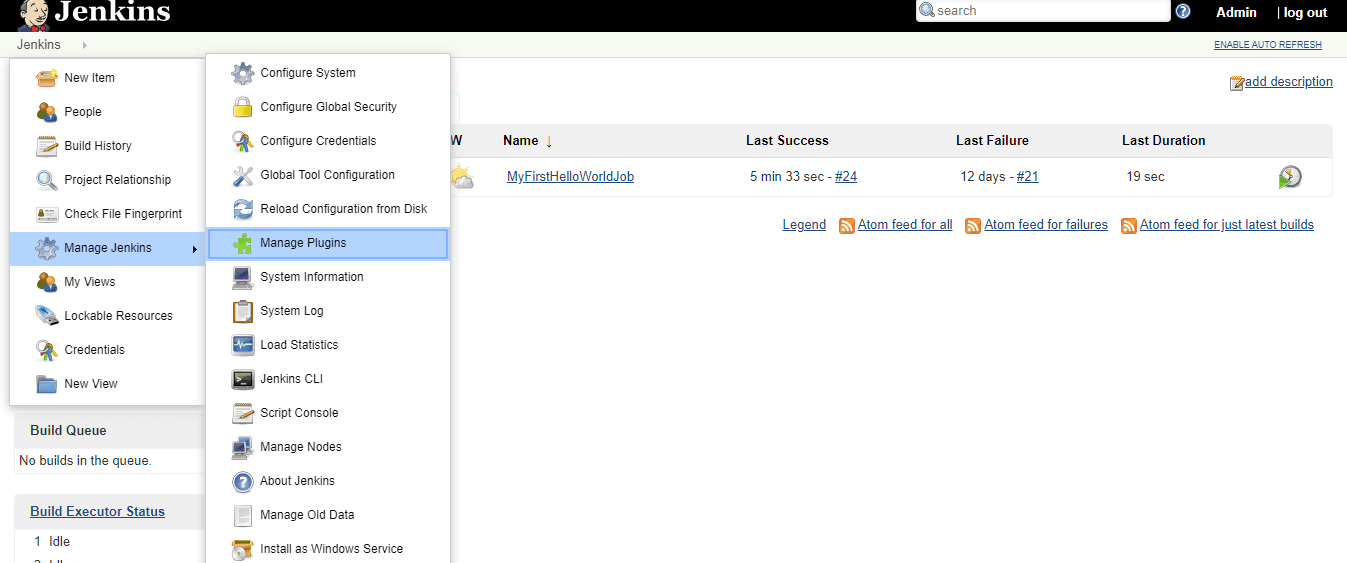
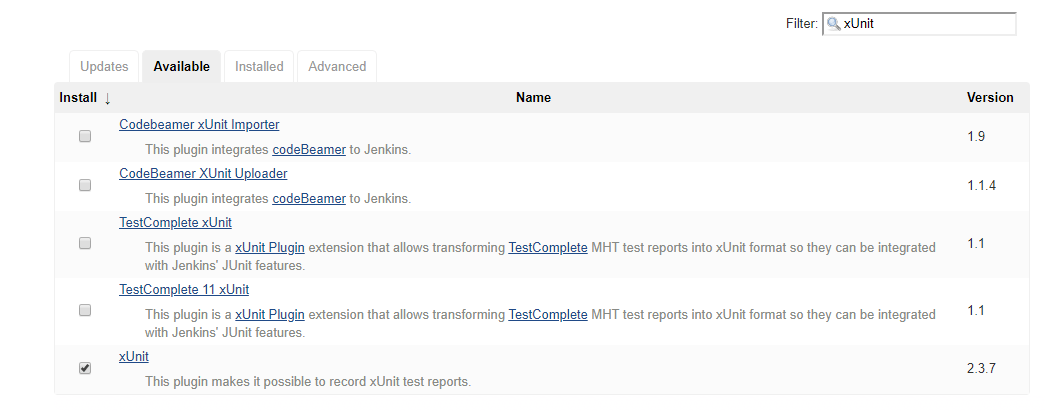
Goto Manage Plugins section under the Jenkins drop menu and search for xUnit under the Available plugins section. Tick the plugin and then click on Install without Restart. This shall install the xUnit plugin for test reporting on Jenkins.
Once done, we shall add this plugin as a build step after the test execution build step.
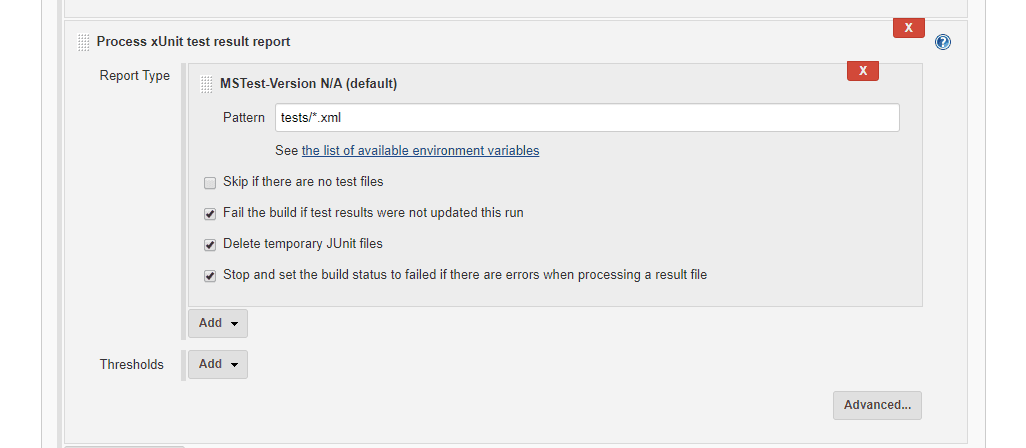
Once we add the step, we shall select the Report Type as MSTest (since the report generated will be of MSTest format) and then under the pattern, we give the below regular expression
tests/*.xmlBy default the plugin searches for any xml report file starting from the %WORKSPACE% path. And since we place all the resultant report files under the test sub folder of the workspace, we give the regex in the similar fashion so that the reports generated under the tests folder shall be taken for report generation.
Once this is done, we save the job and let the job run again, we can see that in the build log that the recorder looks for the file and then creates report basing on that.

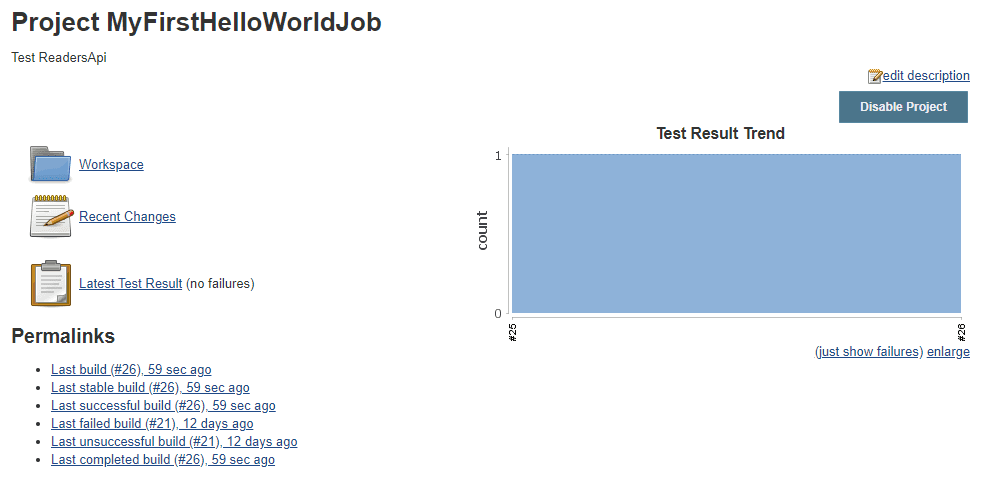
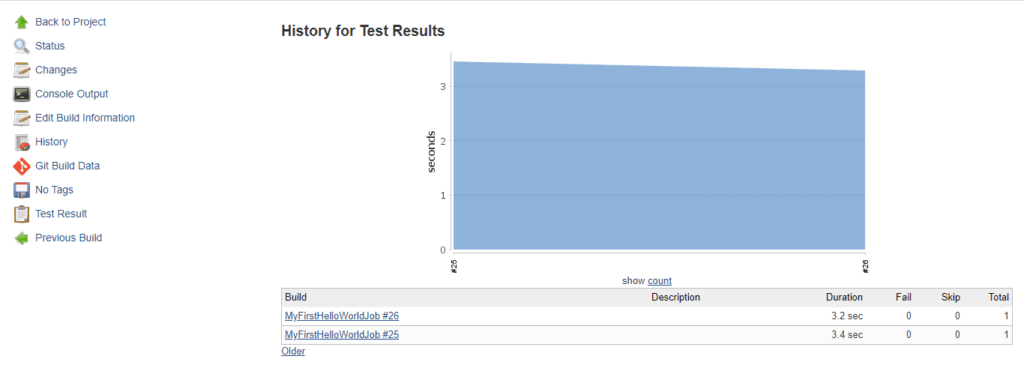
Once this is done, we move back to the job home page, where we can now see a stat graph generated basing on the test results per job run. And when we click on Latest Test Result link (third in the main section), we move to the latest test result page. Clicking on the History in the left gives us the total test stats for all the builds since the test report is configured.

In this way, we can configure test script execution and then record the test reports into stats for the builds in a fully automated fashion using xUnit plugin in Jenkins.
On the final stage of our application lifecycle automation, all remains is deploying the built and tested artifacts onto an environment for use by the team or the customers and then summarize the entire process in a mail notification for the teams with logs about the build and test reports.

Found this article helpful? Please consider supporting!

