AWS aka Amazon Web Services, is a Cloud provider which offers various tools and features for deploying and maintaining applications targeting multiple platforms and use cases.
Introduction
AWS Elastic Beanstalk is a Platform as-a Service (PaaS) tool offered which facilitates faster deployment and ramping up of resources for any given stack without much effort. What’s more: AWS also provides a dedicated toolkit for popular IDEs such as Visual Studio for deploying applications straight from the editor.
In this article, let’s talk about how we can deploy our existing ASP.NET Core application onto an Elastic Beanstalk resource via Visual Studio by making use of the AWS Toolkit provided for Visual Studio.
Install AWS Toolkit
For starters, the AWS Toolkit is provided for Visual Studio 2019 and below as an extension (.vsix) package for developers to deploy applications onto AWS resources right from their developer machines. This helps in rapid development-deployment and testing resources from cloud. The Toolkit package can be downloaded from the AWS Downloads page – https://aws.amazon.com/visualstudio/
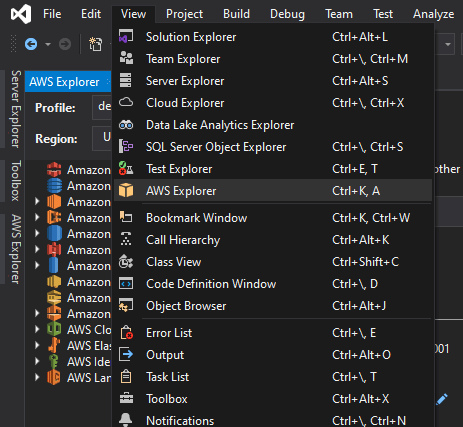
Once downloaded and installed, the Visual Studio is restarts and we can see a new option “AWS Explorer” added under the View menu. When we open the AWS Explorer, it adds up as a left sidebar with options for accessing existing or creating new AWS resources.
Once this is done, we need to add a registered AWS user credentials in order to access the resources via the developer account.
Add AWS User Credentials
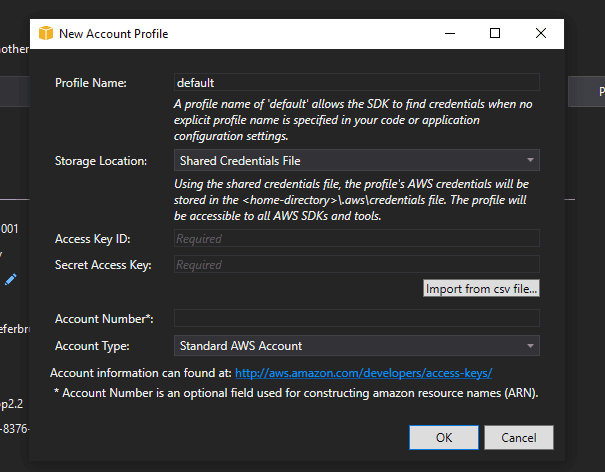
To add a new user, click on the “New Account Profile” (User-with-plus icon on the top of Explorer menu) which opens up a new window for credentials.
We would need to add access key ID and access key for the developer account which we are interested to add to the toolkit. These can be fetched up from the AWS Developer Console by clicking on the Profile icon on the top menu bar and selecting the “My Security Credentials” page.
Here we would need to create Security credentials to be used for accessing AWS CLI, SDK and APIs. This is done by clicking on “Create Access Key” button under the “Access keys for CLI, SDK, & API access” section in the page.
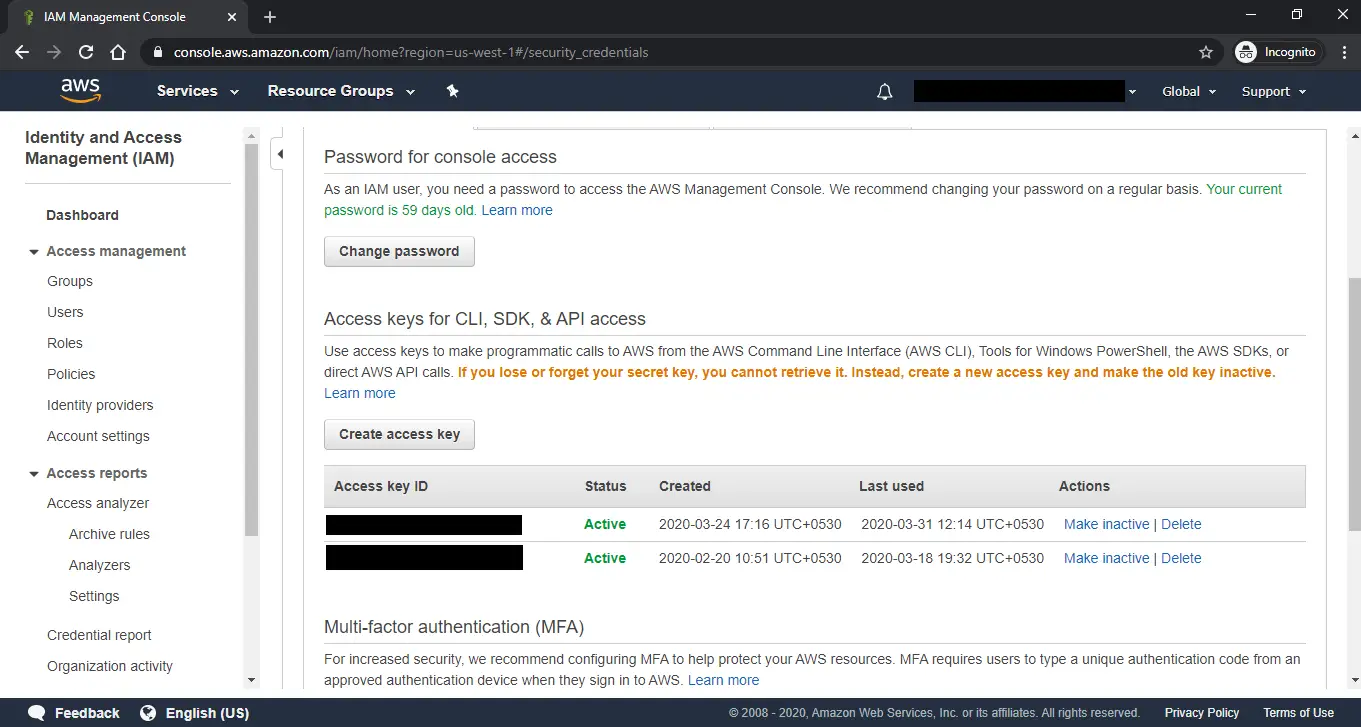
Once the credentials are created, copy the Access Id and Access Key from the page and store it somewhere: since once closed, the access key can’t be traced back and the limit on the number of keys generated is just two. Enter these generated values back in the Visual Studio Add-User window and submit, the pop-up closes and we can see that the resources now begin to show already created resources under the AWS Explorer menu.
Deploy Application
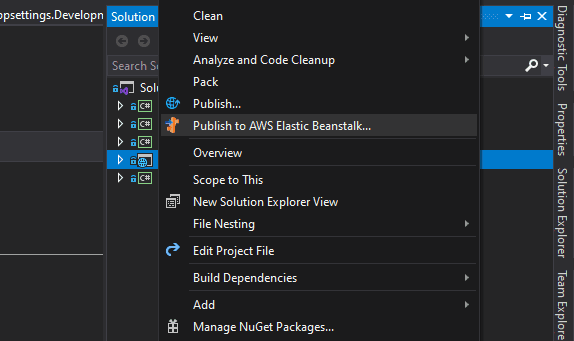
We are now ready with all the prerequisites for app deployment in AWS. Right click on the Web project which we would want to deploy in AWS, and select “Publish to Elastic Beanstalk”.
This will open up a window for setting up configurations in case of a new application or redeploying on an existing application. We can see all the already created applications and their underlying environments created; or can start afresh with a new Elastic Beanstalk resource.
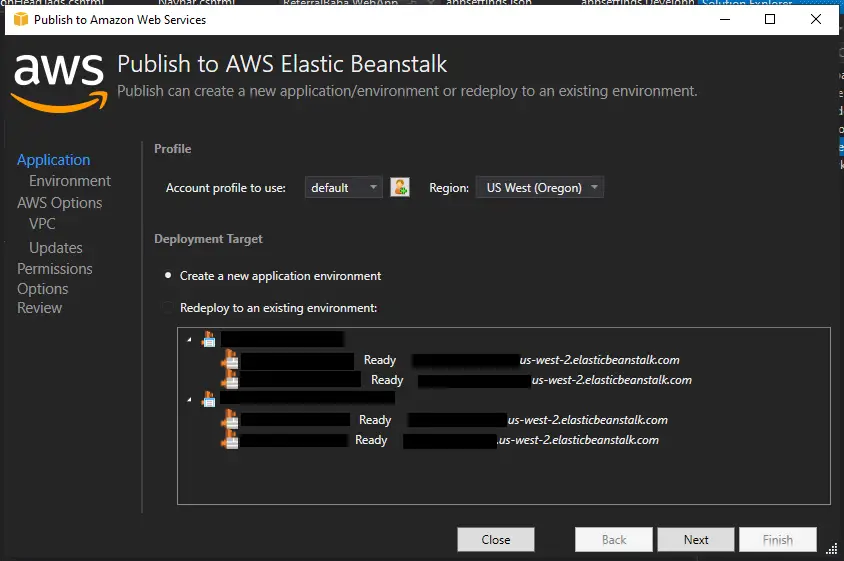
Let’s click on create new application to start afresh. Then we would be asked details about what would be the new application name, the environment name to be created (Elastic Beanstalk allows developers to create resources organized to different environments for different responsibilities under a single application) and the kind of application configured.
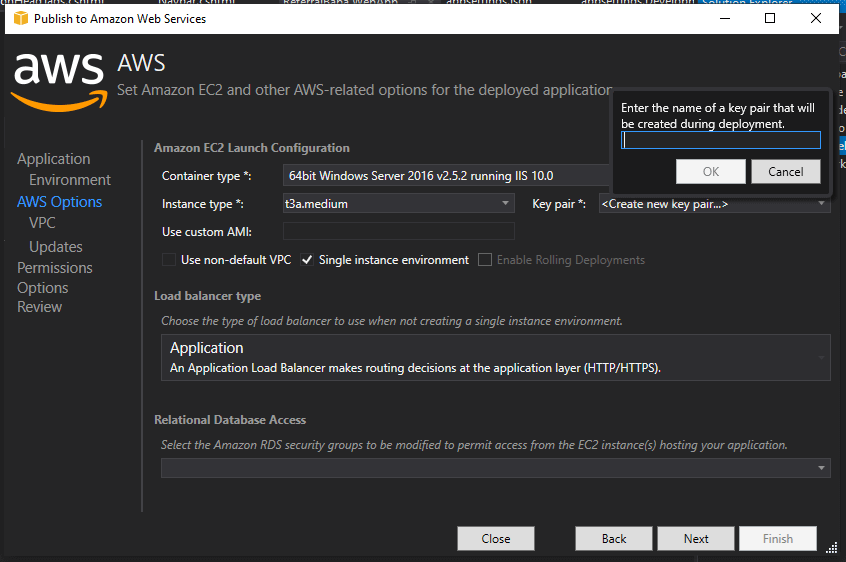
(i) Configuring EC2 Instance
On clicking Next, we’d be shown the EC2 instance which shall work under hood for the elastic beanstalk and on which the application runs. This is a tricky section, since we should carefully choose on what resources need to be added to our EC2 recipe and what are not required. Also, at this section we shall create a new Key Value pair (which is absolutely necessary) and link to our instance so that we can connect to the instance whenever required to troubleshoot. In our case, the option is pre-populated to use a Windows Server Image since we’re trying to deploy a .NET resource which works best on a Windows environment.
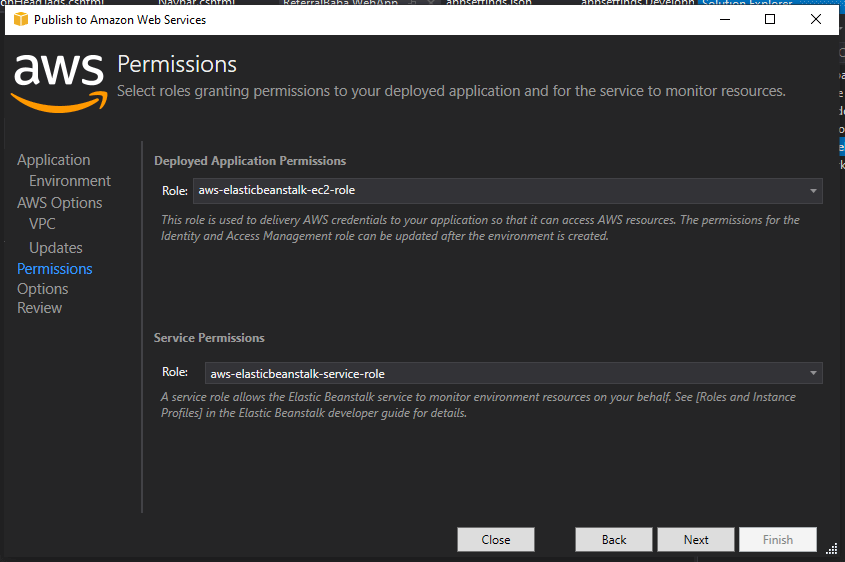
(ii) Configuring EC2 Role
Next, we’d be asked to create a new role or tag an already existing role to our to-be created EC2 instance. This role provides all the necessary permissions and access levels for the EC2 instance onto other AWS resources such as S3 bucket and so on. For this we shall use “elasticbeanstalk-ec2-role” which is a default role for all EC2 instances created via Elastic Beanstalk.
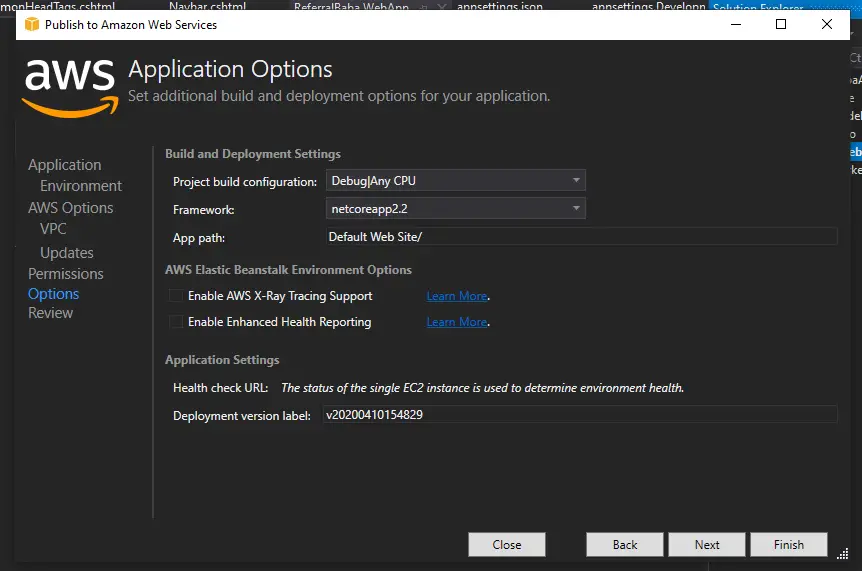
(iii) Configuring Application Runtime and Version
Then, we configure the runtime settings for the kind of application we are deploying. In this case we have “netcoreapp2.2” selected, since the application selected in my case was a dotnetcore 2.2 application. As per the AWS documentation, AWS Elastic Beanstalk currently supports deployment configurations for dotnetcore from 2.1 till the latest 3.1, so no worries on the compatibility part.
Also, we get to see the name of the zip file which holds the binaries and other artifacts generated from dotnet core publish, which shall be uploaded into an S3 bucket and is accessed by the EC2 instance from there. Also this sort of helps in maintaining different versions of deployments which are pushed as updates onto the environment.
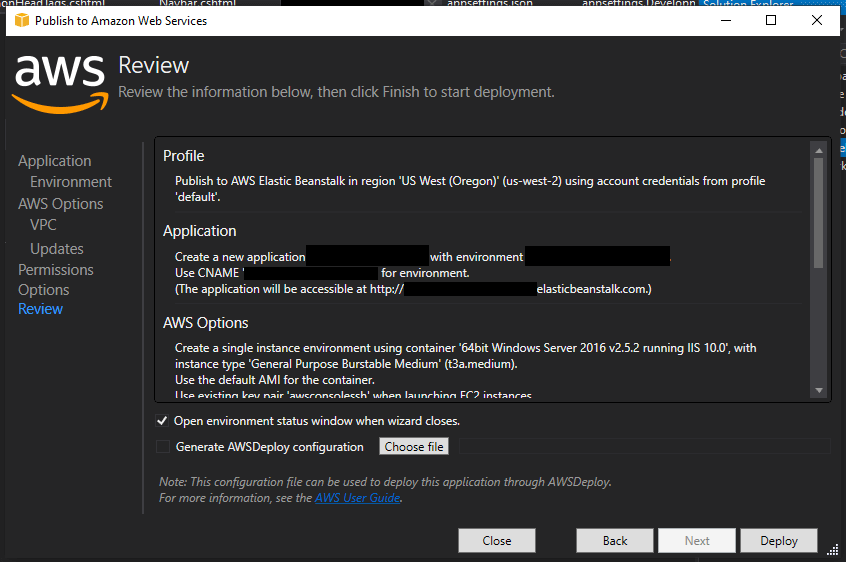
(iv) Final Summary and Creation:
In the final setup, we see a summary of all the configurations we have made for the to-be created Elastic Beanstalk environment and the EC2 instance that is to be created under the hood. Once this is done, the AWS Toolkit shall kick start a VS Code Publish and the generated artifacts are zipped and uploaded onto the created instance and finally, the EC2 instance is created using the selected configurations; thereby deploying the application onto the created Elastic Beanstalk environment.
At the end of this, we can see a browser opened up with the newly created elastic beanstalk URL which shows up the hosted application. This way, can deploy an ASP.NET Core application using AWS Toolkit onto an Elastic Beanstalk environment.
We can also deploy our ASP.NET Core application to a Lambda Function, which is a complete server-less Function as a Service (FaaS) offered by AWS. Check out the post here.

