
With the rise in applications offering user experiences across multiple devices and ecosystems, it is hard to develop and maintain reliable and scalable Login systems which are capable of authenticating users irrespective of the ecosystem and should offer a single sign-in experience across the devices. It should also be capable of handling loads of users and efficiently store their datasets with security. There are multiple Cloud based offerings for delegating User Authorization experience under a single platform such as Azure AD B2C, AWS Cognito, Okta to name a few. In this article, let’s talk about what is AWS Cognito and how we can configure and create a User Authentication experience using UserPools.
What is AWS Cognito?
AWS Cognito is an Identity solution offered by Amazon Web Services aka AWS to help securing applications with a scalable and highly secure authentication solution without having to worry about implementing an authentication mechanism. It provides a customizable Login and Registration UI with options to connect to popular social authentication providers such as Google, Facebook and so on. This helps developers to focus solely on their business solutions while the authentication and user management is maintained under AWS Cognito.
UserPools and Identity Pools
AWS Cognito provides two kinds of solutions based on the nature of the authentication. They are:
User Pool –
A User Pool is an application created to authenticate and manage users for an application. An application is secured by Cognito User Pool where on a new created or validated, a Cognito User Pool token or CUP Token is generated which can be used to safely access the application. Cognito UserPools provide login solutions to applications which are further used in the application context. To secure an application with AWS Cognito we choose to create a UserPool and use the configurations and settings from the created UserPool to validate a CUP token in the Authorization layers.
Identity Pool –
An Identity Pool is a login application created to authenticate users for accessing AWS resources such as S3, CloudWatch and so on. Using an Identity Pool to signin results in a Cognito Identity Pool token or CIP token which is recognized by AWS resources and grant access to validated users.
In a way, Identity Pools are used for accessing AWS resources while User Pools are for authenticating users for accessing applications.
Creating a UserPool:
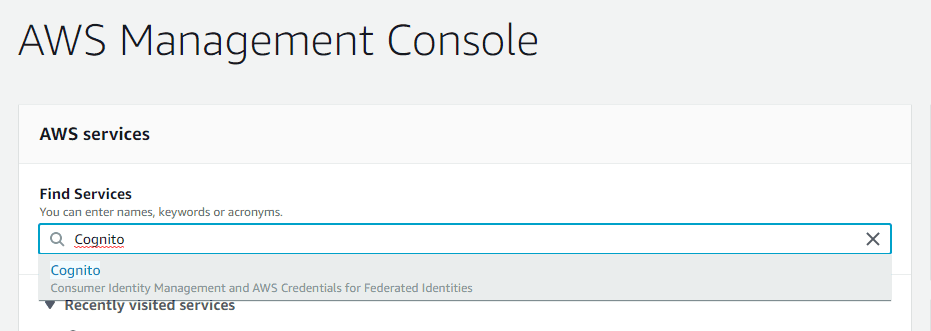
To create a Cognito UserPool, one must possess a valid AWS subscription which is generally free for one year under Free Tier. Login into AWS Console and search for Cognito in available services.
That redirects to the Cognito HomePage with two buttons up front. Click on “Manage UserPools” which takes you to the list of available UserPools along with option to create a new UserPool.

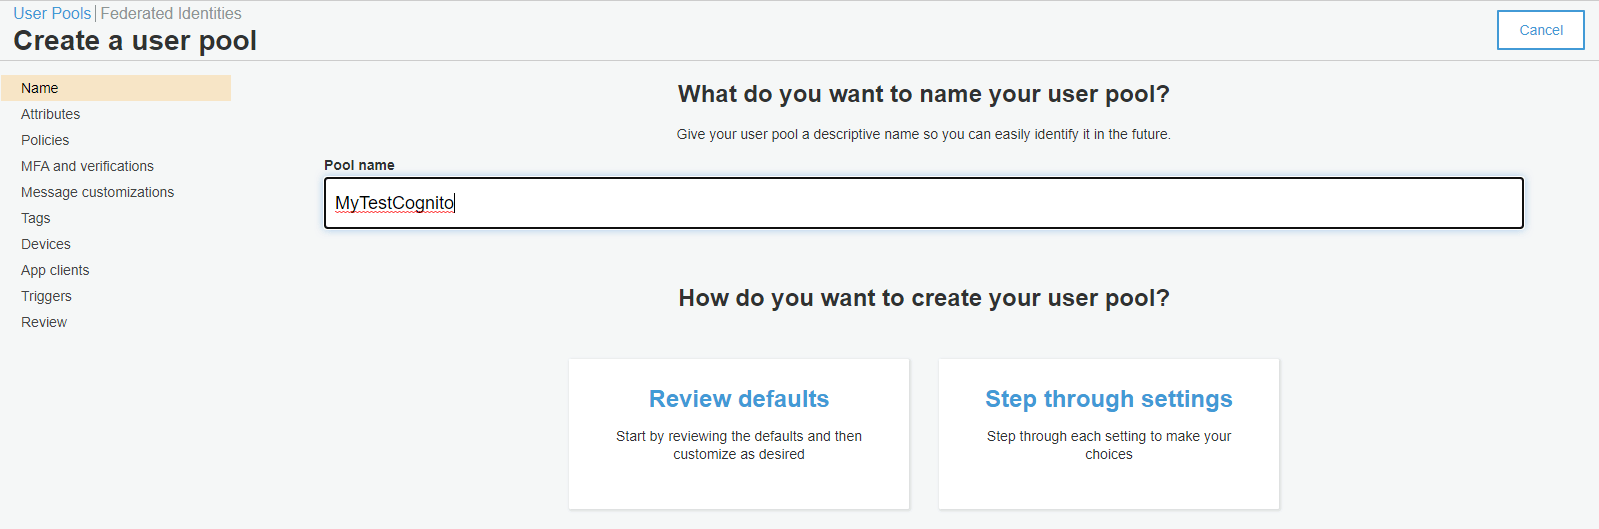
Click on the “Create a User Pool” button on top right which will take you to the User Pool configuration page.
In the UserPool Configuration Page, give your UserPool a name and click on “Step Through Settings” option in the bottom which shall take you to the sections one by one, which are seen on the left side.
In the Attributes section, you can select what Attributes are collected during User signup and using which identifier a User can signin to the application. By default the Username option is selected, which comes along with different secondary combinations such as EmailAddress and Phone Number. Let’s select the other option – EmailAddress, which requires the user to signin using one’s EmailAddress. We also get to add any additional Attributes from the User which can be collected during signup – all of which will be stored under the User in the Cognito. Apart from the default Attributes provided, we can also create our own Attributes specific to our application which can be read and later updated for the user.

In the Policies section, you can configure settings related to Password – such as Length and Expiry. You can also set how the accounts shall be created – whether Users can come and signup themselves or are provided accounted by the Administrator.

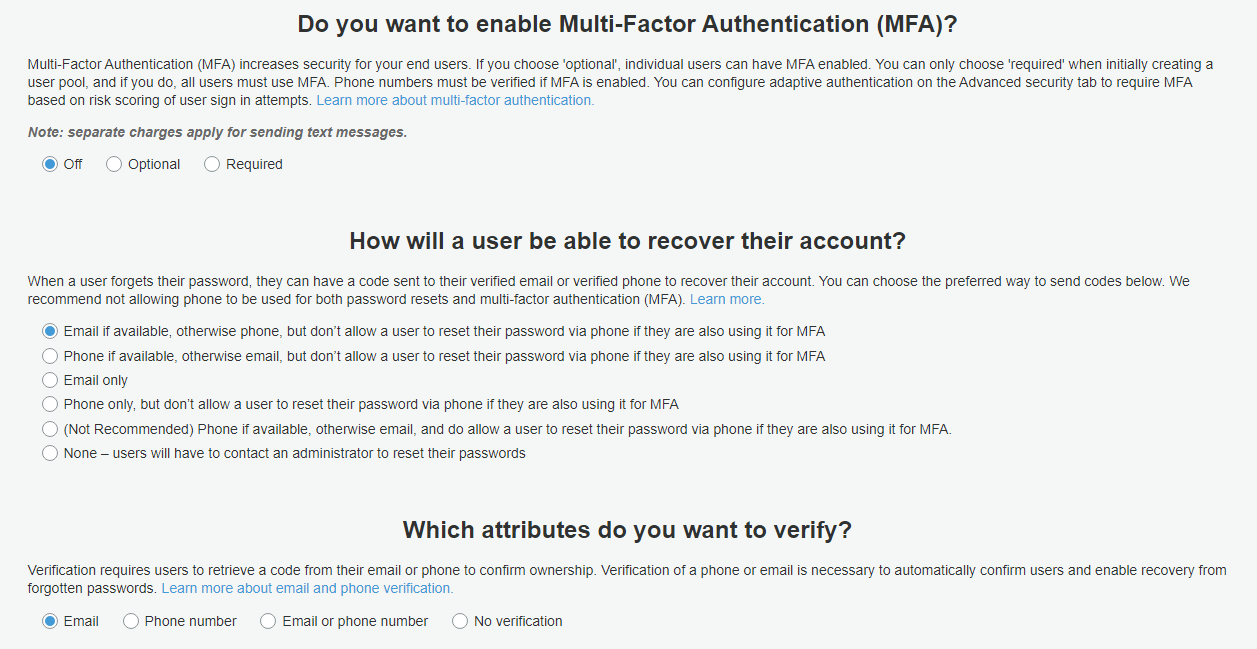
In the MFA section, you can enable and configure Multi-Factor Authentication for the users created in the User Pool along with options to how they can recover their accounts if they loose their Password. Keep in mind that the SMS charges apply for these settings and so we leave them unchanged and disabled.
App Clients section is important – it is where we configure a Client that uses this UserPool for authenticating users in the application. Creating an AppClient also involves configuring OAuth Flows and Scopes, by which a user can signin and authenticate with the system. Ensure that the checkbox for “Generate Client Secret” is ticked off. It is not mandatory for the applications to require ClientSecret during auth flows if it is not created. But if an AppClient has ClientSecret created, it is deemed mandatory to use it everywhere.
App Flows define in how many ways users can signin or signup with the system in exchange for Tokens. Flows such as Username Password Authentication flow (ALLOW_USER_PASSWORD_AUTH), Authentication using Refresh Tokens (ALLOW_REFRESH_TOKEN_AUTH) are supported.
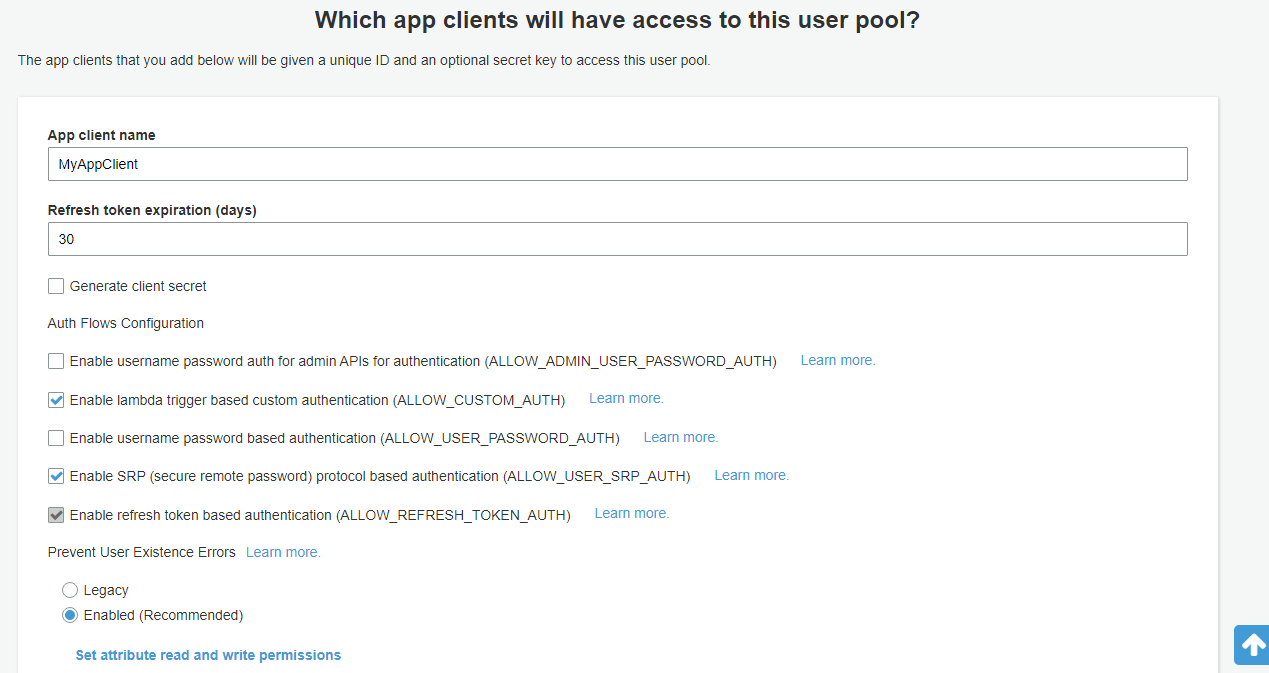
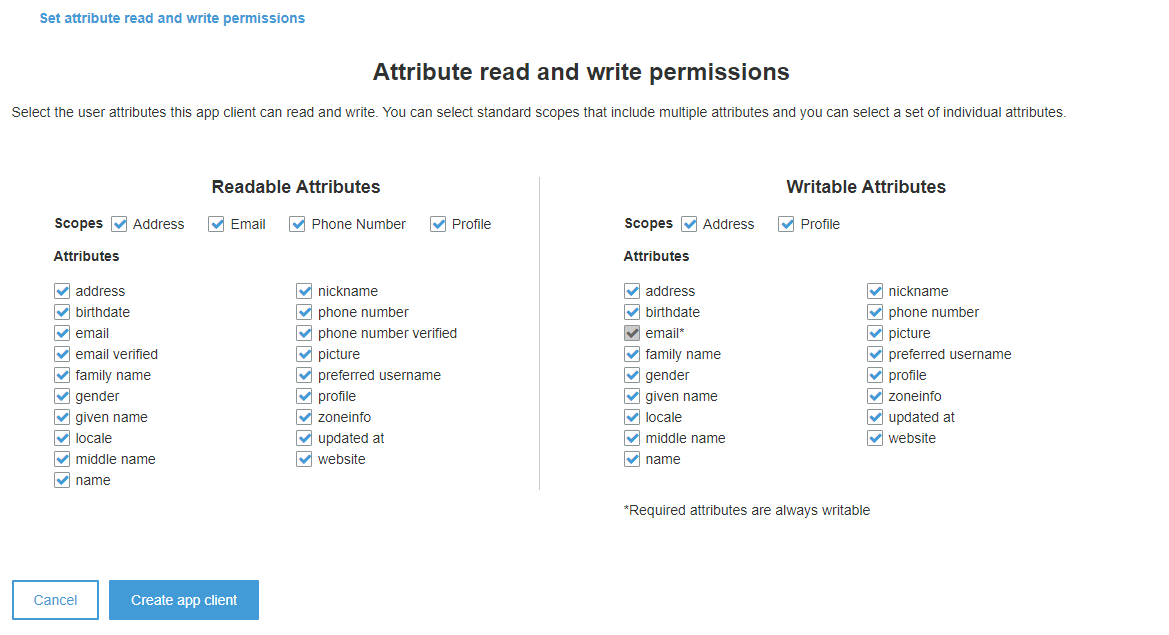
The Scopes define which Attributes (which are previously configured) are read and written by the AppClient. The Attributes which we have defined in the previous section appear as Required fields in the Scopes section and are always Readable and Writeable. Once the configuration is done, click on “Create App Client” which creates a new Client once the User Pool is created.
Finally, at the Review section we get to see a summary of all the changes and configurations we have made as a part of the creating the User Pool and to finish things off we click on “Create Pool”. This results in a new UserPool created that uses EmailAddress as the default SignIn / SignUp identifier along with a created AppClient that resembles an application that authenticates and creates user with the UserPool.

Once created, take a note of the Cognito UserPoolId which uniquely identifies a UserPool. Click on the AppClient settings to take a note of the AppClientId generated for the AppClient we just created. We shall make use of these two values later for integrating in applications.

Testing Signup and SignIn:
To test Signup and SignIn using Cognito, we need to first setup Identity Providers using which the User shall SignIn / SignUp with Cognito. To setup, click on the AppClient Settings and enable “Cognito User Pool” which enables the default Cognito Identity SignIn / SignUp. In this case, we’re creating accounts directly into the Cognito using its own Identity setup.

Second, provide Callback URL to which the Cognito redirects the User post SignIn / SignUp along with the authentication state (a Token or Code). Third, enable the OAuth Flows as shown in the image. Make sure that client_credentials aren’t selected which shall disable all other Flows. Finally, click on Hosted Domains section and create a unique domain name.

Note that domain names are unique globally across the Cognito and hence needs to be carefully chosen. Once these are done, back to the AppClient Settings and click on Launch Hosted UI, which is now active. This redirects to the default Cognito Login Page where you can test by creating a new User with email and Password.
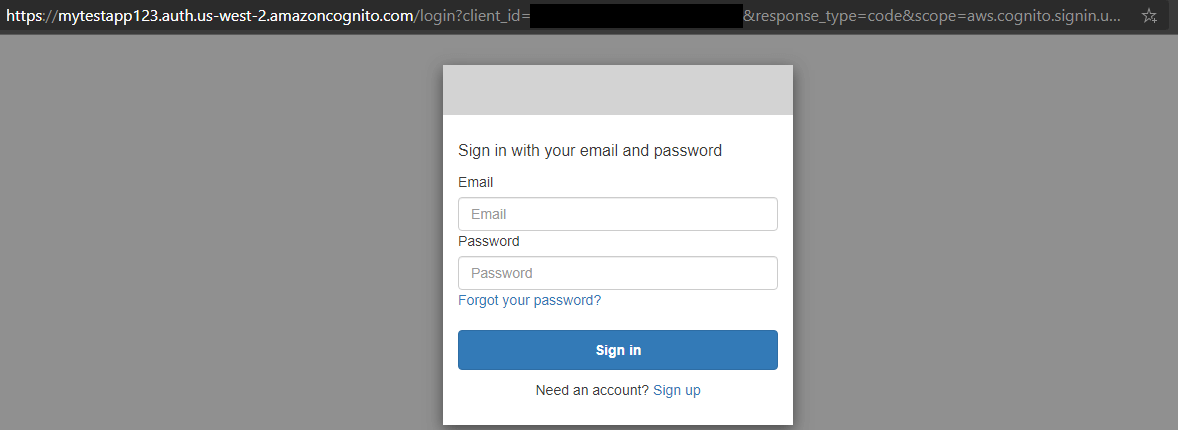
Observe that the URL shall be something like this:
https://your_domain_name.auth.us-west-2.amazoncognito.com/login?client_id=app_client_id&response_type=code&scope=aws.cognito.signin.user.admin+email+openid+phone+profile&redirect_uri=http://localhost:5000Once the user is signed up or signed in, the page redirects to the specified Callback URL which is localhost:5000 in our case along with an Authorization Code. This is because we have mentioned the response_type as “code”. To obtain a “token” in place of “code” we specify the response_type as “token” which redirects to the Callback URL with tokens as query parameters.
In this way, we can create a Cognito UserPool which we shall later use for authenticating users. In the next article, we shall look at how we can actually use this generated token in authenticating user against an API using the UserPool settings we have taken note off.

