MongoDB is an open-source cross platform document-oriented database. It stores data records in the form of JSON-like structures and is classified as a NoSQL data store. It also supports scalability and replication and is one of the most popular options for NoSQL data store usecases.
MongoDB supports integration with all the popular frameworks and programming languages and like any other database, it provides connectivity using language specific libraries and drivers.
In this simple quickstart, let’s look at how we can work with ASP.NET Core (.NET 6) for integrating MongoDB datastore to fetch, insert, update and delete records.
Note: We will omit the common stuff (creating API project, setting up the controllers and so on). Instead we’ll focus on designing the infrastructure layer where the API connects to the datastore and commits/retrieves data as per the requirement.
We will use a few simple design approaches such as a Repository for the logic, IOptions for reading the configurations and so on.
Setting up MongoDB database server via Docker Container
To work with MongoDB, one can directly install MongoDB db engine (also known as mongod.exe) as a standalone program through MSI or equivalent executable programs.
Another great alternative is by using its official docker image. In our case, we’d go ahead by using the mongo official docker image and run our mongo server inside a container.
To run a basic setup of MongoDB container, run the below command:
docker run --name mymongodb -p 27017:27017 -d mongo
Observe that we’re binding the container port 27017 to the host. Why? because 27017 is the default port on which the MongoDB server runs.
From our application, we will construct a proper connection string and connect to any database in this server through this port.
The connection string would look like this:
> mongodb://localhost:27017
Integrating MongoDB with ASP.NET Core (.NET 6)
1. Installing the Mongo driver
To work with MongoDB, we’d need to install the database driver for ASP.NET Core (.NET 6). The official MongoDB driver for ASP.NET Core is available in the Nuget and can be installed with the below command:
> dotnet add package MongoDB.Driver --version 2.13.2
alternatively, one can just paste the below line in their csproj file and restore packages to install the driver library.
<ItemGroup>
    <PackageReference Include="MongoDB.Driver" Version="2.13.2" />
</ItemGroup>
Best part is that the MongoDB driver consists of all the necessary libraries to connect to the MongoDB server and get started with the integration. To get started, we need to first construct our entity which we shall use as a mapper onto the MongoDB to store and fetch records.
MongoDB stores its data in a JSON like structure. Each record consists of a unique record Id called as ObjectId. This ObjectId is automatically generated when a new record is inserted into the database and is indexed, so the queries that run on the ObjectId are the fastest.
2. Setting up the Entities – Decorating with Mongo Attributes
On the dotnet side, we need to setup a property in our entity and decorate it to indicate that the ObjectId that is stored in the MongoDB store be mapped into the entity object when required.
The entity class in our case looks like below:
using MongoDB.Bson;
using MongoDB.Bson.Serialization.Attributes;
using System;

namespace MongoBookStoreApp.Contracts.Entities
{
    public class Book
    {
        [BsonId]
        [BsonRepresentation(BsonType.ObjectId)]
        public string Id { get; set; }
        public string Name { get; set; }
        public string Description { get; set; }
        public string ISDN { get; set; }
        public double Price { get; set; }
        public string AuthorName { get; set; }
        public DateTime AddedOn { get; set; }
    }
}
Observe that we’re decorating our Id with two decorators, one which sets the property to be mapped onto the ObjectId and the other indicates the property to be treated as the BsonId.
What is a BsonId? MongoDB uses a binary representation of the JSON document for its storage, it is called as “Binary JSON” or “BSON”.
3. Instantiating MongoClient and MongoDatabase
Like as in any other database integration, MongoDB too uses a database client through which all the operations are passed over to the database end. We create an instance of the MongoDB Client and then use that to connect to the database and pass on the operations.
From the created MongoClient instance, we create an instance of the Database on which the records are to be stored. This database instance contains the necessary methods for the operations to be performed.
// create client
var client = new MongoClient(@@ConnectionString@@);
var database = client.GetDatabase(@@DatabaseName@@);

// all operations are called on the database instance
The MongoDB Client in this cases is designed to be a singleton when used in Dependency Injection and hence we can create this client instance once and inject it whenever required. Let’s design our MongoClient within a MongoContext class and expose properties for the Client and the Database to be accessed.
using Microsoft.Extensions.Options;
using MongoBookStoreApp.Contracts;
using MongoDB.Driver;

namespace MongoBookStoreApp.Core.Data
{
    public class MongoContext
    {
        private readonly MongoClient _client;
        private readonly IMongoDatabase _database;

        public MongoContext(IOptions<DatabaseSettings> dbOptions)
        {
            var settings = dbOptions.Value;
            _client = new MongoClient(settings.ConnectionString);
            _database = _client.GetDatabase(settings.DatabaseName);
        }

        public IMongoClient Client => _client;

        public IMongoDatabase Database => _database;
    }
}
Observe that we’re using IOptions to bind the configuration settings (which are generally stored in the appsettings JSON) and inject them into the MongoContext class to pass the connectionString and the DatabaseName into the MongoClient and GetDatabase() calls respectively.
namespace MongoBookStoreApp.Contracts
{
    public class DatabaseSettings
    {
        public string ConnectionString { get; set; }
        public string DatabaseName { get; set; }
    }
}
The appsettings JSON will look like below:
"MongoConnection": {
    "ConnectionString": "mongodb://localhost:27017",
    "DatabaseName": "BookstoreDb"
}
The MongoContext class is registered as a singleton and now will be injected as required.
public void ConfigureServices(IServiceCollection services)
{
    services.Configure<DatabaseSettings>(
        Configuration.GetSection("MongoConnection"));

    services.AddSingleton<MongoContext>();

    // all other registrations

    ...
}
Performing CRUD Operations using MongoContext
Once we have created our database instance, we can perform all the CRUD operations over the database instance by using the respective methods. In our case, we declare five operations required for our BookStore and encapsulate them inside a Repository implementation called as BookRepository.
In MongoDB, we have databases that are our encapsulated datastores where records are stored. Within each database we have collections, which hold the records as a single responsibility.
These collections are logical structures similar to tables in a relational database, but the way the data is represented (in the form of JSON vs a row-column format) differs.
When we talk about working on books entity, we’re actually talking about a collection called Books inside a database in our MongoDB server.
namespace MongoBookStoreApp.Contracts.Repositories
{
    public interface IRepository<T>
    {
        IQueryable<T> GetAll();

        Task<T> GetSingleAsync(Expression<Func<T, bool>> predicate);

        Task AddAsync(T obj);

        Task<T> UpdateAsync(T obj);

        Task DeleteAsync(Expression<Func<T, bool>> predicate);
    }

    public interface IBookRepository : IRepository<Book>
    {
        Task<Book> GetBookByIdAsync(string bookId);

        Task CreateBookAsync(CreateOrUpdateBookDto model);

        Task<Book> UpdateBookAsync(string id, CreateOrUpdateBookDto model);

        Task DeleteBookAsync(string id);
    }
}
Let’s implement each method from the Repository and understand how its done.
1. LIST ALL
To list all the books from the collection, we can simply create a queryable provider from the Books collection and return it back. Since the collection instance itself is a kind of Collection, we can simply call AsQueryable() over the instance and it works.
public IQueryable<Book> GetAll()
{
    return _books.AsQueryable();
}
2. LIST ONE
To Find a single record from the collection that matches some criterion, we call the FindAsync() method on the collection. This method takes in a FilterDefinition where we need to pass in our filter condition. The condition (which in our case is a lambda expression) is defined as below:
public async Task<Book> GetSingleAsync(Expression<Func<Book, bool>> predicate)
{
    var filter = Builders<Book>.Filter.Where(predicate);
    return (await _books.FindAsync(filter)).FirstOrDefault();
}
3. CREATE
To create a new record in the collection, we’d just create a new Book instance and then “insert” into the collection. As we know, the ObjectId is generated automatically at the DB level and so we don’t need to pass one by ourselves.
public async Task CreateBookAsync(CreateOrUpdateBookDto model)
{
    Book book = new Book
    {
        Name = model.Name,
        AuthorName = model.AuthorName,
        ISDN = model.ISDN,
        Description = model.Description,
        Price = model.Price,
        AddedOn = DateTime.Now
    };
    await AddAsync(book);
}

public async Task AddAsync(Book obj)
{
    await _books.InsertOneAsync(obj);
}
4. UPDATE
To update an existing record in the collection, we perform two steps – one find the exact record that matches our ObjectId and then update “some” or “all” fields in the record. While these two steps are performed within the database itself for us, we do have options to “update some properties” or “replace the entire record” as per our requirement.
For the former we call FindOneAndUpdateAsync() method while for the latter we use FindOneAndReplaceAsync() method. Both the approaches are done as below:
public async Task<Book> UpdateBookAsync(
        string id, CreateOrUpdateBookDto model)
{
    Book book = new Book
    {
        Id = id,
        Name = model.Name,
        AuthorName = model.AuthorName,
        ISDN = model.ISDN,
        Description = model.Description,
        Price = model.Price,
        AddedOn = DateTime.Now
    };

    return await UpdateAsync(book);
}

public async Task<Book> UpdateAsync(Book obj)
{
    var filter = Builders<Book>.Filter.Where(x => x.Id == obj.Id);

    // approach 1 - update selective properties
    var updateDefBuilder = Builders<Book>.Update;
    var updateDef = updateDefBuilder.Combine(new UpdateDefinition<Book>[]
    {
        updateDefBuilder.Set(x => x.Name, obj.Name),
        updateDefBuilder.Set(x => x.Description, obj.Description),
        updateDefBuilder.Set(x => x.AuthorName, obj.AuthorName),
        updateDefBuilder.Set(x => x.ISDN, obj.ISDN),
        updateDefBuilder.Set(x => x.Price, obj.Price)
    });
    return await _books.FindOneAndUpdateAsync(filter, updateDef);

    // approach 2 - replace the entire record
    return await _books.FindOneAndReplaceAsync(x => x.Id == obj.Id, obj);
}
5. DELETE
Similar to Update, to delete a record from the collection we pass a filter condition to the DeleteOneAsync() method on the collection and the record matching the condition gets dropped from the collection. This is implemented as below:
public async Task DeleteBookAsync(string id)
{
    await DeleteAsync(x => x.Id == id);
}

public async Task DeleteAsync(Expression<Func<Book, bool>> predicate)
{
    _ = await _books.DeleteOneAsync(predicate);
}

/*
The result of the DeleteOneAsync() method is a DeleteResult
which contains information such as the number of records deleted and so on.
*/
Conclusion
ASP.NET Core provides simple and intuitive integrations with most of the popular database providers in the market, and integration with MongoDB is one good example. The integration is as simple as:
- installing the driver
- configuring MongoContext, MongoDatabase and finally
- Calling on the respective method according to the requirement
When we combine this simplicity with some design practices such as Dependency Injection and Repository abstractions, we end up creating a scalable and testable solutions.

Found this article helpful? Please consider supporting!
Boilerplate 🥳
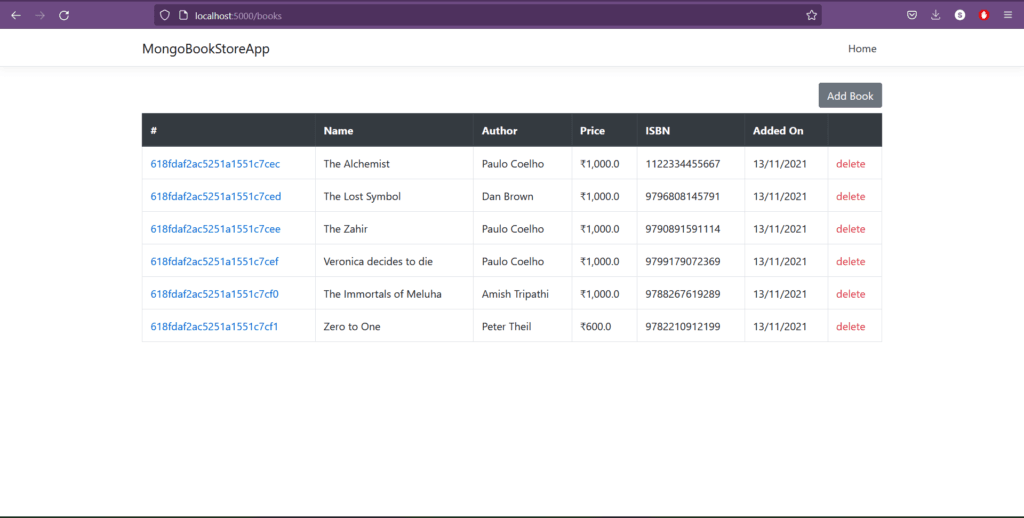
The code snippets used in this article are a part of Mongo BookStore – a simple and practical boilerplate that demonstrates working with MongoDB. The solution uses ASP.NET Core (.NET 6) as a back end API with Angular covering the front end.
The solution is designed with beginners in mind and so uses simpler design techniques such as layered architecture, Repository pattern and comes with functionality to auto-seed the connecting database with sample data.
The boilerplate is Docker ready : contains ready made scripts to deploy and run in a docker container. The complete usage guide is provided in the README of the solution repository.
You can find the solution here. Please do leave a star if you find the boilerplate solution useful.

