Introduction
Caching is an important technique used while designing solutions. It helps reduce frequent database hits by storing frequently accessed data in a high-speed memory and applications can access this memory to read the same. Distributed Caching externalizes this caching store into a separate cluster deployed outside the application tier, so that applications can continue to use caching while the cache is loosely coupled and can be managed independently.
Maintaining caching clusters and scaling nodes can be a tricky process, particularly if the cluster is deployed in an on-premise infrastructure. As applications grow in size and traffic, more and more data may need to be cached.
In such cases, maintaining high-availability and auto-scaling can be challenging for such local deployments.
Why may you consider deploying in the Cloud?
Instead, deploying our cache clusters in cloud infrastructure can be a good choice. Cloud offers High Availability, Scalability and Fault Tolerance which helps us keep our caching clusters always available and scale on demand.
But another challenge is that not all the caching solutions available in the market are Cloud ready and deploying such products may not be reliable.
For example, Memcached is a good caching solution that is offered in AWS but isn’t there in Azure. Applications which are built with Memcached integration may find it challenging to put their applications to Azure and sanity test with available cache services such as Redis or others.
Thankfully, NCache offers a caching solution in both Azure and AWS. In this article, let’s discuss how we can set up an NCache caching cluster in Azure and how we can work with it.
What is NCache?
NCache is one of the popular Distributed Caching solutions available in the market. It offers a high performance caching solution with an intuitive monitoring console. It is written in .NET technology and can be used with any application platforms via its developer libraries.
How to setup NCache Cluster in Azure Cloud – Different Options
NCache offers its cache solution as an Azure-ready deployment via Azure Marketplace. You just need to find NCache from the Marketplace and click on Create.
There are two ways you can quickly setup and run your NCache cluster in Azure –
- Run NCache Enterprise Cache via Virtual Machines
- Run NCache Enterprise Cloud as a SaaS subscription
| NCache Enterprise Software | NCache Enterprise Cloud |
| This option installs NCache Enterprise Cache similar to how you do a standalone installation, but in Cloud | This options offers a SaaS solution with preconfigured servers, you need to subscribe to it |
| This option lets you use your existing licenses as a BYOL (Bring Your Own License) | This option doesn’t require any existing license, you create a subscription from within Azure |
| All the underlying servers are spun, hosted and billed in your Azure subscription | All the underlying servers are spun, hosted and billed in your Azure subscription |
In this article, we will focus on NCache Enterprise Cloud and how it is done.
we’ll follow the below steps in sequence –
How to setup NCache Enterprise Cloud?
- Create a Resource Group
- Add new Resource – Marketplace
- Look for NCache, select “NCache Enterprise Cloud”
- SaaS subscription – review options and click Subscribe
- To complete subscription and create resources (VMs etc.) need to navigate to NCache Cloud Portal. Click “Configure account now”
- Register as new user in NCache Cloud Portal
- Once registration is complete, you need to now create infrastructure for the cache to run. NCache runs in our own account and uses our own VMs.
- Two deployment methods – Automatic or Manual. Automatic means resources are created and handled by NCache, and need to be authorized. Manual means we need to configure and create resources ourselves.
- Create Resources for the cluster to run – VM configuration, deployment configuration
- In Automatic deployment, NCache will create resources for us – in Manual, we will get a Powershell script based on our select which we need to run in the Azure portal.
Create a Resource Group
Let’s start by creating a new Resource Group. A Resource Group is a logical separation within an Azure Subscription, where you can group resources together and apply policies on the whole. I’ll name the Resource Group “ncache-apps”.

Add new Resource – Marketplace
Once the Resource Group is created, navigate into the Resource Group and click on the “Create” option on the top. It opens up the Azure Marketplace where you can pick the service you want to create and start using.

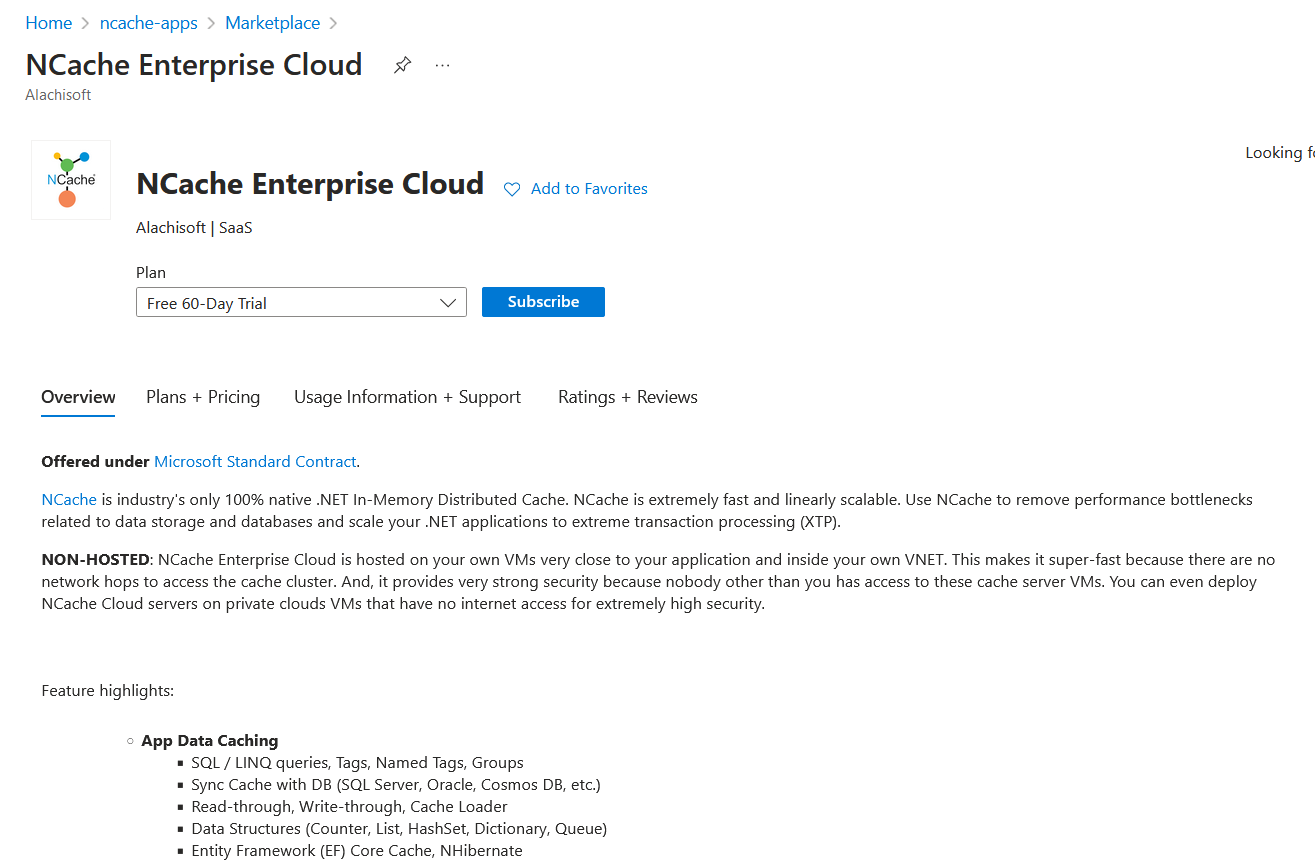
Look for NCache, select “NCache Enterprise Cloud”
Within the Marketplace, search for NCache using the search box. You will have several options available for NCache. Select “NCache Enterprise Cloud“. This option takes you the SaaS route where you can create and manage your NCache clusters in a SaaS subscription model.
The other option “NCache Enterprise Software” deploys NCache in a Virtual Machine within our Resource Group similar to a local installation. You can use your already existing license with this installation and the experience is almost similar to deploying in a local machine.
Please note that for both the options you will have to still pay for the underlying infrastructure (Virtual Machine, Disk, IP etc.) used in Azure.
SaaS subscription – review options and click Subscribe
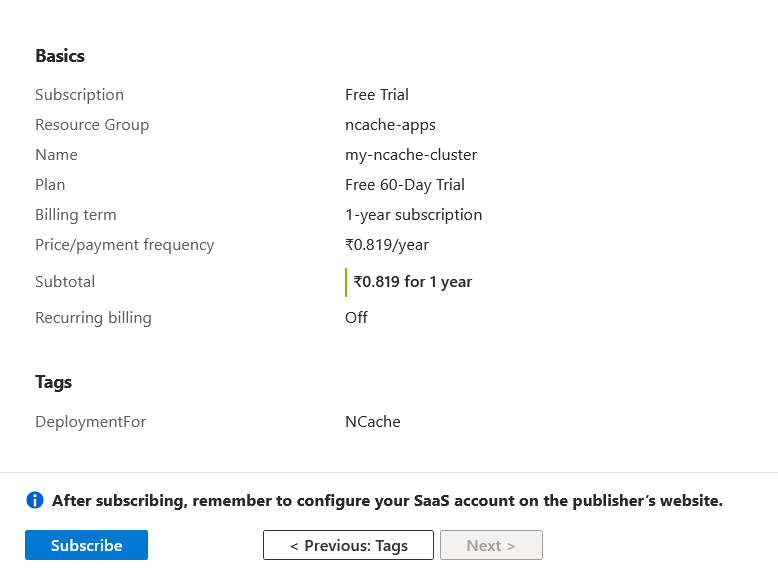
In this step, you will select the Resource Group under which your virtual machines and other services will be created and configured. By default, NCache will provide you with a free 60-day trial, and the subscription is billed annually.

Once all the options are provided, click on “subscribe”. You will now have a subscription created in your Azure account for NCache SaaS.
We will now have to create the resources on which our SaaS will run. The steps from here on are done in NCache Cloud Portal
To complete subscription and create resources (VMs etc.) need to navigate to NCache Cloud Portal. Click “Configure account now”

Register as new user in NCache Cloud Portal
After the subscription part is done, we click on “Configure account now” and we are redirected to the NCache Cloud Portal. Here we have to first register as a new User, as we have not yet created any Cloud Account before.

For users who have already registered, you can link your existing account.
Once registration is complete, you need to now create infrastructure for the cache to run. NCache runs in our own account and uses our own VMs.
Deploying Resources – Automatic or Manual?
NCache offers two deployment options to create and manage underlying cloud infrastructure. This way we don’t need to depend on the Azure portal for our resources and can instead manage from within the NCache Cloud Portal.
Two deployment methods are – Automatic or Manual.
When you choose the Automatic Deployment option, resources are created and handled by NCache. To do this, you need to authorize NCache to create and manage your Azure account.
If you are thinking otherwise, Manual is the option for you.

When you choose Manual Deployment, we need to configure and create resources ourselves.
Once you choose Automatic Deployment, you have multiple options to choose – you can let NCache to create an automatic deployment user for you by logging into your Azure Admin account or, you can also link your existing Deployment user which has the necessary roles and permissions available.
Create Resources for the cluster to run – VM configuration, deployment configuration
Once the user is configured, you will now proceed to configure the underlying infrastructure. In this step, we will provide the details about the number of VMs to be created, the version of NCache to be installed, VM security information, Networking etc.

Once all the information is given NCache creates and deploys the Virtual Machines along with NCache installed.

In Automatic deployment, NCache will create resources for us – in Manual, we will get a Powershell script based on our select which we need to run in the Azure portal.
Post this step, you will have the NCache cluster configured and ready to use. You copy the cluster details (Cluster URL and Port) and configure in your applications to start caching in the cloud.
How to connect to NCache Cluster from an ASP.NET Core application?
We now have an NCache cluster running from within Azure. We have already copied our Cluster URL and port.
To connect to an application, you just need to update the client.nconf file that is maintained in the application.
For example, In the NCachedBookStore solution, you can find a client.nconf file inside the NCachedBookStore.Web project.
There you can find the content as below –
<?xml version="1.0" encoding="UTF-8"?>
  <configuration>
    <ncache-server connection-retries="3" retry-connection-delay="0" retry-interval="1" command-retries="3" command-retry-interval="0.1" client-request-timeout="90" connection-timeout="5" port="9800"/>
    <cache id="demoCache" client-cache-id="" client-cache-syncmode="optimistic" default-readthru-provider="" default-writethru-provider="" load-balance="True" enable-client-logs="False" log-level="error">
      <server name="my_azure_public_address"/>
    </cache>
  </configuration>
You just need to update the Server details, Cache Name and the port. I have used the same cache name that I used in my local deployment, so nothing changes here.
Tip – If you face issues while connecting to the port, see if you need to open the port in Azure firewall which should have already been handled in our case.
Once the application starts up, the caching is now handled by the NCache Enterprise Cloud.
Conclusion
Distributed Caching is an important aspect of any production-ready application, which requires handling requests and data on a large scale. Although self-hosted cache solutions are sufficient, cloud-backed distributed caching solutions offer better fault-tolerance and high-availability with very minimal maintenance.
Like any other distributed caching solutions offered by Azure such as Azure Cache for Redis, users can deploy and use NCache from within Azure. This combines the features offered by NCache with the reliability offered by Azure.
In this article, we have looked into how we can easily setup NCache Enterprise Cloud with the resources created and managed in Azure. We can easily connect to it from an ASP.NET Core application. We have also looked into configuring the NCache VM step by step, and finally seen how we can connect to the cluster from within our NCachedBookStore web application.
Documentation References –
- NCache Cloud – Automatic Deployment in Azure
- NCache Cloud – Manual Deployment in Azure
- Managing NCache Servers
- NCache Cloud Portal
- NCache Cloud – Azure Marketplace

