
While in designing a user interactive application we often encounter with form submissions which are one way of letting user feed the application with data for a purpose – be it a login, feedback or an email subscription. In flutter, we can create such user interaction by making use of a Form widget.
In this article, let’s talk about how we can create an interesting Login form which accepts an EmailAddress and a Password from the user, perform validations on the user input and finally fetch the values from the Form once the user inputs all valid data and hits the submit button.
A little about the Form widget
The Form widget acts as a container for grouping one or more user input fields and offers overall validation and submission. To create a Form widget in our application, we would need to pass in a GlobalKey to the “key” property of the Form.
A GlobalKey is an identifier that uniquely identifies a widget across the widget tree. We can access a widget and get insights about it using this GlobalKey.
Getting Started – Designing the Container
To get started, let’s create a new flutter project for our cause:
> flutter create form_login_appAdd a new Form page which now holds our login page. Let’s say I’d want my login page to stand out with a white login panel on top of a blue background page. For this, I use a little decoration and padding on top of a Container.
The Container sits inside MyForm widget, which is a StatefulWidget.
class MyForm extends StatefulWidget {
  @override
  State<StatefulWidget> createState() {
    return MyFormState();
  }
}

class MyFormState extends State<MyForm> {
  @override
  Widget build(BuildContext context) {
    return Scaffold(
    appBar: AppBar(
        title: Text("My Form"),
    ),
    body: Container(
        decoration: BoxDecoration(color: Colors.blue),
        padding: EdgeInsets.all(20.0),
        width: double.infinity,
        child: Container(
            padding: EdgeInsets.fromLTRB(20.0, 10.0, 20.0, 10.0),
            decoration: BoxDecoration(color: Colors.white),
            child: Column(
                children: <Widget>[
                Text(
                  "Login Form",
                  textAlign: TextAlign.center,
                  style: TextStyle(
                    fontSize: 24.0,
                    fontWeight: FontWeight.w700),
                ),
                // Form Widget Comes Here
              ],
            ),
        )),
    );
  }
}
The final output looks like below:

Holding Data with a Model
To preserve the form values once the form is submitted, we go a little delegated approach by using a Model to hold the submitted form values for us. The form model looks like below:
class FormModel {
  String emailAddress;
  String password;
  FormModel({this.emailAddress, this.password});
}
I’d use an instance of this form model to hold the emailAddress and password once the form is valid and is submitted. For that let’s add an instance field inside our MyForm widget.
Also, let’s create a GlobalKey which uniquely identifies the form which is going to be under our MyForm widget. Add an emailAddress Regular Expression which we shall use to validate the entered emailAddress in our form.
class MyFormState extends State<MyForm> {
    // uniquely identifies a Form
    // observe that we're passing the FormState
    // and not MyFormState which is our widget
    final _formKey = GlobalKey<FormState>();

    // holds the form data for access
    final model = FormModel();

    // email RegExp
    // we'll use this RegExp to check if the
    // form's emailAddress value entered is a valid
    // emailAddress or not and raise a validation error
    // for the erroneous case
    final _emailRegExp = RegExp(
        r"^[a-zA-Z0-9.a-zA-Z0-9.!#$%&'*+-/=?^_`{|}~]+@[a-zA-Z0-9]+.[a-zA-Z]+");
}
Creating the Form Widget and Input Fields
Let’s continue with our Form creation. A Form widget is similar to a container; it accepts a single Child widget which should be a Column in our case that can hold more than one fields for us. We assign the GlobalKey which we have created earlier to the Key of this Form widget which can be later used to access the FormContext.
Column(
    children: <Widget>[
        Text(
            "Login Form",
            textAlign: TextAlign.center,
            style: TextStyle(
                fontSize: 24.0,
                fontWeight: FontWeight.w700),
        ),
        Form(
            key: _formKey,
                child: Column(
                children: <Widget>[
                    //EmailAddressWidget
                    //PasswordWidget
                    //SubmitButton
                ],
            ),
        )
    ],
),
To create our EmailAddress and Password text fields, let’s customize the built-in FormTextField widget and use it inside the Form to accept the values from user. A FormTextField extends a TextField and is used for working with a Flutter Form.
class MyFormTextField extends StatelessWidget {
  Function(String) onSaved;
  InputDecoration decoration;
  Function(String) validator;
  final bool isObscure;

  MyFormTextField(
      {this.isObscure,
      this.decoration,
      this.validator,
      this.onSaved});

  @override
  Widget build(BuildContext context) {
    return TextFormField(
      obscureText: isObscure,
      decoration: decoration,
      validator: validator,
      onSaved: onSaved,
    );
  }
}
The Widget receives the callbacks for TextInput validation and handler for onSaved event via the constructor along with a boolean flag to indicate whether the TextInput is going to work a Password. We also have the InputDecoration that adds customization to the Input field.
In a similar way, let’s create a SubmitButton which the user taps to submit the form and onPressed we process the submitted form values. I’d like to have a Button which occupies 100% of its parent width, and so I wrap it inside a SizedBox() and set the width to double.infinity that gives the max value.
class FormSubmitButton extends StatelessWidget {
  final Function() onPressed;
  FormSubmitButton({this.onPressed});

  @override
  Widget build(BuildContext context) {
    return SizedBox(
        child: RaisedButton(
          onPressed: onPressed,
          child: Text('Submit'),
        ),
        width: double.infinity);
  }
}
Inside the Form widget, let’s use this MyFormTextField and create two widgets – one for an EmailAddress and the other for a Password. Let’s also add the FormSubmitButton that completes our form.
Form(
key: _formKey,
child: Column(
children: <Widget>[
MyFormTextField(
isObscure: false,
// EmailAddress decoration
decoration: InputDecoration(
labelText: "EmailAddress",
hintText: "me@abc.com",
),
// EmailAddress validation
// checks if the value is empty and
// shows an error message along side
// checks if the value is a valid emailAddress
// and shows an error message if not valid
validator: (value) {
if (value.isEmpty) {
return 'Please enter an email address';
} else if (!_emailRegExp.hasMatch(value)) {
return 'Invalid email address!';
}
return null;
},
// onSaved callback
// assign the entered value
// to the emailAddress field of the
// FormModel object we created
onSaved: (value) {
model.emailAddress = value;
},
),
MyFormTextField(
// masks the input text
// typical password box style
isObscure: true,
// Password box decoration
decoration: InputDecoration(
labelText: "Password", hintText: "my password"),
// Password validation
// checks if the value is empty and
// shows an error message along side
validator: (value) {
if (value.isEmpty) {
return 'Please enter a password';
}
return null;
},
// onSaved callback
// assign the entered value
// to the password field of the
// FormModel object we created
onSaved: (value) {
model.password = value;
},
),
FormSubmitButton(
onPressed: () {
// Validate returns true if the form is valid, otherwise false.
if (_formKey.currentState.validate()) {
_formKey.currentState.save();
// the model object at this point can be POSTed
// to an API or persisted for further use
Scaffold.of(_formKey.currentContext).showSnackBar(
SnackBar(content: Text('Processing Data')));
}
},
),
],
),
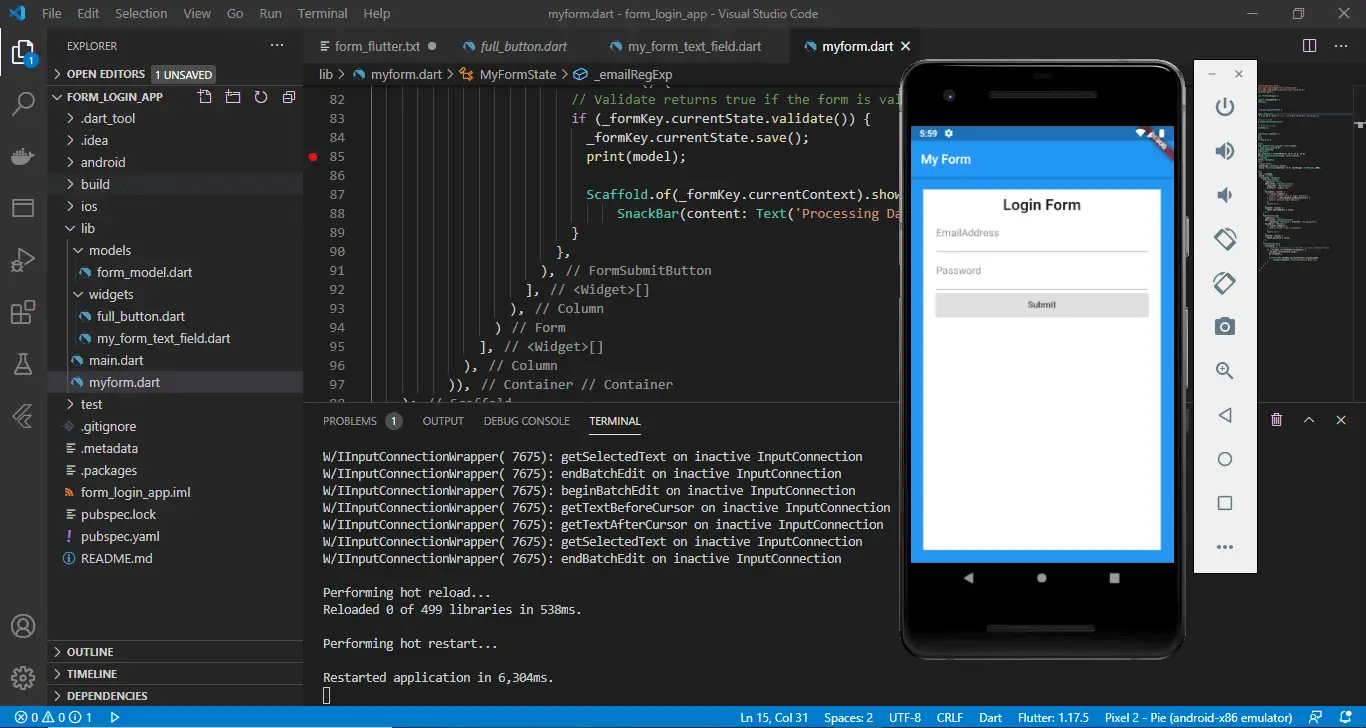
)The completed form looks like this:
How does this Login Form work?
While the comments make the code snippet self-explanatory, let’s just see how things happen once we run this application step-by-step:
- When the user enters the emailAddress and password fields and taps on the Submit button, the onPressed callback fires up.
- Inside the onPressed callback, we use the _formKey which is of type GlobalKey to access the current state of the Form that is tagged to this key. In this case, it is our Login Form and so we’d be able to see through this state and validate it.
- the _formKey.currentState.validate() method fires up the validators defined for every field inside the Form widget. In this case it is the emailAddress and password fields which are inside the Form.
- the validator callbacks for emailAddress and password are called. Inside the emailAddress callback we check whether the input value is not empty and is a valid emailAddress by using the RegExp we defined at the form level. Similarly, the validator inside the password checks if the input password is non-empty. We can further extend this with a similar RegExp validation for the password.
- When the form fields are all valid; the _formKey.currentState.validate() method returns positive and inside the block we invoke _formKey.currentState.save() method. This method triggers onSave callback on all the fields inside the form.
- In the onSave callback passed for emailAddress and password, we’re saving the current value of these fields into the respective properties of the FormModel object available inside the MyFormState widget.
- Finally, we can use this model object to access the form data. For our demonstration sake, we add a SnackBar message to inform user that the form submission is successful.
Tip: Observe that inside the SnackBar we’re passing the _formKey.currentContext instead of the BuildContext of the MyFormState widget. This is because the SnackBar is currently wrapped inside of the Form widget and needs
to use the context of the Form instead of the Widget. Otherwise we might get an error like below:
scaffold.of() called with a context that does not contain a scaffoldRunning the Application –

Found this article helpful? Please consider supporting!
In this way, we can create a simple Login form and handle the form data on submit. The complete working project is available at https://github.com/referbruv/flutter-login-form-example
Read How to setup Flutter Development Environment Here – How to Install and Configure Flutter

