Table of Contents
Introduction
In a recent World Cup T20 match, Disney+ Hotstar app – which is the official streaming partner clocked 10M+ persistent connections.
From an Engineering perspective, it’s a big deal, because the app needs to scale up its server resources to record levels within seconds to cater to the connections. Just imagine if you need to manually create and add nodes to the existing servers list in such a situation – it’s a disaster.
Auto-scaling and container orchestration are important requirements in a microservice architecture, where one needs to up or down the number of handlers in a fraction of seconds without any issues.
In this article, we’ll discuss about Kubernetes, which is a popular container orchestration engine and learn how we can deploy an ASP.NET Core Web API (.NET 6) in a Kubernetes cluster. We’ll use Docker to build container images and use Minikube as our Kubernetes Cluster for deployment.
Since this is not a Kubernetes tutorial, I’ll try my best to give brief description about what we are using – I’d still recommend to learn more about Kubernetes to understand better.
What is Kubernetes?
The official website for Kubernetes explains, “Kubernetes is an open source container orchestration engine for automating deployment, scaling, and management of containerized applications. The open source project is hosted by the Cloud Native Computing Foundation.”
As mentioned before, with Kubernetes you can deploy and maintain containers with ease, while it does the heavy-lifting and management for you.
In the world of Kubernetes, you have a Cluster – which is a load balanced set of Nodes (VMs). Each Node runs one or more Pods. A Pod is the smallest possible entity and you can run one or more containers in one Pod. The general practice is one container per pod.
That’s enough of introduction about Kubernetes, let’s get started. To demonstrate, we need a .NET 6 Web API to containerize and deploy to a cluster. I’ll use the readily available ContainerNinja.CleanArchitecture WebAPI solution for this purpose.
Getting Started
ContainerNinja.CleanArchitecture WebAPI is a part of the ContainerNinja.CleanArchitecture solution which is a boilerplate solution based on .NET 6, with all features and best practices included. The API project contains the Items API that provides CRUD operations over an entity “Item”. The project also contains provision to generate JWT tokens and authorize requests based on token validation.
Best part of this is that the solution is container ready – it has a Dockerfile readily available for us to build an image. I’d highly recommend you to use the solution – you can also try with any other project you are comfortable with...
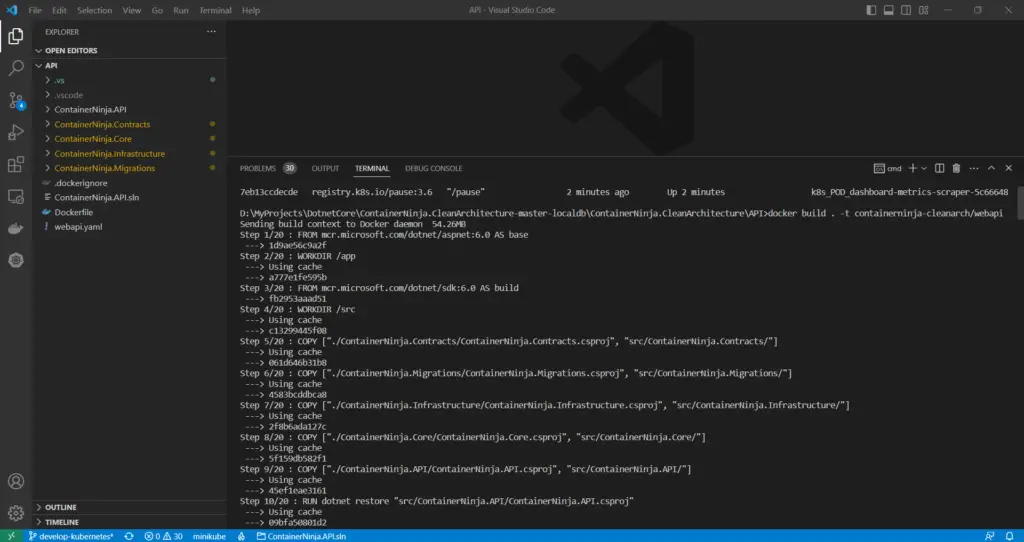
Step 1 – Build a Docker image for the WebAPI
In the first step, we will build a docker image for the WebAPI. Let’s review the Dockerfile available in the ContainerNinja WebAPI solution. It is as below –
FROM mcr.microsoft.com/dotnet/aspnet:6.0 AS base
WORKDIR /app

FROM mcr.microsoft.com/dotnet/sdk:6.0 AS build
WORKDIR /src

# copy all the layers' csproj files into respective folders
COPY ["./ContainerNinja.Contracts/ContainerNinja.Contracts.csproj", "src/ContainerNinja.Contracts/"]
COPY ["./ContainerNinja.Migrations/ContainerNinja.Migrations.csproj", "src/ContainerNinja.Migrations/"]
COPY ["./ContainerNinja.Infrastructure/ContainerNinja.Infrastructure.csproj", "src/ContainerNinja.Infrastructure/"]
COPY ["./ContainerNinja.Core/ContainerNinja.Core.csproj", "src/ContainerNinja.Core/"]
COPY ["./ContainerNinja.API/ContainerNinja.API.csproj", "src/ContainerNinja.API/"]

# run restore over API project - this pulls restore over the dependent projects as well
RUN dotnet restore "src/ContainerNinja.API/ContainerNinja.API.csproj"

COPY . .

# run build over the API project
WORKDIR "/src/ContainerNinja.API/"
RUN dotnet build -c Release -o /app/build

# run publish over the API project
FROM build AS publish
RUN dotnet publish -c Release -o /app/publish

FROM base AS runtime
WORKDIR /app

COPY --from=publish /app/publish .
RUN ls -l
ENTRYPOINT [ "dotnet", "ContainerNinja.API.dll" ]
In this Dockerfile, we first copy the project (.csproj) files into the base image, run a restore and then build the solution altogether. Finally, We run publish command for the release binaries and start the application. Simple and straightforward.
Step 2 – Configure Minikube to use local Docker Registry
Next, we should build a docker image based on this Dockerfile and upload it to any external Docker registry such as Docker Hub, since Kubernetes reads from any external registry to pull the image.
According to the Kubernetes documentation, we can also build the same image within Minikube docker environment and configure so that Kubernetes pulls the image from the local registry instead of Docker Hub.
We run the below command to achieve this –
# Powershell
& minikube -p minikube docker-env --shell powershell | Invoke-Expression

# cmd
@FOR /f "tokens=*" %i IN ('minikube -p minikube docker-env --shell cmd') DO @%i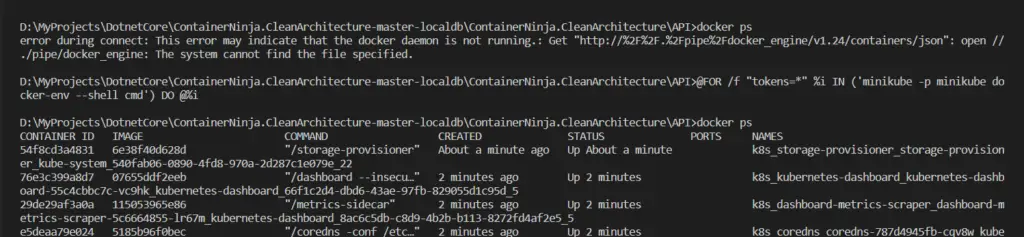
Once this command is run, we can run the same docker build command in the same terminal and the image is now built within the minikube docker environment.
The command to build image is as below –
/> docker build . -t containerninja-cleanarch/webapiWe run this image in the current path where the Dockerfile exists, the output is the custom image tagged with “containerninja-cleanarch/webapi”.
From here, we enter Kubernetes deployment.
We can create and manage containers in two ways:
- via using commands, which is called Imperative approach.
- Declarative approach, where we create a yaml file that contains the instructions and we apply the yaml to the cluster.
In this article I’ll show you how use YAML files to create and manage applications, since it is the easiest and most useful way.
kubernetes: Create Deployment from Docker Image
As mentioned before, you deploy and run container in a Pod. But for an application that needs to scale, we can’t manually create and delete Pods. To simplify this, Kubernetes provides us with Workloads. A Workload represents an application managed in Kubernetes. To deploy an application to one or more Pods, and manage them we create a Deployment.
We can create a Deployment as below –
apiVersion: apps/v1
kind: Deployment
metadata:
  name: containerninja-cleanarch-webapi
spec:
  replicas: 2
  selector:
    matchLabels:
      app: containerninja-cleanarch-webapi
  template:
    metadata:
      labels:
        app: containerninja-cleanarch-webapi
    spec:
      containers:
        - name: containerninja-cleanarch-webapi
          image: containerninja-cleanarch/webapi:latest
          imagePullPolicy: Never
          resources:
            limits:
              memory: "128Mi"
              cpu: "500m"
          ports:
            - containerPort: 80
Kubernetes uses selectors to group Pods created in a Deployment together. In the above YAML file, we are creating a Deployment with the selector “containerninja-cleanarch-webapi”, which creates 2 Pods (replicas) using the container image “containerninja-cleanarch/webapi:latest”. each container exposes port 80.
While a Deployment creates and runs our application in the configured number of Pods, we cannot access them from outside. To connect to a deployment and access, we create a Service that exposes based on the given selector.
Kubernetes: Create Service for Deployment
A Kubernetes Service is an abstraction which defines a logical set of Pods and a policy by which to access them. You create a Service over a deployment, for any other external service to access the containers inside the deployment.
We create a service by the following YAML file –
apiVersion: v1
kind: Service
metadata:
  name: containerninja-cleanarch-webapi
spec:
  type: NodePort
  selector:
    app: containerninja-cleanarch-webapi
  ports:
    - port: 80
      nodePort: 31000
Observe that we have used the selector “containerninja-cleanarch-webapi” under spec.selector.app, which is same as the selector of the Deployment. When we apply this YAML after the Deployment, we have a Service created. It is of type NodePort; other possible service types are LoadBalancer and ClusterIP. The Service binds the port of the Deployment to external port 31000 (Node Port) through which external systems can interact with the Deployment.
We’ll put both these YAML blocks in a single YAML file, and apply it to the cluster. The final YAML file looks like below –
apiVersion: apps/v1
kind: Deployment
metadata:
  name: containerninja-cleanarch-webapi
spec:
  replicas: 2
  selector:
    matchLabels:
      app: containerninja-cleanarch-webapi
  template:
    metadata:
      labels:
        app: containerninja-cleanarch-webapi
    spec:
      containers:
        - name: containerninja-cleanarch-webapi
          image: containerninja-cleanarch/webapi:latest
          imagePullPolicy: Never
          resources:
            limits:
              memory: "128Mi"
              cpu: "500m"
          ports:
            - containerPort: 80

---
apiVersion: v1
kind: Service
metadata:
  name: containerninja-cleanarch-webapi
spec:
  type: NodePort
  selector:
    app: containerninja-cleanarch-webapi
  ports:
    - port: 80
      nodePort: 31000
We’ll save it to “webapi.yaml” which sits in the root path of the solution next to the Dockerfile. To apply this YAML, we use the following command –
/> kubectl apply -f ./webapi.yaml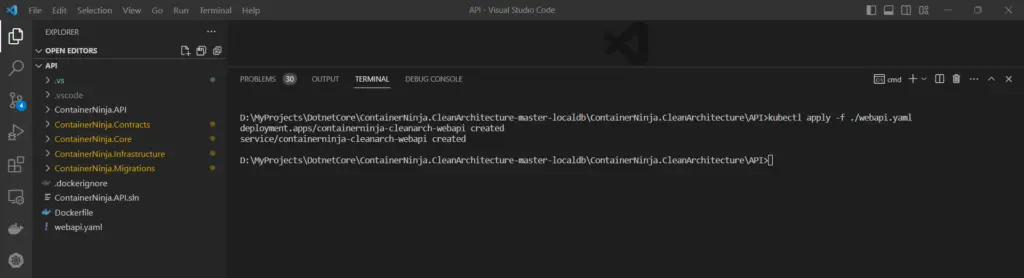
kubectl here stands for Kube Controller, which is a command-line tool used to connect to and work with a kubernetes cluster. In our case this command applies our Deployments and Services to the locally running Minikube cluster.
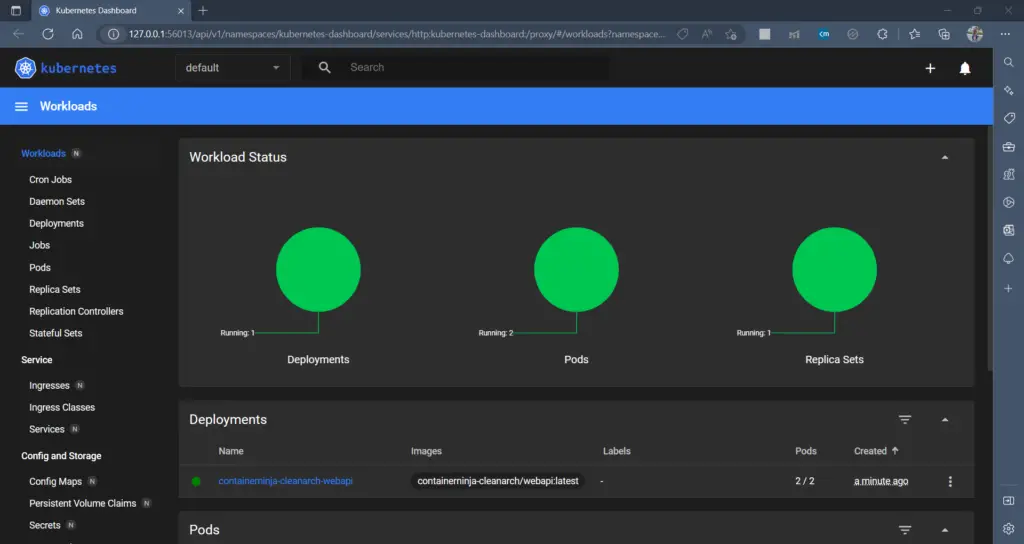
Once the changes are applied, you can view the pods and deployments created on the Minikube Dashboard. Use the below command –
/> minikube dashboard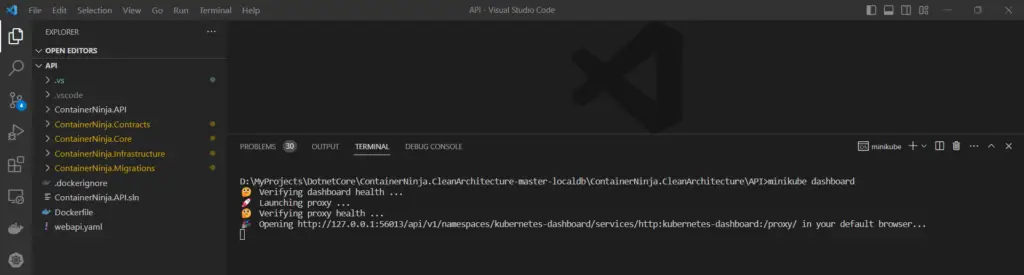
Calling API from the Deployment
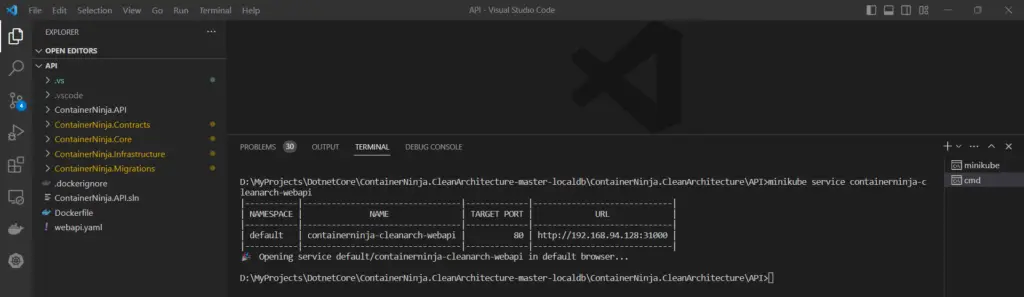
Now that the containers are up and running, its time to verify the deployment. To do this, first we need to obtain the external URL of the NodePort service we created to access the deployment. Use the below command to get it –
# minikube service service_name
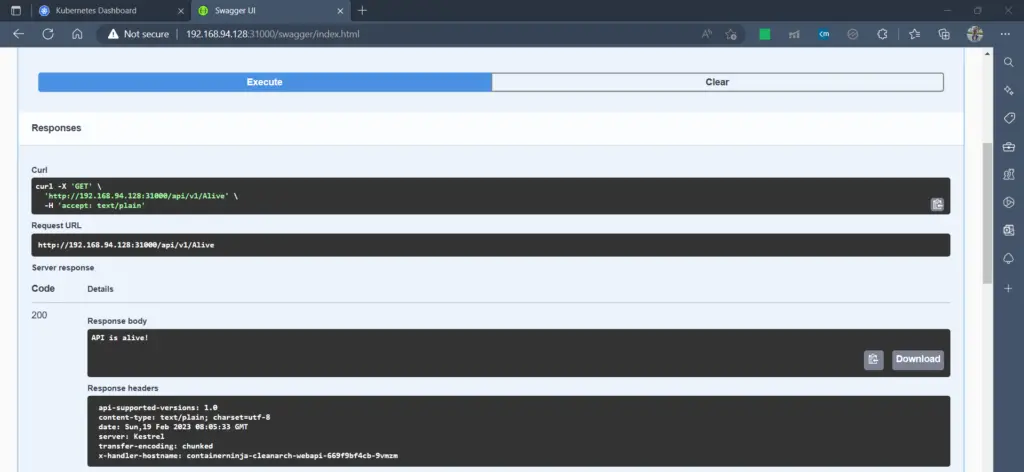
> minikube service containerninja-cleanarch-webapiThe command will open the service in a new browser window. You can use the “/swagger” link to see if the application is working, since the API comes with Swagger integrated.
Next, we can hit the “/v1/Alive” to see if the API returns a success response from within the Swagger UI.
Finally, we can import the swagger collection into Postman, and verify the CRUD operations.
kubernetes: requests to a replicaset
We mentioned before that the deployment creates two Pods (replicas) for us. But how to know which Pod has served the response for us? To know this, we add the below Global Filter to our API Controller. It adds the current host name as a custom response header.
using System.Threading.Tasks;
using Microsoft.AspNetCore.Mvc.Filters;

namespace ContainerNinja.API.Filters
{
    public class AddHandlerHostHeaderResponseFilter : IAsyncActionFilter
    {
        public async Task OnActionExecutionAsync(
                ActionExecutingContext context, ActionExecutionDelegate next)
        {
            // let the request be handled
            var executedContext = await next();

            // add a custom response header for all successful requests
            var hostName = System.Net.Dns.GetHostName();
            var response = executedContext.HttpContext.Response;

            response.Headers.Add("X-Handler-HostName", new[] { hostName });
        }
    }
}
When we call the API via postman (or via Swagger in the above screenshot) we can see the response header ‘x-handler-hostname’ which currently gives me the value ‘containerninja-cleanarch-webapi-669f9bf4cb-9vmzm’ which is one of the containers created in the replicaSet. As we continue to send requests, the load is handled by one of the Pods in the replicaset.
Conclusion
Kubernetes is an open source container orchestration engine for automating deployment, scaling, and management of containerized applications.
In this article, we looked at how we can deploy our ASP.NET Core Web API code to a Kubernetes cluster. We used Docker as the container runtime for our example, and using it we created a container image of the project.
Next we created a Deployment to run the containers and exposed them using Service. We also tested this using Postman.
This is a most simple guide to running containers in Kubernetes. We can take it to the next level; to design and deploy a full-stack application with all the tiers (UI, API, Cache, Database) and create mutual communication among them…
All the code snippets and the YAML are part of the ContainerNinja.CleanArchitecture repository. Please do leave a star if you find the solution useful.
Kubernetes is one of the most sought after technologies in the Industry right now. Becoming a Certified professional can increase your career prospects by leaps and bounds.
Check out this most popular Kubernetes Course in Udemy at a HUGE DISCOUNT for a LIMITED PERIOD – Certified Kubernetes Administrator (CKA) with Practice Tests exclusive for our readers!


