This is the sixth article in the “Flutter for Beginners” where in we are looking at how to get started with developing mobile applications in the world of flutter. By the end of this series, we shall try to make a simple blog app with a home list of articles with a navigation to each individual article.
So far we have seen how to setup the environment, create a sample project to get started and then also analyzed the various files and folders that reside under a flutter project and their individual purposes on the whole.
And we have a gone a step ahead and created a scrollable view of an article page with an Image, a Title and a long description without having to face issues of display overflow. In this article, let’s talk about a Widget which we have been using so far in developing an app screen – the scaffold.
Read How to setup Flutter Development Environment Here – How to Install and Configure Flutter
Know how a Flutter Project looks like Here – Understanding App Structure and Anatomy
Know What is the purpose of main.dart file Here – main.dart and First run
Know What are Stateless and Stateful widgets Here – Understanding Stateful and Stateless Widgets
Know How to create a Scrollable Content View Here – Creating a Scrollable Content View
What is a Scaffold Widget?
A Scaffold literally means a platform that supports or holds on to something. And in the world of flutter, a Scaffold widget does the same thing: it holds all the underlying widgets together to form a fluid screen. It basically creates a firm ground or base for the app screen on which the child widgets hold on and are rendered on the screen.
It provides the basic app bar body layout with provision to add a navbar on the top and the body on which the actual presentation happens.
For example, let’s take the article page we have designed in previously.
class MyApp extends StatelessWidget {
  // This widget is the root of your application.
  @override
  Widget build(BuildContext context) {
    return MaterialApp(
      home: Scaffold(
        appBar: AppBar(
          title: Text("Article Home"),
        ),
        body: SingleChildScrollView(
          child: Column(
            children: <Widget>[
              BannerImageWidget(),
              TitleWidget(),
              DescriptionWidget(),
            ],
          ),
        ),
      ),
    );
  }
}
In this case, The MyApp widget in its rendering creates a MaterialApp() which is internally a Stateful “Widget”. The duty of this MaterialApp() widget is to apply google’s material styling to all the widgets that are rendered under itself. Alternatively, we can also have a CupertinoApp() widget be returned under the MyApp instead of the MaterialApp() for apps targeting the iOS platform.
So basically we have Utility widgets MaterialApp() and CupertinoApp() which provide the styling and look and feel of an Android and iOS layouts respectively.
One step down, and we have the Scaffold() widget placed for the home property, which actually is “for the default route of the app ([Navigator.defaultRouteName], which is /)”. This Scaffold() widget shall be loaded for the default route or the base route of navigation stack in the application. Under the Scaffold() widget, we have two properties appBar and body.
The appBar property is of type [PreferredSizeWidget] which extends the base Widget class. PreferredSizeWidget takes up an unconstrained space if a preferred height is not specified. And with respect to the Scaffold widget, it sets its app bar height to the app bar’s preferred height plus the height of the system status bar.
Hence the type [PreferredSizeWidget] for the appBar property. For this we assign a Widget AppBar() which paints an AppBar with optional menus or controls with it. It takes a title property which is displayed on the AppBar when this particular view (presented by the entire Scaffold widget and its contents) on the screen.
Next, we have the body property which accepts a single “Widget” element. This can itself be a container f(or several child Widgets, like in the case above wherein we have passed a Column() Widget which aligns all its child Widgets assigned under the children list property in a vertical fashion.
Or it can be a single Widget which holds something alone (such as a text or an image or some Widget).
Now what if I don’t want to use a Scaffold? will my app won’t run? Nothing like that! The Scaffold() widget is just yet another “Widget” like all other Widgets it holds. And when you don’t use a Scaffold to render a view, a widget can still be rendered by assigning them to the home property of the MaterialApp() or the CupertinoApp() respectively.
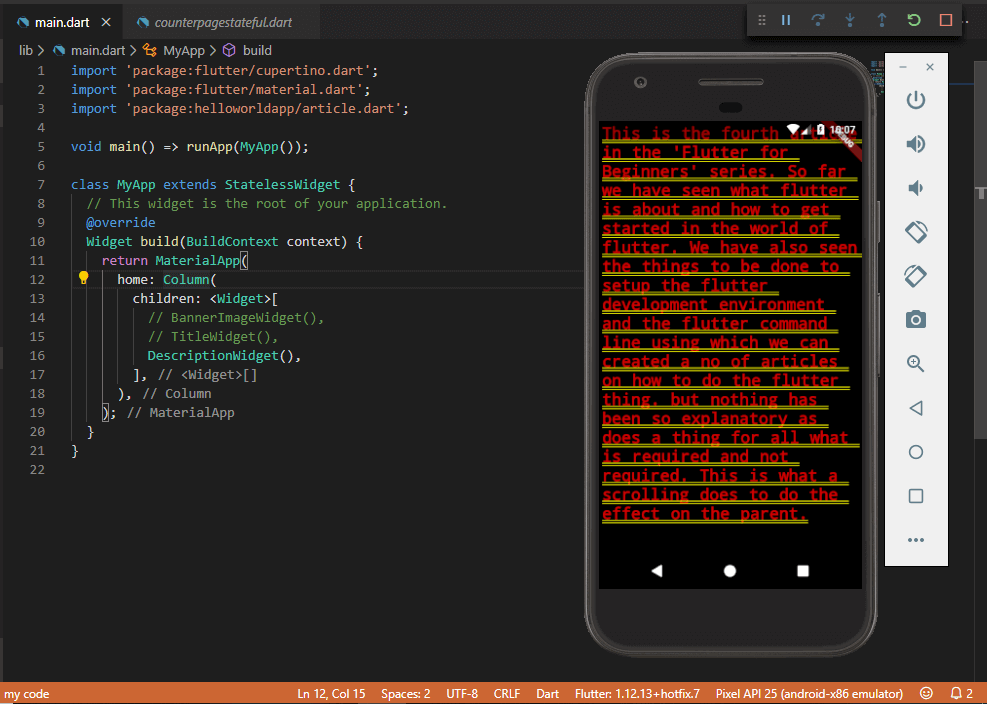
In our case, let’s remove the Scaffold() widget alone and attach the Column() widget to the home property of the MaterialApp() and see what happens.

We can see that the text still loads, but there’s nothing looking good here. That’s not what you expect from a standard mobile app right?
And that’s how Scaffold() helps us create a proper rendering of the elements on the screen with the standard layout and styling applied (of course complementing the MaterialApp() or CupertinoApp() parent of it).

Found this article helpful? Please consider supporting!
In the next article, we shall see how we can iterate a bunch of articles under this Scaffold() and create a good looking “list” of article widgets.

