Introduction
In our journey to implementing Role-based access control in AWS, we began designing a simple Admin-Editor model which is authenticated from the front-end via Cognito. We looked at how we can create a Cognito User Pool and further aggregate users into Cognito Groups based on their expected Roles. In the next step, we shall now look into how we create and integrate an Identity Pool.
What is Amazon Cognito Identity Pool?
The tokens which are issued by a Cognito User Pool are called Cognito User Pool tokens or CUP tokens. This token describes a user identity and helps any resource identify who’s access it. For example, an API deployed in an AWS Lambda with an API Gateway setup can parse this token and setup the Claims data into the request Context.
But this context is not useful for accessing any AWS resources such as an S3 bucket or a Dynamo DB table. Because the AWS resources can’t recognize and validate a user’s details for their access – or rather we can say that they work in a different way. In order to validate access to AWS resources, we require a different kind of a token called as the Cognito Identity Pool token or shortly CIP token. This token is issued by an Identity Pool, which when linked to an Identity provider such as a User Pool can issue tokens used for authenticating access to AWS resources.
Creating the Identity Pool
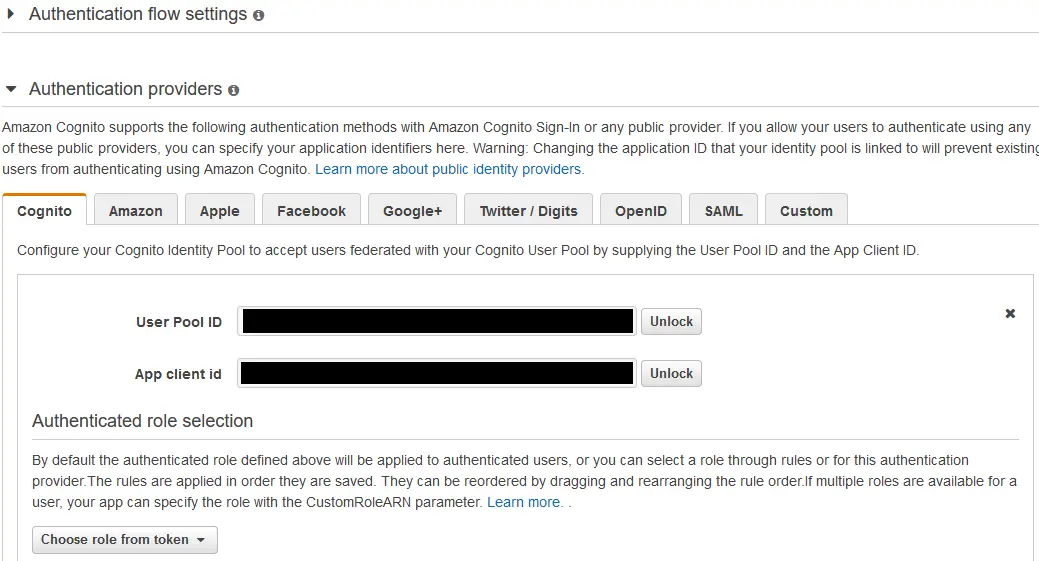
Creating an Identity Pool is easy. Click on “Federated Identities” on the top left of the User Pools page and then click on “Create new Identity Pool”. Give the Identity Pool a proper name and under the “Authentication Providers” section navigate to Cognito tab and provide your User Pool Id and the Client Id (the one available under your App Clients in the User Pool section).
Click on “Create” and the pool gets created that issues CIP tokens in exchange for User Identity authenticated by the linked User Pool. In the next step where you’re asked to create Roles for Authenticated and UnAuthenticated Identities – cancel here, because we’ve already created our Roles so no need to create again.
Once your Identity Pool is created, copy the Identity Pool Id shown in the “Edit Identity Pool” section and keep it aside – we’re gonna put this to use in our IAM Roles.
Back in IAM, edit the roles rbac-users-editor-role and rbac-users-admin-role and this particular policy to the array of their existing IAM permissions.
{
    "Effect": "Allow",
    "Action": [
        "mobileanalytics:PutEvents",
        "cognito-sync:*",
        "cognito-identity:*"
    ],
    "Resource": [
        "*"
    ]
}
One more important step is to setup Trust Relationship for these Roles with the now created Cognito Identity. This enables these Roles to request and access the Identity Pool for CIP tokens when needed.
To do this, click on the “Trust Relationships” tab next to the “Permissions” tab in both the Roles and click on “Edit trust Relationship”. Then add the below Policy document.
{
  "Version": "2012-10-17",
  "Statement": [
    {
      "Effect": "Allow",
      "Principal": {
        "Federated": "cognito-identity.amazonaws.com"
      },
      "Action": "sts:AssumeRoleWithWebIdentity",
      "Condition": {
        "StringEquals": {
          "cognito-identity.amazonaws.com:aud": "MyCoGnItO_IdEnTiTyPoOl_Id"
        },
        "ForAnyValue:StringLike": {
          "cognito-identity.amazonaws.com:amr": "authenticated"
        }
      }
    },
    {
      "Effect": "Allow",
      "Principal": {
        "AWS": "arn:aws:iam::052114553793:role/service-role/myLambdaServiceRole"
      },
      "Action": "sts:AssumeRole"
    }
  ]
}
Observe two JSON elements inside the Permissions array. The first one allows the possessor of this Role to Assume Role with the Identity Pool if the user is authenticated with the mentioned Cognito Identity Pool. Now how this works? Remember that we have created this Identity Pool and linked our User Pool as an Identity Provider? That link makes this work. The second one allows the Lambda on which our API service is going to run use this Role and execute with the privileges of this Role.
“Both the Roles (Admin and Editor) are configured with the same Trust Relationship policy, since this step is mandatory for any Role based access to work.”
Back into the Identity Pool – we are yet to configure these Roles in our Identity Pool, which assigns these Roles for Authenticated users. click on “Edit Identity Pool” and inside the Edit section, create a new Role for “UnAuthenticated Role” and for the “Authenticated Role” select the Role rbac-users-editor-role.

Why Editor role? Because we want to begin with the lowest possible role for an authenticated role and then elevate to a higher role when needed. Then how do Admins get the role needed? Under the “Authenticated Providers” section, look for a small drop down under the “Authenticated Role selection” section. There select “Choose from token” in the options and save the changes.
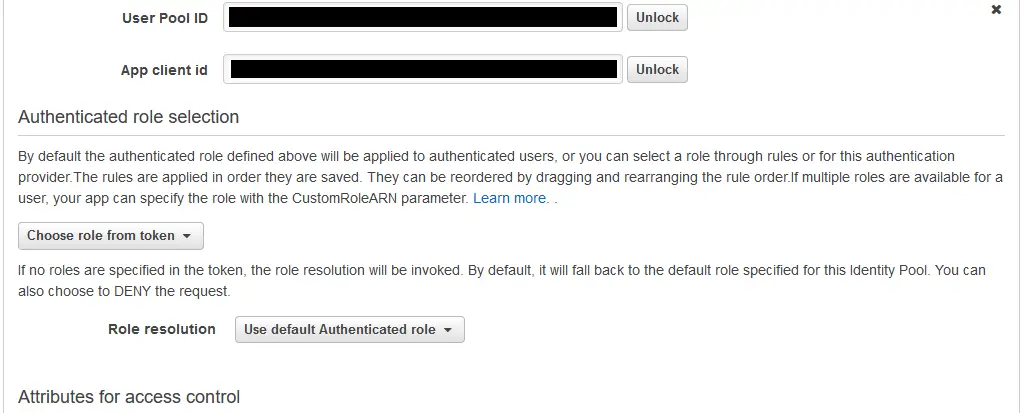
From the JWT token claims we’ve seen that we get the role of the Group under which the user is a part of as part of the Claims. When we configure the Identity Pool to use the Role that is provided in the token instead of its default token, it overrides the default authenticated role when there’s a role present in the claims.
Remember we’ve given Precedence 1 for Admin role and a greater number for Editor role? That plays the trick here – for Admins the preferred_role will be rbac-users-admin-role which overrides the default rbac-users-editor-role that the Identity Pool attaches and this works out.
We’re now ready with the necessary design and policies in place for to be consumed within our application code. In the next and final step, we’ll see all of this in action – we’ll look at how we configure our ASP.NET Core API to use these Roles which come with the requesting User context and generate credentials to access the AWS resources.
Read How we got started with Role based Access with AWS Here – Role based Access Control in AWS
Read How to Assume Role with ASP.NET Core Here – Assume Role with ASP.NET Core

