Introduction
One of the most significant use cases of using Docker is the ease of creating and accessing applications built within containers without having to worry about dependencies and installations. All we would do is to look out for a suitable image available in Docker Hub and pull it up into our system for use; or alternatively pull a relatively suitable image, customize with all our required dependencies and finally transform it into a Dockerfile which can be used for future use.
In this article, let’s talk about one such scenarios which makes us realize how Docker has really made lives easier. Let’s talk about how we can install and configure MySQL server in our system using the Docker route.
About MySQL and Installation Procedure
MySQL is one of those oldest open-source databases available in the market, which is quite popular among developers. MySQL is best known for its capabilities in performance, replication and most importantly the community support. It is also the mostly used database behind PHP applications, making it a part of the LAMP stack (Linux-Apache-MySQL-PHP) which is acronym used for PHP based applications.
To use MySQL in applications, we would need to download and install MySQL workbench which is a comprehensive package including the MySQL server, client and other utilities used for developing applications based on it. Connecting to MySQL server requires MySQL shell which is a Command-Line Interface (CLI) providing us with tools and utilities for working on MySQL server, which also comes as a part of the MySQL workbench package.
While this may sound simple, chances are that installing MySQL workbench may involve Operating System level compatibilities and related issues might arise during installation. Another thing to note is that not always we might require all the tools and utilities which come as a part of MySQL package and it might result in unnecessary disk space.
MySQL as a Container via Docker
To solve possible issues as mentioned above, we can choose the Docker route where we just use the MySQL image available in Docker Hub and pull it into our system for our use. This is alot simpler and easier to use than the original route; all we need to do is just pull the appropriate image which contains MySQL installed and connect to it.
MySQL provides official Docker images for MySQL server and in this demonstration, we shall put up a docker-compose file which pulls up a MySQL image from the Docker Hub and configures it in our local system.
We then look at two approaches to connect to the MySQL server inside the container:
- How we can connect to the MySQL server within its own container
- How we can connect to the MySQL server via another MySQL container which acts as the client
Preparing the docker-compose file
We can setup a simple docker service which hosts a MySQL service using the yaml approach as below:
version: '3'

services:
    db:
        image: mysql
        command: --default-authentication-plugin=mysql_native_password
        restart: always
        environment:
            MYSQL_ROOT_PASSWORD: YOUR_PASSWORD_HERE
        ports:
            - 3306:3306
What it does?
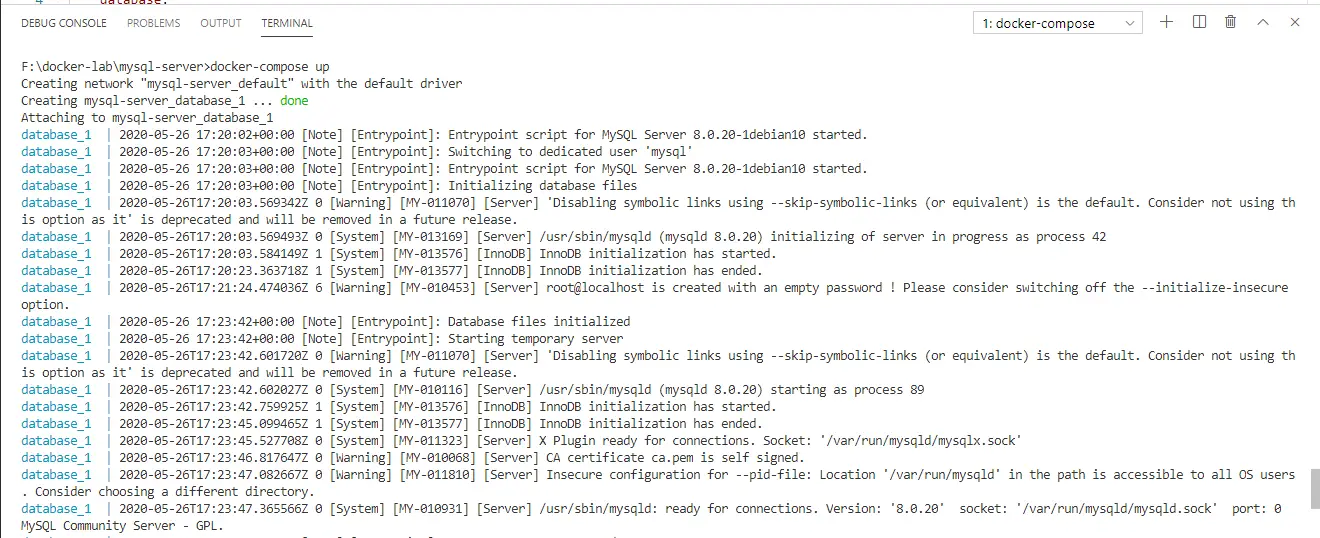
When we run this yaml script,
> docker-compose up
docker pulls up the mysql image available from docker hub and boots up a container running MySQL database with the following configurations:
- Configures the authentication method to use native password (via the flag)
- Sets the root password to the specified value (put your password in the placeholder: YOUR_PASSWORD_HERE)
- Maps the host port 3306 to port 3306 within the container where the database service runs
Once this service boots up, we have our mysql container ready to be used.
Connecting Within the Container
As mentioned earlier, connecting to MySQL for querying involves using the MySQL CLI which comes along with the MySQL package and hence is available within the container. To connect to the CLI within the container, we make use of the docker exec command which enables us to run a second command over the running container.
A General connection command to MySQL via CLI will be as:
> mysql -h localhost -P 3306 -u root -pabcd@1234
Where:
- localhost refers to the database server, in this case it is local to the CLI.
- Port is 3306 as mentioned earlier, it is the default database service port.
- Username is root and
- Password is abcd@1234. Observe that there is no space between the flag -p and the password.
- Also note that -P stands for Port and -p specifies the password (just in case if you haven’t noticed)
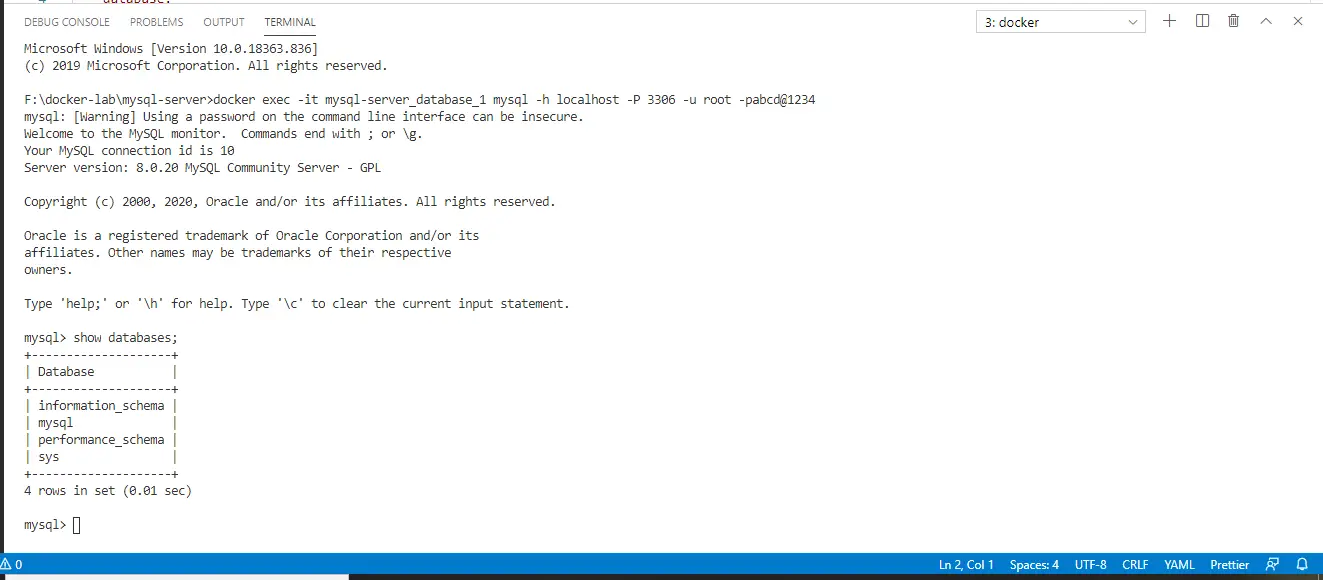
We run the above command on the container using the docker exec command as:
> docker exec -it mysql-server_db_1 mysql -h localhost -P 3306 -u root -pabcd@1234
Here mysql-server_db_1 is the name of the service Docker creates when it runs the docker-compose file. Once this is executed, we have our terminal connected to the MySQL CLI and we are ready to run SQL commands over the MySQL server running inside the container.
Connecting from another MySQL container which acts as the client
We have seen earlier that accessing MySQL server via CLI involves installing MySQL shell client. In the previous section, we made use of the MySQL shell that comes along within the same container. Now we can simulate a remote server – client scenario by using another MySQL container which acts like a client MySQL connecting and working on the remote MySQL server, which in this case is our first container.
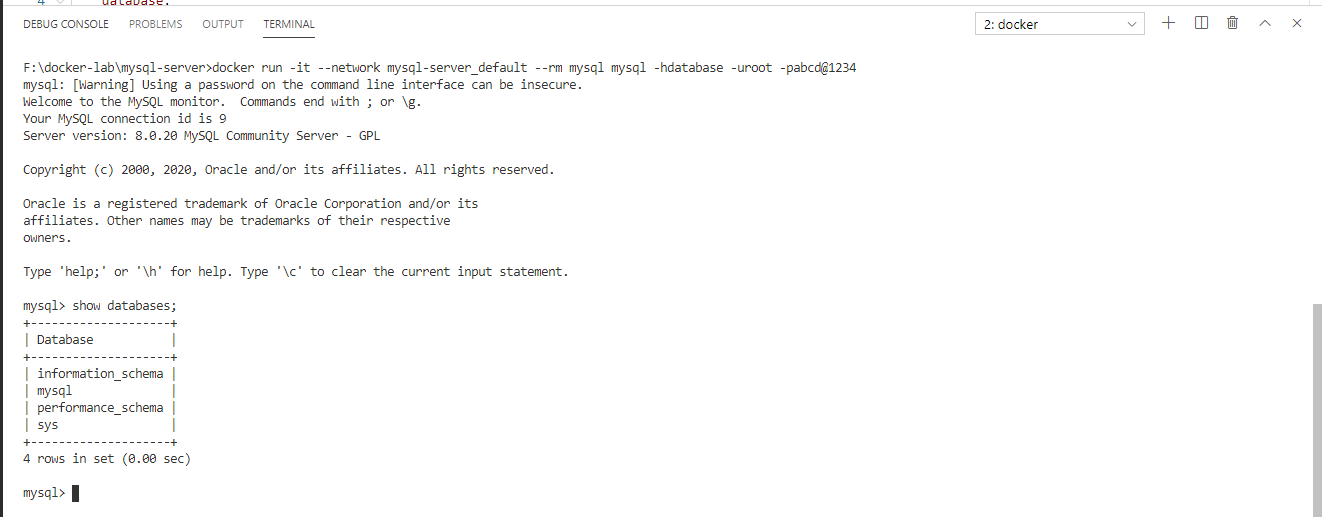
To simulate this, we can run another mysql container and execute the MySQL connect command within the created container to connect to the first container that acts like the server.
The docker run command in this case shall be as:
> docker run -it --network mysql-server_default --rm mysql mysql -hdatabase -uroot -pabcd@1234
Where the –network lets the new container created from the image “mysql” be attached to that network under which the database server container runs. The last part of the command:
mysql -hdb -uroot -pabcd@1234
is similar to the actual mysql CLI command except that we mention the host with the -h flag as “db” which is the service name mentioned in the docker-compose file. While executing the command, Docker automatically resolves the host name “db” with the service which is running internal to the network. This is the reason for the –network flag specified before. The other params passed are the same: a user and a password.
Running this command also leads us to the MySQL command line for the remote server which is now in the container.
Tip: Sometimes you might encounter this error:
“ERROR 2003 (HY000): Can’t connect to MySQL server on ‘database’ (111)”
which actually means that the docker command to connect to MySQL has occured even before the MySQL server is ready to accept connections. So just make sure that the server is completely up and running with the below message:
“2020-05-26T17:25:03.742854Z 0 [System] [MY-010931] [Server] /usr/sbin/mysqld: ready for connections. Version: ‘8.0.20’ socket: ‘/var/run/mysqld/mysqld.sock’ port: 3306 MySQL Community Server – GPL.”
Connecting from an Application as a Backend Database
We can also use the MySQL instance running inside the container as a backend server for applications running in the host operating system, by means of a connection string as below:
"Server=127.0.0.1;Port=3306;Uid=root;Password=abcd@1234;Database=readers"This approach might not work for the first time, since MySQL blocks access when tried using an IP address instead of localhost.
Can’t Connect to MySQL Server on 127.0.0.1 (10061)But using localhost may not be successful since the server isn’t working in the localhost of the host. To solve this, we add a new user to the MySQL database within the container which is provided access to connect with IP as below:
mysql> CREATE USER 'okarin'@'localhost' IDENTIFIED BY 'abcd@1234';
mysql> GRANT ALL PRIVILEGES ON *.* TO 'okarin'@'localhost'
    ->     WITH GRANT OPTION;
mysql> CREATE USER 'okarin'@'%' IDENTIFIED BY 'abcd@1234';
mysql> GRANT ALL PRIVILEGES ON *.* TO 'okarin'@'%'
    ->     WITH GRANT OPTION;
Once this is done, we can now connect to our database within the container using the IP equivalent of the localhost (which is 127.0.0.1) as:
"Server=127.0.0.1;Port=3306;Uid=okarin;Password=abcd@1234;Database=readers"This way, we can install and configure MySQL via a containerized solution, which simplifies our effort for installing MySQL and results in a much cleaner and simpler approach.

