Introduction
Logging is one of the important aspects of any application that deserves an efficient design and implementation. It is the only source that developers can find helpful in troubleshooting issues, once the code is deployed and running in the servers.
When the application is deployed in a containerized environment, logging is even more important since its tough to get into the container and find out what’s happening in it.
To solve this, Docker provides logging drivers which can plug into any of the output interfaces available and help push logs to the integrated components as configured. In this example, let’s look at how we can configure and push our Docker container logs into Fluentd.
What is Fluentd?
Fluentd is an open source data collector which can help in building a centralized and unified logging layer for the Docker container system.
To better explain how this is done, let’s take an API written in ASP.NET Core which pushes out trace logs and error logs to the stdout and is deployed into a docker container.
Logging at Source – Some API implementation in ASP.NET Core
The API has its logging mechanism configured to push into the stdout as below:
services.AddLogging(builder =>
{
    builder.AddConsole();
});
To test this, we’d have a controller in place which would log the response onto the Logger.
namespace SomeApi.Controllers
{
    [ApiController]
    [Route("api/[controller]")]
    public class AliveController : ControllerBase
    {
        private ILogger<AliveController> _logger;

        public AliveController(ILogger<AliveController> logger)
        {
            _logger = logger;
        }

        public string Get()
        {
            var response = $"I'm Alive! Here's a Guid for you {Guid.NewGuid().ToString()}";
            _logger.LogInformation(response);
            return response;
        }
    }
}
The Dockerfile for the API to be deployed into a docker container is created as follows:
FROM mcr.microsoft.com/dotnet/core/sdk:5.0 AS build
WORKDIR /app

COPY *.csproj .

RUN dotnet restore

COPY . .

RUN dotnet publish -c Release -o out

FROM mcr.microsoft.com/dotnet/aspnet:5.0 as runtime

WORKDIR /app

COPY --from=build /app/out .

ENTRYPOINT [ "dotnet", "SomeApi.dll" ]
If you’re not into ASP.NET Core, no issues; we’ve just taken this as an example for our experiment. You can replace this with any framework or code that suits your purpose.
At this point, we have a working API that is running in a docker container. Next we have to link this docker container to have its logs pushed into the Fluentd system.
How to set up Fluentd Logging driver
To have the docker container pass on its logs to Fluentd, we need to configure the logging driver for the container and set it to fluentd. Docker supports several logging drivers which are a kind of known interfaces for the docker that it can use to connect to the particular external system.
In our case, we use fluentd driver that is supported by Docker. When we configure this logging driver, Docker ensures all the transformation needed for the logs that it being generated by the container and pushes it to the fluentd system that is available. We do all this within a Docker-Compose file so as to group all these components together within a system.
The API part of the compose file looks like below:
version: '3'
services:
    api:
        build:
            context: ./api
            dockerfile: Dockerfile
        ports:
            - 5000:80
        logging:
            driver: fluentd
            options:
                tag: "docker.{{.ID}}"
        depends_on:
            - "logger"
observe that we have a section called “logging” and under which we specify the “driver” as “fluentd” and within the options we provide a “tag” format for every log to be tagged by the container Id of the container from which the log is being generated. This helps us in identifying which log has come from which container.
This completes our API configuration, which is our source of logs for this system. In the next step we deal with setting up fluentd.
How to configure Fluentd Listener
Fluentd system is available in various forms for different operating systems, and is also available as a Docker image which can be run in parallel as a container. For our experiment, we’d pick the docker container for Fluentd and configure it to suit our requirement.
Fluentd requires configuration about the port and host in which it’d listen on, how it’d process the logs and so on in the form of a conf file, which we add to the fluentd system. fluentd uses this and listens on to the port for any incoming log streams and processes it out accordingly. For our case, we’d initially set the fluentd to print all the incoming logs into the stdout. The fluentd.conf which contains this configuration looks like below:
#fluentd.conf#

<source>
  type forward
  port 24224
  bind 0.0.0.0
</source>

<match *.*>
  @type stdout
</match>
we’ll update the docker-compose file that we’ve created before to contain the fluentd container configuration. The file now looks like below:
version: '3'
services:
    api:
        build:
            context: ./api
            dockerfile: Dockerfile
        ports:
            - 5000:80
        logging:
            driver: fluentd
            options:
                tag: "docker.{{.ID}}"
        depends_on:
            - "logger"
    logger:
        image: fluent/fluentd:edge-debian
        volumes:
            - ./logger/tmp:/fluentd/etc
        command: '-c /fluentd/etc/fluentd.conf -v'
        ports:
            - 24224:24224
            - 24224:24224/udp
In this “logger” container that runs “fluentd”, we’ve configured to setup a volume that shares the fluentd.conf from the local folder. This is to have the flexibility to change the configuration when needed. The container is bound to run on ports 24224, which is the default port for fluentd.
The API container which is configured with fluentd log driver constantly pushes the logs to port 24224, the port on which fluentd listens to. This creates the necessary interaction between the API container and the logger container which runs fluentd.
How to write Docker container logs from fluentd to MySQL
To advance this further, let’s modify our system such that all the logs written onto fluentd is to be written to a mysql database. fluentd fully supports this, along with several other external integrations by means of “plugins”.
Basically we need to install whatever integration we’re interested in the form a plugin to the fluentd system and configure the fluentd.conf file to handle it. This is similar to our previous case, where we’re writing all the logs captured by fluentd to stdout.
For this, we need to modify our fluentd container to have mysql integration “plugin” installed during the container creation and configure fluentd.conf accordingly.
To get started, first we’d add a mysql database container to our docker-compose file onto which fluentd writes its logs.
version: '3'
services:
    db:
        build:
            context: ./db
            dockerfile: Dockerfile
        command: --default-authentication-plugin=mysql_native_password
        restart: always
        environment:
            MYSQL_ROOT_PASSWORD: abc@123
            MYSQL_DATABASE: localdb
        ports:
            - 3306:3306
we’re using a custom Dockerfile instead of the straightforward “mysql” image. Why? Because we need to have some startup scripts to be executed in the databse as we set it up. We’ll get to that in a minute.
In the next step we need to have the mysql plugin installed in our fluentd container. For this, we take the custom Dockerfile route and create our custom container from the fluentd:edge-debian image we used previously.
It picks up the fluentd:edge-debian image and installs “fluent-plugin-mysql” that is available to write fluentd logs onto mysql database. This plugin requires mysql-client as prerequisite, so we install “default-libmysqlclient-dev” before it.
The finished file looks like below:
FROM fluent/fluentd:edge-debian AS base

USER root

RUN buildDeps="sudo make gcc g++ libc-dev"
    && apt-get update
    && apt-get install -y --no-install-recommends $buildDeps
    && sudo apt-get install -y default-libmysqlclient-dev
    && sudo gem install fluent-plugin-mysql
    && sudo gem sources --clear-all
    && SUDO_FORCE_REMOVE=yes
    apt-get purge -y --auto-remove
    -o APT::AutoRemove::RecommendsImportant=false
    $buildDeps
    && rm -rf /var/lib/apt/lists/*
    && rm -rf /tmp/* /var/tmp/* /usr/lib/ruby/gems/*/cache/*.gem

USER fluent
And in the docker-compose file we modify our “logger” configuration as below. We replace our build section to have our Dockerfile be picked up instead of the image.
version: '3'
services:
    logger:
        build:
            context: ./logger
            dockerfile: Dockerfile
        volumes:
            - ./logger/tmp:/fluentd/etc
        command: '-c /fluentd/etc/fluentd.conf -v'
        ports:
            - 24224:24224
            - 24224:24224/udp
        depends_on:
            - "db"
Now we need to modify the fluentd.conf file to write logs to mysql instead of stdout. For this we provide the configuration in a format defined as below:
<source>
  type forward
  port 24224
  bind 0.0.0.0
</source>

<match docker.**>
  @type mysql_bulk
  host db
  database localdb
  username root
  password abc@123
  column_names container_id,container_name,log
  table fluentd_logs
  flush_interval 10s
</match>
The match docker.** ensures that only logs from the Docker containers (remember the tag format we gave in logger driver) be picked up for writing to mysql. Within this we have our database host, database name, table name, columns to be populated and the flush_interval (how frequently logs be written onto the database) details provided.
Observe that for host we’ve given as “db”. This is because this fluentd should write to the database that is running within the container “db” within this compose network. docker-compose ensures these underlying resolutions.
Now for the question, do we have these database, table available in our container when it is up? No. That’s why we used a custom Dockerfile for the mysql, instead of an image. The Dockerfile for the mysql database looks like below:
FROM mysql

ADD ./init/schema.sql /docker-entrypoint-initdb.d

EXPOSE 3306
We have put our schema generation and others within a file called schema.sql and during startup we’re configuring mysql to run these scripts (they’re run because we’re adding them to the docker-entrypoint-initdb.d). The schema.sql contains the below script:
USE localdb;
CREATE TABLE fluentd_logs(
    id bigint primary key auto_increment,
    container_id nvarchar(500),
    container_name nvarchar(500),
    log nvarchar(1000)
);
since we provided the MYSQL_DATABASE variable in docker-compose file, the database is created. This is followed by this script execution and thus the db will have all the infra ready for the docker logs be written onto the db when the fluentd receives them from the API.
The complete docker-compose looks like below:
version: '3'
services:
db:
build:
context: ./db
dockerfile: Dockerfile
command: --default-authentication-plugin=mysql_native_password
restart: always
environment:
MYSQL_ROOT_PASSWORD: abc@123
MYSQL_DATABASE: localdb
ports:
- 3306:3306
logger:
build:
context: ./logger
dockerfile: Dockerfile
volumes:
- ./logger/tmp:/fluentd/etc
command: '-c /fluentd/etc/fluentd.conf -v'
ports:
- 24224:24224
- 24224:24224/udp
depends_on:
- "db"
api:
build:
context: ./api
dockerfile: Dockerfile
ports:
- 5000:80
logging:
driver: fluentd
options:
tag: "docker.{{.ID}}"
depends_on:
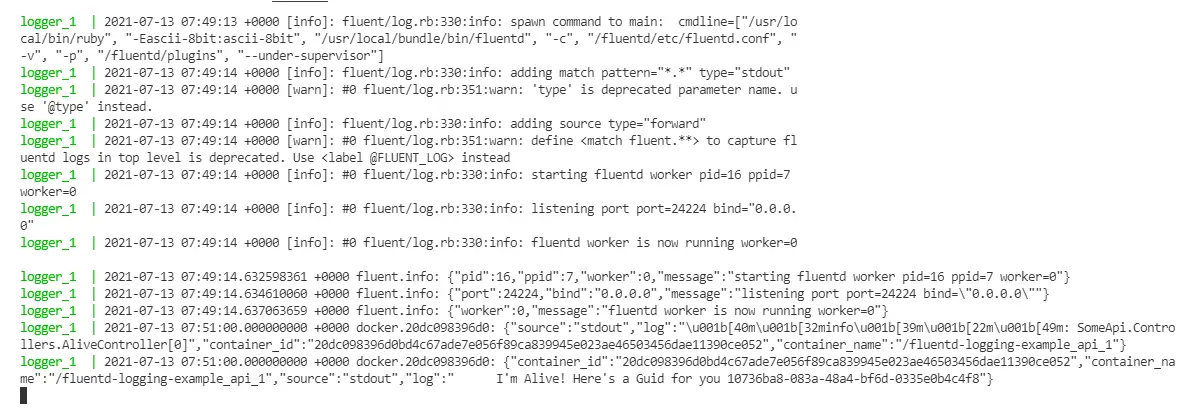
- "logger"When we run this docker-compose file, the containers api, logger and db are built respectively. When we hit something in the API, it creates logs which are pushed onto port 24224 by the fluentd logger driver tagged with the containerId.
> docker-compose build --no-cache # builds the containers using the configurations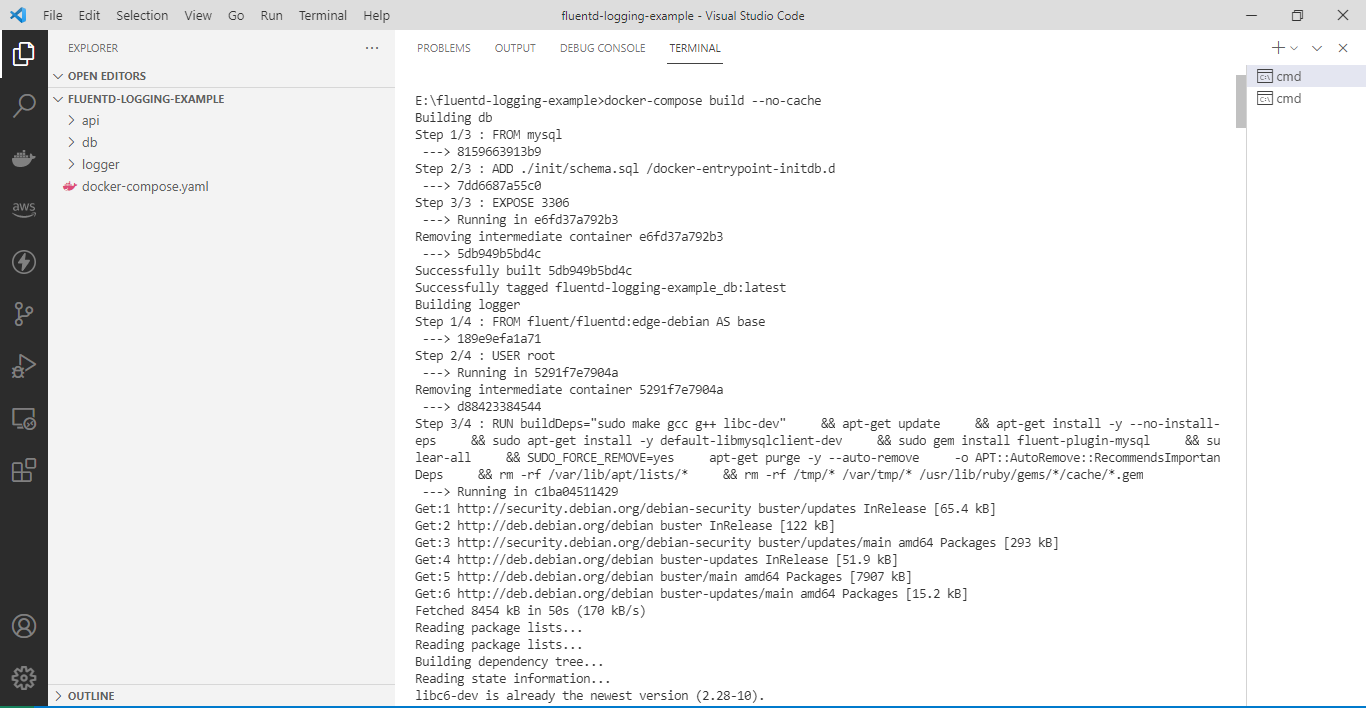
> docker-compose up
# containers boot up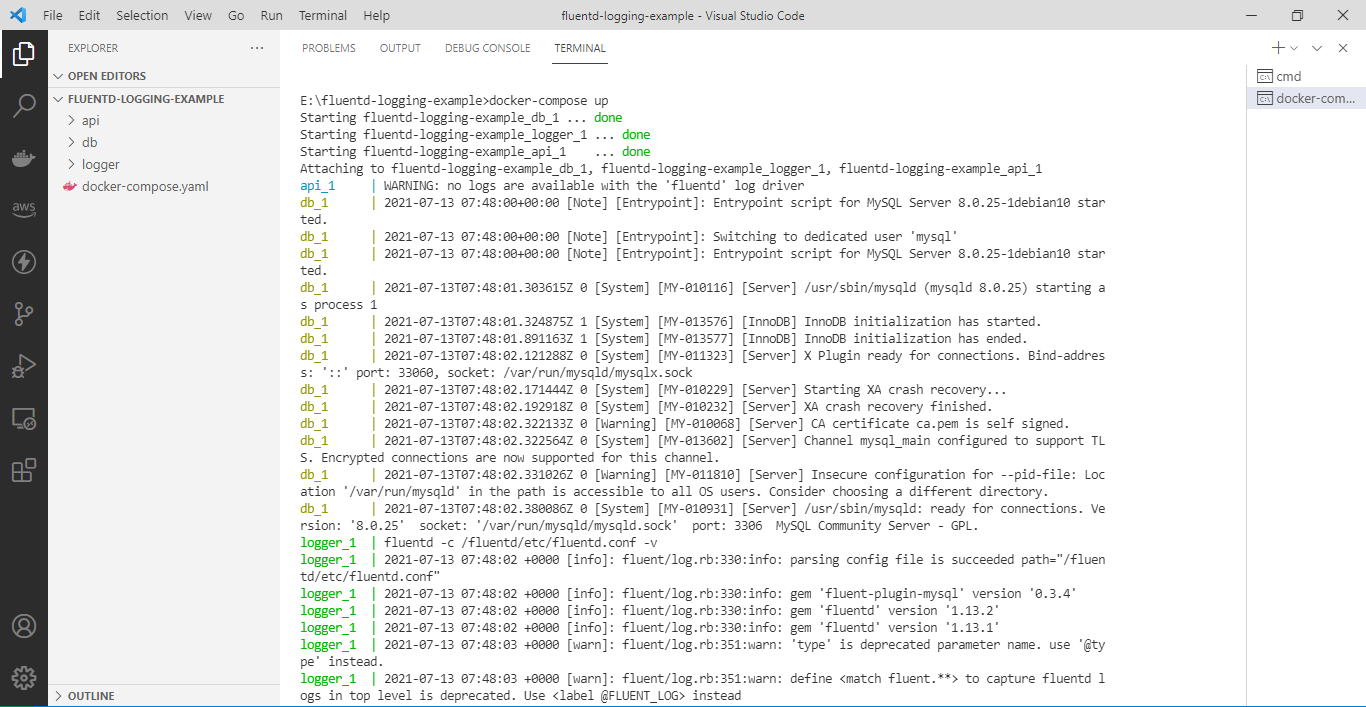
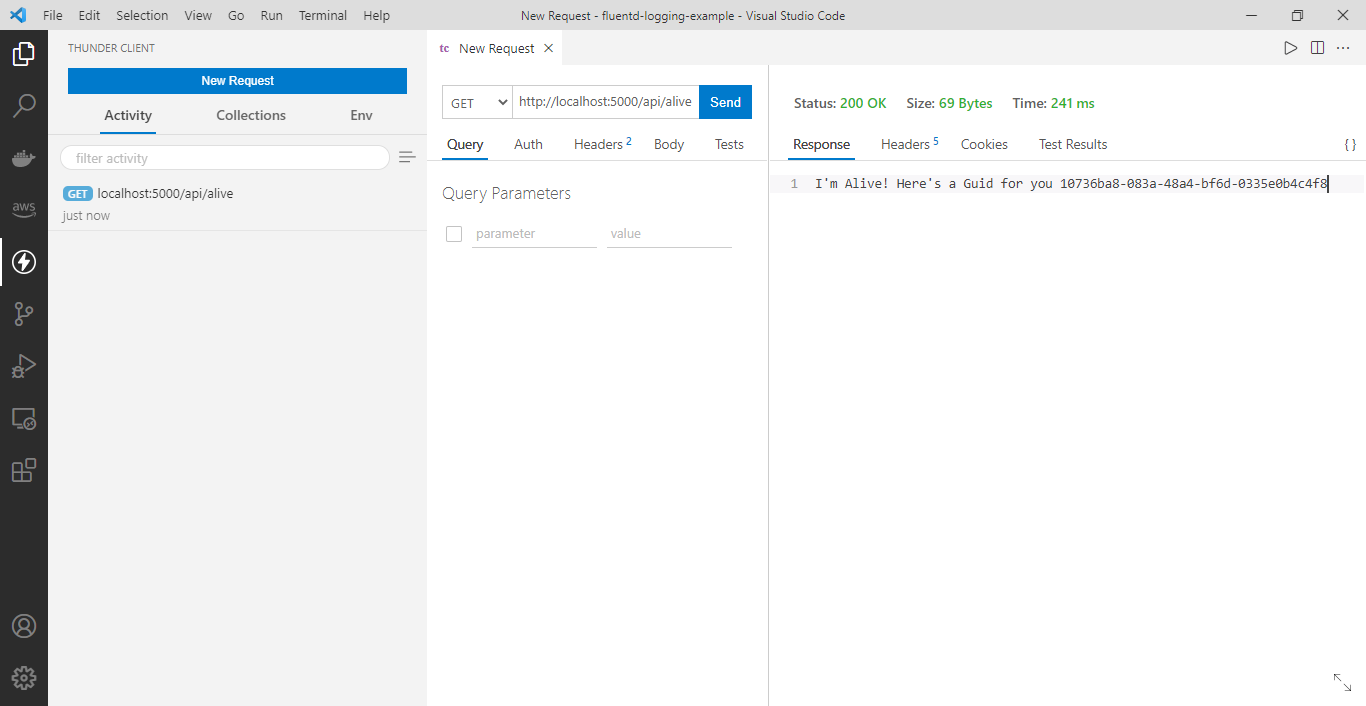
Test the logging by invoking the API, which generates a response log.
Conclusion
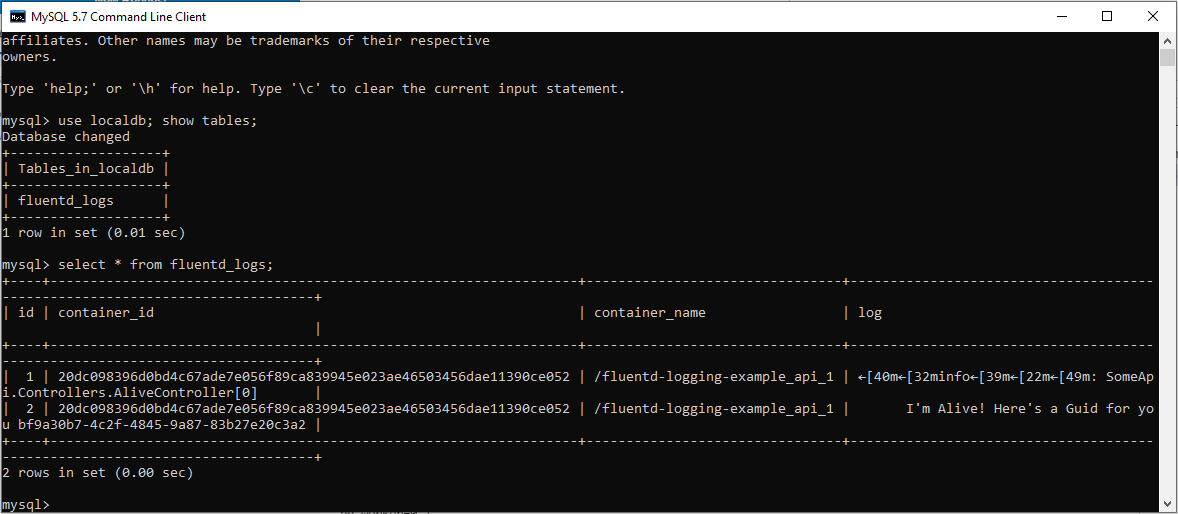
This log stream is received by the logger container that runs fluentd which listens on the same port and then writes it to the fluentd_logs table within the “db” container, which is configured in the fluentd.conf file through the “fluent-plugin-mysql” package.
Verifying by logging into the MySQL database via MySQL client and Querying on the fluentd_logs table.
The complete source code is available at: https://github.com/referbruv/docker-fluentd-example

