In a previous article, we have looked at how we can easily deploy an aspnetcore application onto an Amazon Elastic Beanstalk instance via Visual Studio using the AWS Toolkit provided by AWS for developers. In this article, let’s look at how we can deploy the same aspnetcore application to an Azure App Service instance vis the same Visual Studio.
In this article, we use Visual Studio 2019 Community Edition and ASP.NET Core 3.1 for demonstration.
For Starters, Azure App Services is a Platform as-a Service (PaaS) service provided by Microsoft Azure as a part of its cloud services and products. Azure App Services facilitate easy deployment and maintenance of various tech stack applications without having to worry about individual components or the hosting environment. There are varieties of applications which can be deployed and hosted in Azure App Services such as NodeJS, Angular, PHP and others to name a few. Also, Microsoft Azure provides a highly integrated developer tools for Visual Studio IDE to enable developers for the best experience on cloud deployments.
Similar Read for AWS: Deploying an ASP.NET Core App using AWS Elastic Beanstalk and Visual Studio
Plus we get additional features such as Cloud Debugging which greatly helps in understanding and troubleshooting an application hosted and running in Cloud environment straight from the developer system provided we have the same source code which is deployed in the environment, and several other interesting features to begin with.
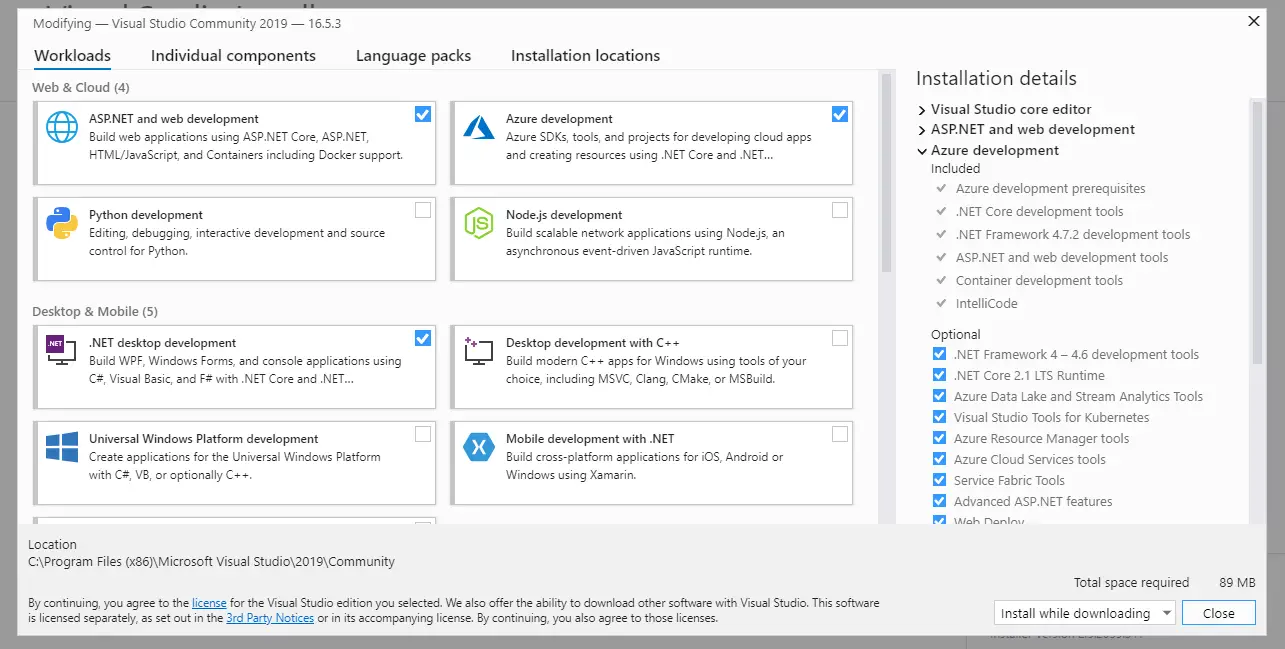
To have these tools, we can install them via Visual Studio Installer for the recent versions of Visual Studio (since there are free community editions available for developers). In the installer menu, where we get to choose which components need to be installed along with the base IDE, we need to check the Azure Development tools which option install installs the Azure Cloud CLI and other Azure based developer tools.

Once installed, we open the Visual Studio IDE with our application to be deployed and click on the Sign-in icon at the top right of the IDE. This opens up a pop-up for signing into a microsoft account. Here we type in our azure credentials for which we have obtained an Azure subscription. Microsoft Azure provides a 12-month free developer subscription for the ones interested in getting familiar with the Azure stack, more details here:
https://azure.microsoft.com/en-in/
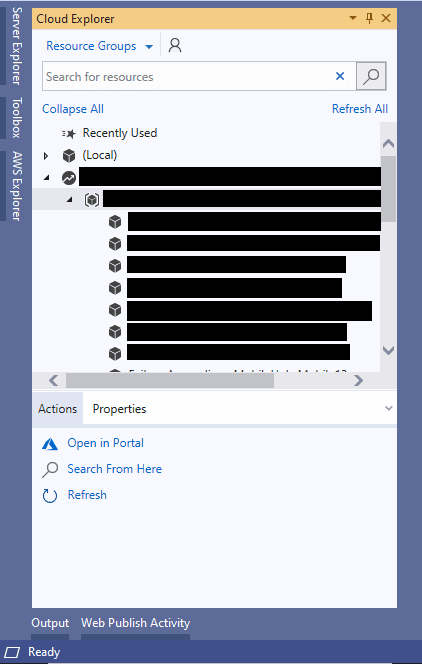
Next, we have our Login session available within the Visual Studio IDE as a Visual Studio Profile and it is used for accessing the Azure Cloud tools, so that we would concentrate only on the development part and the deployment happens instantly without having to worry about sessions or identities and all. Just to cross check, we can check whether we’re able to view all our cloud resources for the profile by using the Cloud Explorer view. (Top Menu bar -> View Menu -> Cloud Explorer or Ctrl + , Ctrl + X)
Now that we’re all set, let’s get into the actual deployment part. For an aspnetcore application to be "deployed" into an azure app service, its more of an app "publish" rather than a deployment when doing via Visual Studio. This is because we have plenty of options available when we "publish" an aspnetcore application via Visual Studio and we have an option to "publish and deploy" to an azure app service among them. And we’re gonna make use of that option, which really keeps things alot simple.
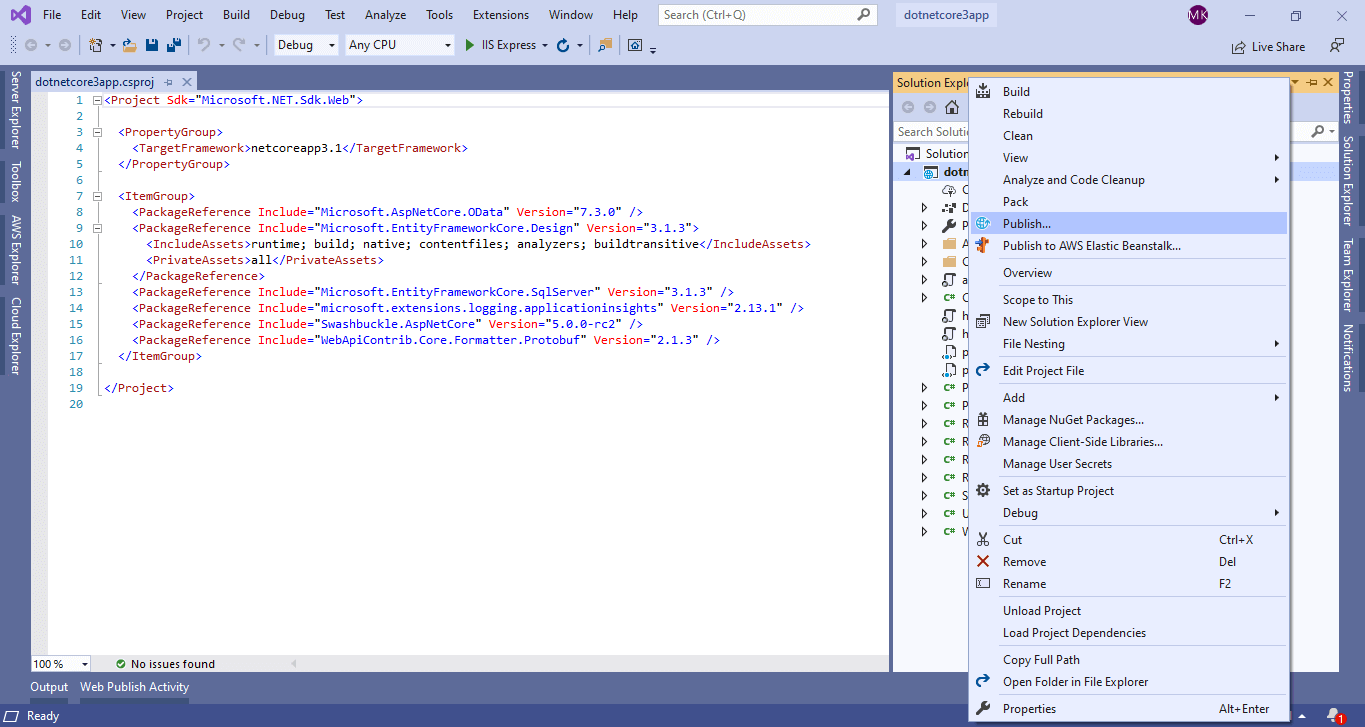
Just right click on the project and click on "publish" which takes us to the "publish and deploy" menu.
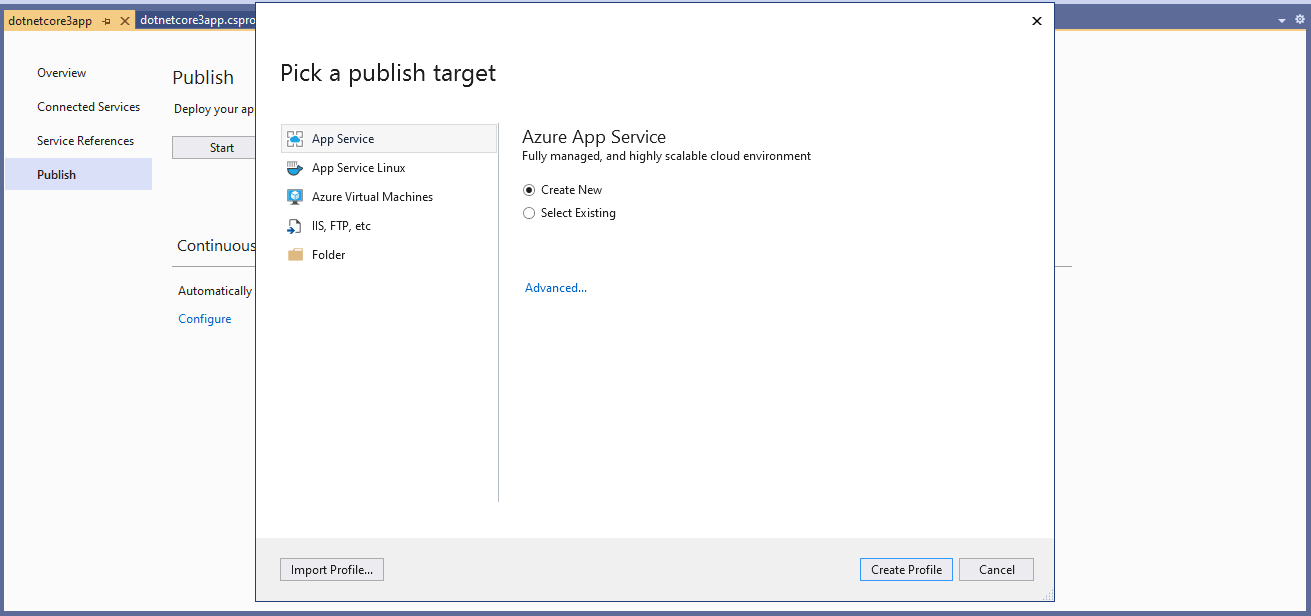
Here we have several "target" systems to which we can publish our application. The ones pre-selected is "App Service" which stands for an Azure App Service with a "windows" environment stack. Since an appservice is a PaaS service where the underlying environment is not completely accessible to the developers, we do have option to choose from which environment we are deploying our application onto. Since aspnetcore is "platform independent" we don’t necessarily bother about it, but when it comes to pricing and charges, this can matter to us. So it just boils down to ones choice about which one to choose. We go with the first selection "app service" and click on Create Profile. This creates a Publish Profile internally, for us to reuse this deployment setting profile for future deployments.
Next, we will choose on what resources will be created in the cloud environment for this publish. In the previous step, since we selected "new application", we would need to do this for the first time. For subsequent deployments we shall do with "existing environment" and select on the ones we will create in this step.
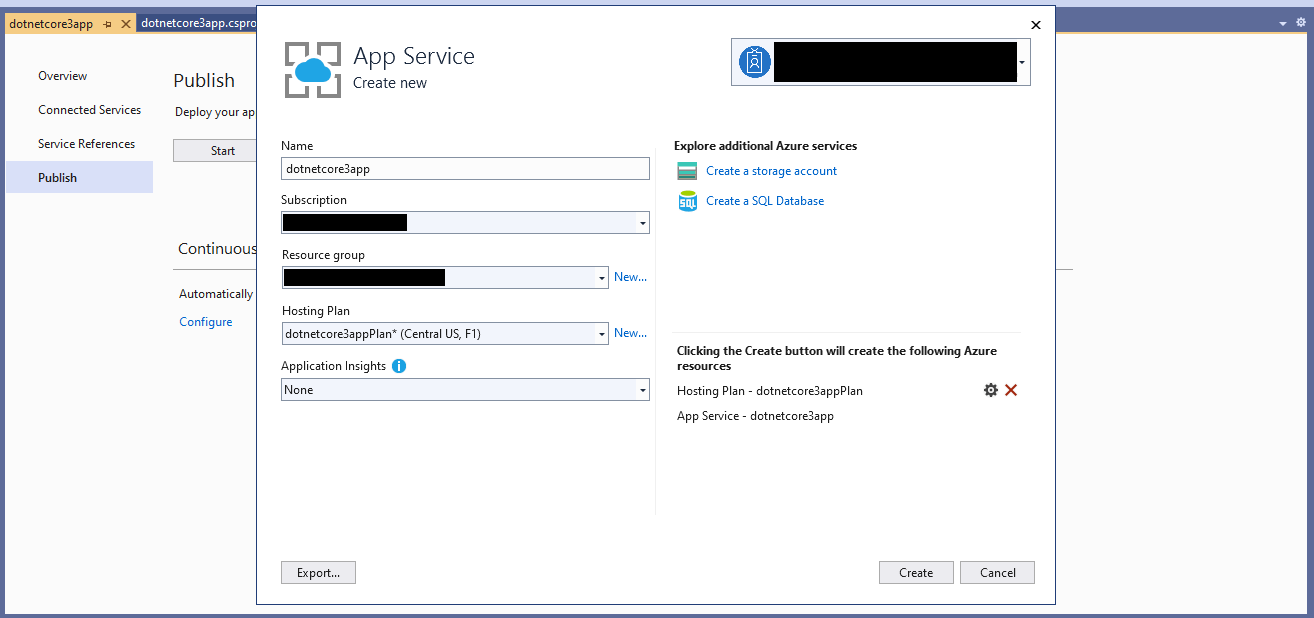
In this step is where the signed in profile comes into play, as all the azure subscriptions and resource groups which are created for the signed-in profile will be shown here for our choice. We’ll choose what resource group needs to be selected for this deployment to be organized into and what Service Plan the app takes in.
An Application Service Plan or a Hosting Plan is the hardware we’re gonna allocate for this app service resource being created. Here we have options like the Free Tier (F1), Small (Sn), Basic (Bn), Peformance (Pn) and so on, which are all priced tiers and offer resources according to the tier selected. Changing an application Tier scales the application up or down.
There is also option to enable Application Insights for the to-be deployed appservice, which is a free cloud logging and monitoring service appended to the app service helping up to monitor the traffic and troubleshoot any problematic requests made.
Read: Integrating ASP.NET Core API Logs to Azure Application Insights via ILogger
Along with creating an appservice, we can also create an app database to be used along side our application when deployed in the app service. This is particularly useful for fresh deployments of prototype applications which start afresh with empty databases. We just click on the "Create SQL Database" option within the popup window, which opens up another popover with options to create a new database.

For starters, there are two things called a "database" and a "database server". A "database server" is a server which holds several "databases", one being the one we’re creating now. If we want to have a separate "database server" for the application to be deployed, we can click on the "new" next to the "database server" dropdown to create a new server and then use that for the application. When we create a database with this method, the connection string is auto generated and attached to the appsettings.json file under the "ConnectionStrings:DefaultConnection" key-value.
Once we’re all done with the configurations, just click on "Create" and we have our application published and deployed to an azure appserver instance in the cloud.

