This is the tenth article in the "Flutter for Beginners" where in we are looking at how to get started with developing mobile applications in the world of flutter. By the end of this series, we shall try to make a simple blog app with a home list of articles with a navigation to each individual article. So far we have seen how to setup the environment, create a sample project to get started and then also analysed the various files and folders that reside under a flutter project and their individual purposes on the whole. And we have a gone a step ahead and created a scrollable view of an article page with an Image, a Title and a long description without having to face issues of display overflow. We have also looked at how to customize our ListView a bit more and complete the view by linking our home page with our blog content page by means of tap event and routing. In this article, let’s link our front end List UI to a real backend API and bind our list with the data get HTTP GET from the API.
Read:
Article 1 – Setting Things up and Getting Started
Article 2 – Understanding App Structure and Anatomy
Article 3 – Understanding the main.dart and flow of execution – First run
Article 4 – Understanding Stateful and Stateless Widgets
Article 5 – Creating a Scrollable Content View
Article 6 – Understanding a Scaffold Widget
Article 7 – Working with Container, Rows and Columns
Article 8 – Creating and binding content to a List View
Article 9 – Customizing List Tiles and On-Tap Navigation
Getting Started – Designing the PostService:
In order to achieve our goal, let’s decompose our requirement into three simple steps for better understanding on what we are trying to do. These are:
- GET Posts by calling API from an HTTP Endpoint – Results in a JSON document of Posts Collection
- Parse the resultant JSON into List of Items
- Bind the List of items onto the UI List
Step 1 – Calling HTTP GET API:
To achieve this step, we’d make use of a dart package "http" which makes things easier for us. Let’s create a dart class called PostService which acts a Service class for retrieving and returning post collection. We begin by adding the dependency to the pubspec.yaml file and let the project restore the dependencies.
#pubspec.yaml#

dependencies:
  http: ^0.12.0+4
More about the package here: https://pub.dev/packages/http
Once we have the http library added, In the postservice.dart, we design a method getPosts() which returns a Future<List<Item>>.
A future represents the result of an asynchronous operation, and can have two states: uncompleted or completed. This enables us to perform an asynchronous I/O operation over a resource.
#post_service.dart#

import 'dart:convert';
import 'package:helloworldapp/models/item.dart';
import 'package:http/http.dart' as http;

class PostService {
  final String baseUri = "http://api.mysite.com";

  Future<List<Item>> getPosts() async {
    var url = '$baseUri/api/posts/all';
    final res = await http.get(url);

    if (res.statusCode == 200) {
      var content = res.body;
      var arr = json.decode(content) as List;

      // for every element of arr map to _fromJson
      // and convert the array to list
      return arr.map((e) => _fromJson(e)).toList();
    }

    return List<Item>();
  }
}
Step 2 – Parse the Resultant JSON into List of Items:
Now that we have the result in place, all we would do is to transform the result JSON which when decoded using the json.decode() would give us a List<Map> collection. Once this is done, we would convert this collection into a List<Item> where in each item of the collection is of type Item.
This is done using a private transformation method as below:
#post_service.dart#

Item _fromJson(Map<String, dynamic> item) {
    return new Item(
        content: item['content'],
        description: item['description'],
        title: item['title'],
        url: "$assetUri/${item['cover']}");
  }
and we call it under the arr.map() method which maps each element of the List
Step 3 – Binding the Array onto the UI List – FutureBuilder:
This step is somewhat interesting, because the postService.getPosts() method returns a Future<List<Item>> object, which is a Future. Now we don’t know when this future will return us data, since Future is a delayed response that happens asynchronously. Whereas our ListView strictly expects a collection of Items and renders this Item onto the View. How do we bridge this gap? Enter, FutureBuilder.
A FutureBuilder widget enables us to asynchronously render a widget for an incoming future of entity. The FutureBuilder expects two parameters: an incoming future on which the rendering happens in an asynchronous manner, and a builder method which handles how the operation happens when the Future completes. Like we saw earlier, a Future has two states: completed and uncompleted. The FutureBuilder waits for the future operation to be completed, and once its done the resultant data is rendered onto the widget within the builder method.
In our case, we wrap our ListView widget with a FutureBuilder where we tie this FutureBuilder onto the Future<List<Item>> result given out by the getPosts() method.
#my_list_view.dart#

import 'package:flutter/material.dart';
import 'package:helloworldapp/article_tile.dart';
import 'package:helloworldapp/models/item.dart';

class MyListView extends StatelessWidget {
  final Future<List<Item>> items;

  MyListView({this.items});

  @override
  Widget build(BuildContext context) {
    return FutureBuilder(
      future: items,
      builder: (context, snapshot) {

        // operation for completed state
        if (snapshot.hasData) {
          return ListView.builder(
              itemCount: snapshot.data.length,
              itemBuilder: (context, index) {
                var item = snapshot.data[index];
                return ArticleTile(item);
              });
        }

        // spinner for uncompleted state
        return SpinnerWidget();
      },
    );
  }
}
#article_list_page.dart#

import 'package:flutter/cupertino.dart';
import 'package:flutter/material.dart';
import 'package:helloworldapp/my_list_view.dart';
import 'package:helloworldapp/services/post_service.dart';

class ArticleListPage extends StatelessWidget {
  final String title;
  ArticleListPage(this.title);

  // get Future<List<Items>> via the postService
  var items = PostService().getPosts();

  @override
  Widget build(BuildContext context) {
    return Scaffold(
        appBar: AppBar(
          title: Text(title),
        ),
        body: MyListView(
          items: items,
        ));
  }
}
Where the SpinnerWidget is a Spinner to the center of the View designed as below:
import 'package:flutter/material.dart';

class SpninnerWidget extends StatelessWidget {
  @override
  Widget build(BuildContext context) {
    return Center(
      child: Container(
          alignment: AlignmentDirectional.bottomCenter,
          child: Column(
            children: <Widget>[
              CircularProgressIndicator(),
            ],
            mainAxisAlignment: MainAxisAlignment.spaceAround,
            crossAxisAlignment: CrossAxisAlignment.center,
          )),
    );
  }
}
Once we link all these items together, we have the below result in place:
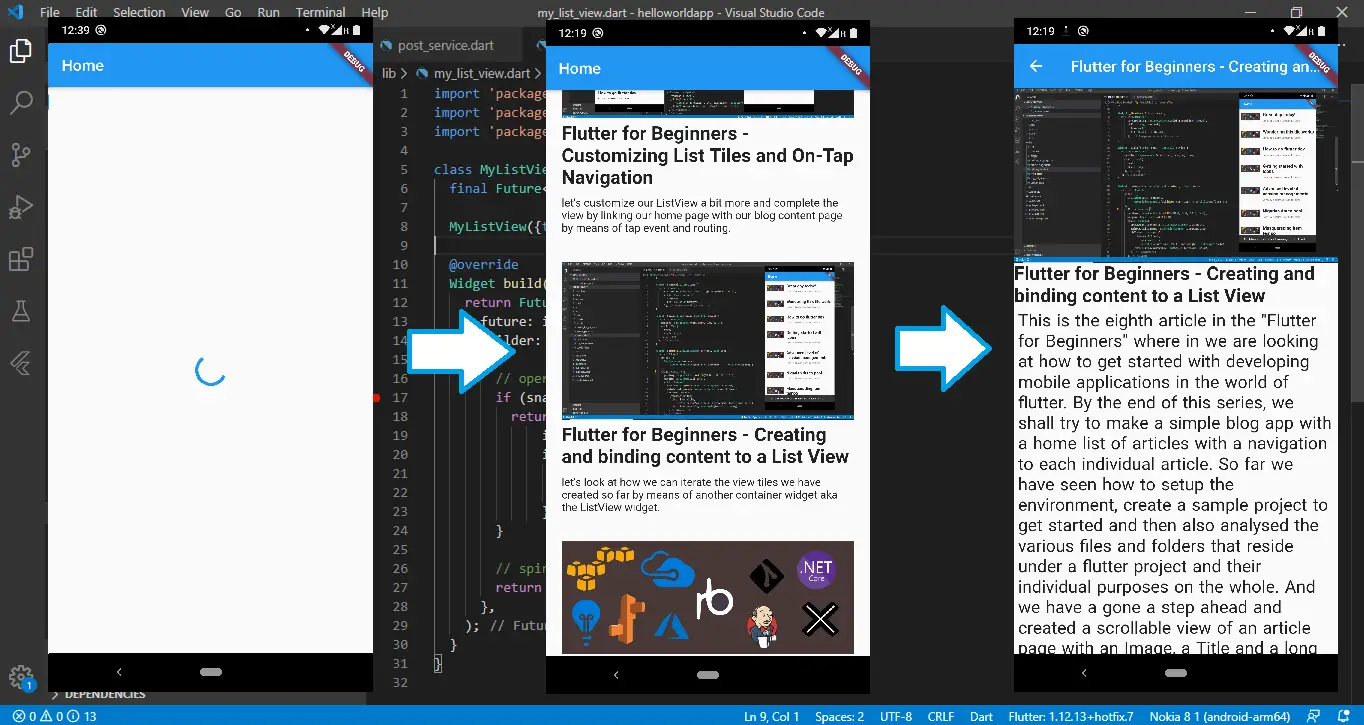
This way, we make use of the FutureBuilder widget to defer the rendering of the targeted widget for an asynchronous operation, thereby successfully completing our first blog app which loads data from an API and results in a simple blog home page along with individual details.

